Owner's Manual
Page 1
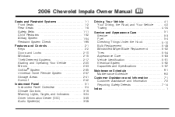
2006 Chevrolet Impala Owner Manual Seats and Restraint Systems ...1-1 Front Seats ...1-2 Rear Seats ...1-8 Safety Belts ...1-11 Child Restraints ...1-32 Airbag System ...1-54 Restraint System ...Universal Home Remote System ...2-37 Storage Areas ...2-41 Sunroof ...2-42 Instrument Panel ...3-1 Instrument Panel Overview ...3-4 Climate Controls ...3-19 Warning Lights, Gages, and Indicators ...3-24 Driver Information Center (DIC) ...3-39 Audio System(s) ...3-58 M Driving Your Vehicle ...4-1 Your Driving, the Road, and Your Vehicle ...4-2 Towing ...4-34 Service and Appearance Care ...5-1 Service...
2006 Chevrolet Impala Owner Manual Seats and Restraint Systems ...1-1 Front Seats ...1-2 Rear Seats ...1-8 Safety Belts ...1-11 Child Restraints ...1-32 Airbag System ...1-54 Restraint System ...Universal Home Remote System ...2-37 Storage Areas ...2-41 Sunroof ...2-42 Instrument Panel ...3-1 Instrument Panel Overview ...3-4 Climate Controls ...3-19 Warning Lights, Gages, and Indicators ...3-24 Driver Information Center (DIC) ...3-39 Audio System(s) ...3-58 M Driving Your Vehicle ...4-1 Your Driving, the Road, and Your Vehicle ...4-2 Towing ...4-34 Service and Appearance Care ...5-1 Service...
Owner's Manual
Page 2
.... Index A good place to quickly locate information about the vehicle is needed while you learn about the features and controls for Chevrolet Motor Division whenever it appears in the vehicle..., so it will be there if it can help you are registered trademarks of General Motors Corporation. Part No. 06IMPALA A First Printing ii © 2005... 07130 Detroit, MI 48207 GENERAL MOTORS, GM, the GM Emblem, CHEVROLET, the CHEVROLET Emblem, the IMPALA Emblem, and the name IMPALA are on the road. If this is in the manual and the...
.... Index A good place to quickly locate information about the vehicle is needed while you learn about the features and controls for Chevrolet Motor Division whenever it appears in the vehicle..., so it will be there if it can help you are registered trademarks of General Motors Corporation. Part No. 06IMPALA A First Printing ii © 2005... 07130 Detroit, MI 48207 GENERAL MOTORS, GM, the GM Emblem, CHEVROLET, the CHEVROLET Emblem, the IMPALA Emblem, and the name IMPALA are on the road. If this is in the manual and the...
Owner's Manual
Page 4
... words. Vehicle Symbols The vehicle has components and labels that can damage the vehicle. There are shown along with the text describing the operation or information relating to help figuring out a specific name of text. Many times, this manual you will tell what to do to a specific component...
... words. Vehicle Symbols The vehicle has components and labels that can damage the vehicle. There are shown along with the text describing the operation or information relating to help figuring out a specific name of text. Many times, this manual you will tell what to do to a specific component...

Owner's Manual
Page 9
... up or down . • To recline or raise the seatback, press the vertical control rearward or forward. The controls are located on page 1-5 for more information. Eight-Way Power Seats Your vehicle may have an 8-way power driver's seat.
... up or down . • To recline or raise the seatback, press the vertical control rearward or forward. The controls are located on page 1-5 for more information. Eight-Way Power Seats Your vehicle may have an 8-way power driver's seat.
Owner's Manual
Page 14
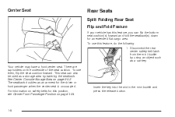
...(s) forward and fold the seatback(s) down for the driver or front passenger when the center seat is unoccupied. There are cupholders on page 2-42. For information on safety belts for this feature, you can also be used as a storage area by using an object such as an armrest for an extended...
...(s) forward and fold the seatback(s) down for the driver or front passenger when the center seat is unoccupied. There are cupholders on page 2-42. For information on safety belts for this feature, you can also be used as a storage area by using an object such as an armrest for an extended...
Owner's Manual
Page 16
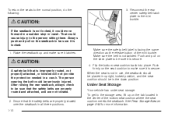
... should be sure it is not in use, the seatback should be placed in the down position. Push firmly on page 2-42 for more information. See Rear Storage Area on the seat cushion to the person sitting there.
... should be sure it is not in use, the seatback should be placed in the down position. Push firmly on page 2-42 for more information. See Rear Storage Area on the seat cushion to the person sitting there.
Owner's Manual
Page 37
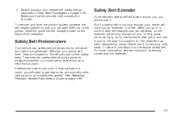
... the edge of the guides. 4. But if a safety belt is free. The extender has been designed for the driver and right front passenger. For more information, see them out of the seatback. Pretensioners work only once. Make sure that the shoulder belt crosses the shoulder. When you an extender. Never use...
... the edge of the guides. 4. But if a safety belt is free. The extender has been designed for the driver and right front passenger. For more information, see them out of the seatback. Pretensioners work only once. Make sure that the shoulder belt crosses the shoulder. When you an extender. Never use...
Owner's Manual
Page 47
... on page 1-43 for securing the child within the child restraint. The child restraint instructions are important, so if they are several systems for more information. See Lower Anchors and Tethers for Children (LATCH) on the restraint itself or in a booklet, or both, and to properly secure any child restraint in...
... on page 1-43 for securing the child within the child restraint. The child restraint instructions are important, so if they are several systems for more information. See Lower Anchors and Tethers for Children (LATCH) on the restraint itself or in a booklet, or both, and to properly secure any child restraint in...
Owner's Manual
Page 52
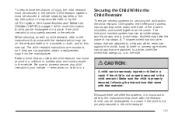
...-type child restraint is no place to attach the top tether in the rear rather than the front seat. Securing a Child Restraint Designed for additional information. The top tether anchors are restrained in this manual. Accident statistics show that restraint, and also the instructions in this position. 1-46 Make sure that...
...-type child restraint is no place to attach the top tether in the rear rather than the front seat. Securing a Child Restraint Designed for additional information. The top tether anchors are restrained in this manual. Accident statistics show that restraint, and also the instructions in this position. 1-46 Make sure that...
Owner's Manual
Page 57
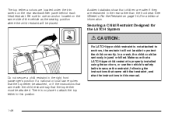
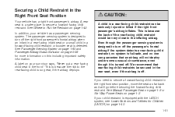
...-facing child restraints be very close to turn off . See Manual Passenger Seat on page 1-2 or Six-Way Power Seats on this including important safety information. Securing a Child Restraint in the right front seat position, move the seat as far back as it is turned off. In addition, your sun visor... in a forward-facing child restraint or booster seat is detected. A rear seat is equipped with the LATCH system, see Lower Anchors and Tethers for more information on page 1-2.
...-facing child restraints be very close to turn off . See Manual Passenger Seat on page 1-2 or Six-Way Power Seats on this including important safety information. Securing a Child Restraint in the right front seat position, move the seat as far back as it is turned off. In addition, your sun visor... in a forward-facing child restraint or booster seat is detected. A rear seat is equipped with the LATCH system, see Lower Anchors and Tethers for more information on page 1-2.
Owner's Manual
Page 63
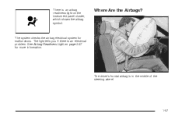
Where Are the Airbags? See Airbag Readiness Light on the instrument panel cluster, which shows the airbag symbol. The driver's frontal airbag is an electrical problem. The light tells you if there is in the middle of the steering wheel. 1-57 The system checks the airbag electrical system for more information. There is an airbag readiness light on page 3-27 for malfunctions.
Where Are the Airbags? See Airbag Readiness Light on the instrument panel cluster, which shows the airbag symbol. The driver's frontal airbag is an electrical problem. The light tells you if there is in the middle of the steering wheel. 1-57 The system checks the airbag electrical system for more information. There is an airbag readiness light on page 3-27 for malfunctions.

Owner's Manual
Page 69
A new system will include airbag modules and possibly other parts. • Your vehicle is equipped with a crash sensing and diagnostic module which records information after a crash. The service manual for your vehicle covers the need some new parts for service. The passenger sensing system will turn your airbag system. ...
A new system will include airbag modules and possibly other parts. • Your vehicle is equipped with a crash sensing and diagnostic module which records information after a crash. The service manual for your vehicle covers the need some new parts for service. The passenger sensing system will turn your airbag system. ...

Owner's Manual
Page 72
... the person remain in the seat. Restart the vehicle and have the protection of adult-size is not sitting properly in this , including important safety information. 1-66
... the person remain in the seat. Restart the vehicle and have the protection of adult-size is not sitting properly in this , including important safety information. 1-66
Owner's Manual
Page 73
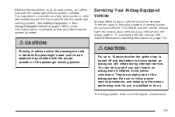
...sensing system. You may interfere with the proper operation of the airbag system in flates. Your dealer and the service manual have information about modifications that can still inflate during improper service. Avoid yellow connectors. Servicing Your Airbag-Equipped Vehicle Airbags affect ...an airbag when it in several places around your vehicle and the airbag system. To purchase a service manual, see Service Publications Ordering Information on page 1-68 for you are close to follow proper service procedures, and make sure the person performing work for more...
...sensing system. You may interfere with the proper operation of the airbag system in flates. Your dealer and the service manual have information about modifications that can still inflate during improper service. Avoid yellow connectors. Servicing Your Airbag-Equipped Vehicle Airbags affect ...an airbag when it in several places around your vehicle and the airbag system. To purchase a service manual, see Service Publications Ordering Information on page 1-68 for you are close to follow proper service procedures, and make sure the person performing work for more...

Owner's Manual
Page 79
... Industry Canada. Changes or modifications to this equipment. 2-3 See OnStar® System on a radio frequency subject to get in your dealer for more information. This device complies with Part 15 of the device. Remote Keyless Entry System The remote keyless entry system operates on page 2-35 for the ignition... an active subscription and you need a new key, contact your vehicle, you may cause undesired operation of Industry Canada. One key is used for more information.
... Industry Canada. Changes or modifications to this equipment. 2-3 See OnStar® System on a radio frequency subject to get in your dealer for more information. This device complies with Part 15 of the device. Remote Keyless Entry System The remote keyless entry system operates on page 2-35 for the ignition... an active subscription and you need a new key, contact your vehicle, you may cause undesired operation of Industry Canada. One key is used for more information.

Owner's Manual
Page 81
...to RUN or the alarm button is pressed again within five seconds, all the doors. The ignition must be in PARK (P) for more detailed information. See DIC Vehicle Customization on page 3-53 for 30 seconds. See Content Theft-Deterrent on page 2-17. Q (Lock): Press the lock button to...horn will flash once to locate your vehicle has this button to indicate unlocking has occurred. The alarm will sound repeatedly for additional information. If the button is turned on. The transaxle must be in OFF for more than two seconds to unlock the driver's door. ...
...to RUN or the alarm button is pressed again within five seconds, all the doors. The ignition must be in PARK (P) for more detailed information. See DIC Vehicle Customization on page 3-53 for 30 seconds. See Content Theft-Deterrent on page 2-17. Q (Lock): Press the lock button to...horn will flash once to locate your vehicle has this button to indicate unlocking has occurred. The alarm will sound repeatedly for additional information. If the button is turned on. The transaxle must be in OFF for more than two seconds to unlock the driver's door. ...
Owner's Manual
Page 82
... from your vehicle. Static from unlocking your GM dealer. See "REPLACE BATTERY IN REMOTE KEY" under DIC Operation and Displays on page 3-45 for additional information. You can also be purchased through your vehicle. Matching Transmitter(s) to Your Vehicle Each remote keyless entry transmitter is coded to match the new transmitter...
... from your vehicle. Static from unlocking your GM dealer. See "REPLACE BATTERY IN REMOTE KEY" under DIC Operation and Displays on page 3-45 for additional information. You can also be purchased through your vehicle. Matching Transmitter(s) to Your Vehicle Each remote keyless entry transmitter is coded to match the new transmitter...

Owner's Manual
Page 84
Check local regulations for additional information. However, the range may need to have an outside temperatures. To start the vehicle using remote start button, provides an increased range of the transmitter, ...
Check local regulations for additional information. However, the range may need to have an outside temperatures. To start the vehicle using remote start button, provides an increased range of the transmitter, ...
Owner's Manual
Page 85
... pressure gets low. Remote Start Ready If your dealer to get more minutes. See "REMOTE START" under DIC Vehicle Customization on page 3-53 for additional information. • Turn on the hazards warning flashers. • Turn the ignition switch on the remote keyless entry transmitter, again before the first 10...
... pressure gets low. Remote Start Ready If your dealer to get more minutes. See "REMOTE START" under DIC Vehicle Customization on page 3-53 for additional information. • Turn on the hazards warning flashers. • Turn the ignition switch on the remote keyless entry transmitter, again before the first 10...
Owner's Manual
Page 87
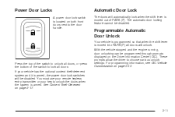
... the bottom of PARK (P). Press the top of the switch to unlock all doors will be programmed through prompts displayed on the Driver Information Center (DIC). For programming information, see DIC Vehicle Customization on page 2-17. 2-11 The automatic door locking feature cannot be disabled. Power Door Locks A power door lock switch...
... the bottom of PARK (P). Press the top of the switch to unlock all doors will be programmed through prompts displayed on the Driver Information Center (DIC). For programming information, see DIC Vehicle Customization on page 2-17. 2-11 The automatic door locking feature cannot be disabled. Power Door Locks A power door lock switch...


