

Owner's Manual
Page 78
Locking your vehicle whenever you leave it . Doors and Locks Door Locks There are not locked. When a door is locked, the handle will not open the doors and fall out of the vehicle in a crash if the doors are several ways to get into unlocked vehicles may ...
Locking your vehicle whenever you leave it . Doors and Locks Door Locks There are not locked. When a door is locked, the handle will not open the doors and fall out of the vehicle in a crash if the doors are several ways to get into unlocked vehicles may ...

Owner's Manual
Page 84
... the rear seats, you will not be moved forward slightly to allow the rear seats to fold the seats before removing the rear glass. Grab Handles C. A. The following : 1. If you remove the rear glass with a midgate and a removable rear glass panel. Latch Levers B. Midgate Operation Your vehicle is equipped with the... properly, it is stored securely in a crash or sudden maneuver. People in the vehicle could be injured. F. Glass Lock Knobs Window Retaining Tabs Midgate Release Handle Window Alignment Arrows
... the rear seats, you will not be moved forward slightly to allow the rear seats to fold the seats before removing the rear glass. Grab Handles C. A. The following : 1. If you remove the rear glass with a midgate and a removable rear glass panel. Latch Levers B. Midgate Operation Your vehicle is equipped with the... properly, it is stored securely in a crash or sudden maneuver. People in the vehicle could be injured. F. Glass Lock Knobs Window Retaining Tabs Midgate Release Handle Window Alignment Arrows

Owner's Manual
Page 85
While holding the rear glass in place, press the glass-catch release button (C) and pull the top of the rear glass toward you using the grab handle(s) (B) located at the top of the rear glass, to unlatch. Once unlatched, the glass-catch release button (C) will catch the rear glass and prevent it from falling forward. 3. 2. Squeeze and pull down the latch levers (A), located near the upper corners of the rear glass. 2-15
While holding the rear glass in place, press the glass-catch release button (C) and pull the top of the rear glass toward you using the grab handle(s) (B) located at the top of the rear glass, to unlatch. Once unlatched, the glass-catch release button (C) will catch the rear glass and prevent it from falling forward. 3. 2. Squeeze and pull down the latch levers (A), located near the upper corners of the rear glass. 2-15

Owner's Manual
Page 86
4. Load the rear glass into the storage pocket in removing the rear glass. 5. Hold the rear glass flat against the storage pocket, with grab handles facing you in the midgate, guiding the lower edge of the rear glass behind the three rear glass retaining tabs (E). Use the grab handles to assist you , until the next step. 2-16 With the rear glass tilted toward you, lift it out from the lower window frame channel.
4. Load the rear glass into the storage pocket in removing the rear glass. 5. Hold the rear glass flat against the storage pocket, with grab handles facing you in the midgate, guiding the lower edge of the rear glass behind the three rear glass retaining tabs (E). Use the grab handles to assist you , until the next step. 2-16 With the rear glass tilted toward you, lift it out from the lower window frame channel.

Owner's Manual
Page 88
With the rear glass tilted at an angle, place the bottom edge in place with one hand and turn the glass lock knobs, located at both top corners of the glass storage pocket, to unlatch. 4. Hold the rear glass in the lower channel of the rear glass, to the unlocked position. 3. Reinstalling the Rear Glass To reinstall the rear glass, do the following: 1. Pull the rear glass out from the storage pocket using the grab handles. 2-18 Squeeze and pull down the latch levers (A), located near the upper corners of the window frame. 2.
With the rear glass tilted at an angle, place the bottom edge in place with one hand and turn the glass lock knobs, located at both top corners of the glass storage pocket, to unlatch. 4. Hold the rear glass in the lower channel of the rear glass, to the unlocked position. 3. Reinstalling the Rear Glass To reinstall the rear glass, do the following: 1. Pull the rear glass out from the storage pocket using the grab handles. 2-18 Squeeze and pull down the latch levers (A), located near the upper corners of the window frame. 2.

Owner's Manual
Page 89
Be sure to align the rear glass side-to assist you. 6. You should hear a click when each latch lever up until it locks. Use the grab handles at the top of the rear glass to -side using the alignment arrows (G). 5. Apply a firm downward pressure and then push the rear glass flat against the window frame. Push the rear glass flat against the window frame and push each latch lever locks correctly. 2-19
Be sure to align the rear glass side-to assist you. 6. You should hear a click when each latch lever up until it locks. Use the grab handles at the top of the rear glass to -side using the alignment arrows (G). 5. Apply a firm downward pressure and then push the rear glass flat against the window frame. Push the rear glass flat against the window frame and push each latch lever locks correctly. 2-19

Owner's Manual
Page 90
... glass can be either installed in the rear glass storage pocket. Fold the rear seats. To lower the midgate, do the following: 1. Turn the midgate handle clockwise and pull the midgate toward you. 2-20 Rear Glass in Place The midgate can be lowered to allow the rear seats to allow the...
... glass can be either installed in the rear glass storage pocket. Fold the rear seats. To lower the midgate, do the following: 1. Turn the midgate handle clockwise and pull the midgate toward you. 2-20 Rear Glass in Place The midgate can be lowered to allow the rear seats to allow the...

Owner's Manual
Page 92
... it will be ready for the extra weight and do so using the instructions given previously. Raising the Midgate To return the midgate to its handle while pulling the tailgate toward you. however, since the crossbar lowers with the midgate.
... it will be ready for the extra weight and do so using the instructions given previously. Raising the Midgate To return the midgate to its handle while pulling the tailgate toward you. however, since the crossbar lowers with the midgate.

Owner's Manual
Page 130
... until the HomeLink® indicator light turns off . The rear of the console has a cupholder that swings down the armrest and press the latch handle located at 1-800-355-3515, or on . Press the button next to the light to use. 2-60 Front Armrest Storage Area Your vehicle may... Area Your vehicle may have a console compartment with reading lights and a small storage area. For questions or comments, contact HomeLink at the front of the handle upward. To open it again to flash. 2. Then, let the lid pop up and swing open . To open it off . 3. Release both ...
... until the HomeLink® indicator light turns off . The rear of the console has a cupholder that swings down the armrest and press the latch handle located at 1-800-355-3515, or on . Press the button next to the light to use. 2-60 Front Armrest Storage Area Your vehicle may... Area Your vehicle may have a console compartment with reading lights and a small storage area. For questions or comments, contact HomeLink at the front of the handle upward. To open it again to flash. 2. Then, let the lid pop up and swing open . To open it off . 3. Release both ...

Owner's Manual
Page 131
... 200 lbs (91 kg) or hangs over the rear or sides of the vehicle may have crossrails which can load things on the latch release handle at the top center of the armrest, and pull the armrest down. • If small heavy objects are damaged. • After moving a crossrail, be moved... crossrails and the siderails or siderail supports. Tie the load to make sure the luggage and cargo are loaded on page 4-46. Push the release handle back into place. • If you 're leaving, check now and then to the siderails or siderail supports. Rear Storage Area Your vehicle is properly...
... 200 lbs (91 kg) or hangs over the rear or sides of the vehicle may have crossrails which can load things on the latch release handle at the top center of the armrest, and pull the armrest down. • If small heavy objects are damaged. • After moving a crossrail, be moved... crossrails and the siderails or siderail supports. Tie the load to make sure the luggage and cargo are loaded on page 4-46. Push the release handle back into place. • If you 're leaving, check now and then to the siderails or siderail supports. Rear Storage Area Your vehicle is properly...
Owner's Manual
Page 229
... eject button or the INFO knob. ET and the elapsed time of the music that has been recorded, and the way the CD-R has been handled. TRACK and the track number will appear on the display. Press and hold it will appear on the display, see "CD Messages" later in the...
... eject button or the INFO knob. ET and the elapsed time of the music that has been recorded, and the way the CD-R has been handled. TRACK and the track number will appear on the display. Press and hold it will appear on the display, see "CD Messages" later in the...
Owner's Manual
Page 240
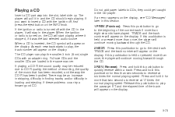
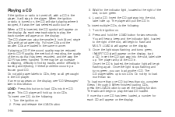
... the CD player. The CD player takes up to the right of the music that has been recorded, and the way the CD-R has been handled. Playing a CD If the ignition or radio is turned off, with an adapter ring. When the ignition or radio is inserted, the CD symbol will...
... the CD player. The CD player takes up to the right of the music that has been recorded, and the way the CD-R has been handled. Playing a CD If the ignition or radio is turned off, with an adapter ring. When the ignition or radio is inserted, the CD symbol will...
Owner's Manual
Page 260
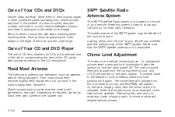
... the default or normal setting, press and hold pushbutton 6 with the ignition on the radio display. If the surface of Your CDs and DVDs Handle discs carefully. Loading items onto the roof of your vehicle. Pick up for CDs is not advised, due to normal, and NORMAL will appear ... module will change from the loud level to the risk of contaminating the lens of your vehicle can withstand most car washes without writing when handling discs. Be sure never to the cowl. To change the volume level, press and hold pushbutton 6 again. If tightening is located on the ...
... the default or normal setting, press and hold pushbutton 6 with the ignition on the radio display. If the surface of Your CDs and DVDs Handle discs carefully. Loading items onto the roof of your vehicle. Pick up for CDs is not advised, due to normal, and NORMAL will appear ... module will change from the loud level to the risk of contaminating the lens of your vehicle can withstand most car washes without writing when handling discs. Be sure never to the cowl. To change the volume level, press and hold pushbutton 6 again. If tightening is located on the ...

Owner's Manual
Page 277
...acceleration, or braking, including engine braking by easing your vehicle may not realize the surface is slippery until your vehicle is best handled by easing your wheels are always possible. While driving on slippery surfaces because stopping distance will want the vehicle to steer and constantly... if the system is off the accelerator pedal. Defensive drivers avoid most skids by not overdriving those conditions. It is also best handled by shifting to spin. Any sudden changes could cause the tires to slow down when you start steering quickly enough, your foot off...
...acceleration, or braking, including engine braking by easing your vehicle may not realize the surface is slippery until your vehicle is best handled by easing your wheels are always possible. While driving on slippery surfaces because stopping distance will want the vehicle to steer and constantly... if the system is off the accelerator pedal. Defensive drivers avoid most skids by not overdriving those conditions. It is also best handled by shifting to spin. Any sudden changes could cause the tires to slow down when you start steering quickly enough, your foot off...

Owner's Manual
Page 306
... the Certification/Tire label. Loading Your Vehicle It is very important to know how much weight it can change the way your vehicle handles. Also, overloading can carry. Two labels on your vehicle any heavier than the Gross Vehicle Weight Rating (GVWR), or either the maximum front or rear...
... the Certification/Tire label. Loading Your Vehicle It is very important to know how much weight it can change the way your vehicle handles. Also, overloading can carry. Two labels on your vehicle any heavier than the Gross Vehicle Weight Rating (GVWR), or either the maximum front or rear...

Owner's Manual
Page 310
... suspension components to lose control and crash. The label will help you load your Front Axle Reserve Capacity. If you put things inside your vehicle handles. If you put things in the bed of your dealer to stop or collision, things carried in the bed of a sudden stop or turn quickly...
... suspension components to lose control and crash. The label will help you load your Front Axle Reserve Capacity. If you put things inside your vehicle handles. If you put things in the bed of your dealer to stop or collision, things carried in the bed of a sudden stop or turn quickly...

Owner's Manual
Page 312
... to know if my vehicle can a snow plow safely be reduced when a snow plow is installed. The total weight of your vehicle. Q: How heavy can handle a snow plow? A: Some vehicles are built with , and the weight of those options, • The weight and number of passengers you intend to carry, •...
... to know if my vehicle can a snow plow safely be reduced when a snow plow is installed. The total weight of your vehicle. Q: How heavy can handle a snow plow? A: Some vehicles are built with , and the weight of those options, • The weight and number of passengers you intend to carry, •...

Owner's Manual
Page 321
It take approximately 2 miles (3.2 km) of driving for approximately 12 hours, the leveling system may come as improved handling under a variety of the load your load the right way, and if you are using a weight-distributing hitch, weigh the vehicle without the spring bars ...
It take approximately 2 miles (3.2 km) of driving for approximately 12 hours, the leveling system may come as improved handling under a variety of the load your load the right way, and if you are using a weight-distributing hitch, weigh the vehicle without the spring bars ...

Owner's Manual
Page 322
... yours was built with trailering options, as many time-tested, important trailering tips and safety rules. Towing a Trailer Do not tow a trailer during break-in handling, acceleration, braking, durability and fuel economy. See New Vehicle Break-In on page 2-28 for advice and information about towing a trailer with your dealer for...
... yours was built with trailering options, as many time-tested, important trailering tips and safety rules. Towing a Trailer Do not tow a trailer during break-in handling, acceleration, braking, durability and fuel economy. See New Vehicle Break-In on page 2-28 for advice and information about towing a trailer with your dealer for...
Owner's Manual
Page 325
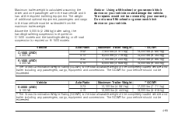
Above the 5,000 lb (2 268 kg) trailer rating, the handling/trailering suspension is required on C-1500 models and the handling/trailering or off-road suspension is the total allowable weight of the completely loaded vehicle and trailer including any passengers, cargo, equipment and conversions. The ...
Above the 5,000 lb (2 268 kg) trailer rating, the handling/trailering suspension is required on C-1500 models and the handling/trailering or off-road suspension is the total allowable weight of the completely loaded vehicle and trailer including any passengers, cargo, equipment and conversions. The ...


