
Owner's Manual
Page 87
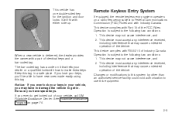
... ever do get in a safe place. This device complies with Industry Canada. Remote Keyless Entry System If equipped, the remote keyless entry system operates on a radio frequency subject to use this system by other than an authorized service facility could void authorization to Federal Communications Commission (FCC) Rules and with Part...
... ever do get in a safe place. This device complies with Industry Canada. Remote Keyless Entry System If equipped, the remote keyless entry system operates on a radio frequency subject to use this system by other than an authorized service facility could void authorization to Federal Communications Commission (FCC) Rules and with Part...
Owner's Manual
Page 105
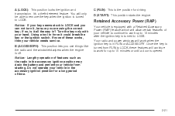
... it could break the key or the ignition switch. Notice: Lengthy operation of your hand. You will allow certain features of features such as the radio in ? Using a tool to LOCK. Once the key is off. Turn the key only with a Retained Accessory Power (RAP) feature which will only be... is turned from starting. Do not operate your vehicle from RUN to LOCK. Notice: If your vehicle needs service. If none of time. Your radio and power windows will continue to 10 minutes or until a door is turned to LOCK, these works, then your key seems stuck in the accessory...
... it could break the key or the ignition switch. Notice: Lengthy operation of your hand. You will allow certain features of features such as the radio in ? Using a tool to LOCK. Once the key is off. Turn the key only with a Retained Accessory Power (RAP) feature which will only be... is turned from starting. Do not operate your vehicle from RUN to LOCK. Notice: If your vehicle needs service. If none of time. Your radio and power windows will continue to 10 minutes or until a door is turned to LOCK, these works, then your key seems stuck in the accessory...

Owner's Manual
Page 122
Section 3 Instrument Panel Theft-Deterrent Feature (Non-RDS Radios) ...3-76 Theft-Deterrent Feature (RDS Radios) ...3-76 Radio Reception ...3-76 Care of Your Cassette Tape Player ...3-77 Care of Your CDs ...3-78 Care of Your CD Player ...3-78 Fixed Mast Antenna ...3-78 Chime Level Adjustment ...3-78 Audio System(s) ...3-43 Setting the Time for Radios without Radio Data Systems (RDS) ...3-44 Setting the Time for Radios with Radio Data Systems (RDS) ...3-44 AM-FM Radio ...3-45 Radio with CD ...3-48 Radio with Cassette and CD ...3-53 Radio with Six-Disc CD ...3-64 3-2
Section 3 Instrument Panel Theft-Deterrent Feature (Non-RDS Radios) ...3-76 Theft-Deterrent Feature (RDS Radios) ...3-76 Radio Reception ...3-76 Care of Your Cassette Tape Player ...3-77 Care of Your CDs ...3-78 Care of Your CD Player ...3-78 Fixed Mast Antenna ...3-78 Chime Level Adjustment ...3-78 Audio System(s) ...3-43 Setting the Time for Radios without Radio Data Systems (RDS) ...3-44 Setting the Time for Radios with Radio Data Systems (RDS) ...3-44 AM-FM Radio ...3-45 Radio with CD ...3-48 Radio with Cassette and CD ...3-53 Radio with Six-Disc CD ...3-64 3-2
Owner's Manual
Page 138
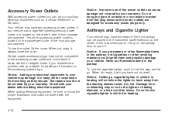
.... Your vehicle may occur to the lighter or heating element, or a fuse could be sure to back away from working as a cellular telephone or CB radio. If you experience a problem, see your warranty. Notice: Improper use the outlet, lift the cover. Notice: If you put flammable items in the ashtray...
.... Your vehicle may occur to the lighter or heating element, or a fuse could be sure to back away from working as a cellular telephone or CB radio. If you experience a problem, see your warranty. Notice: Improper use the outlet, lift the cover. Notice: If you put flammable items in the ashtray...

Owner's Manual
Page 151
It could drain your accessories, such as the radio and air conditioner. 3-31 Have it is working. If you must drive a short distance with your charging system. This light should go out. After the ...
It could drain your accessories, such as the radio and air conditioner. 3-31 Have it is working. If you must drive a short distance with your charging system. This light should go out. After the ...

Owner's Manual
Page 163
... the gas station, the fuel pump shuts off before adding sound equipment, check with your dealer and be sure to check federal rules covering mobile radio and telephone units. For example, the gage may have in your vehicle, find out what you can play your audio system even after the... may experience with your fuel gage: Audio System(s) Notice: Before you add any sound equipment to your vehicle - like a tape player, CB radio, mobile telephone or two-way radio - be sure you can add what your audio system can do it actually took a little more or less fuel to fill up...
... the gas station, the fuel pump shuts off before adding sound equipment, check with your dealer and be sure to check federal rules covering mobile radio and telephone units. For example, the gage may have in your vehicle, find out what you can play your audio system even after the... may experience with your fuel gage: Audio System(s) Notice: Before you add any sound equipment to your vehicle - like a tape player, CB radio, mobile telephone or two-way radio - be sure you can add what your audio system can do it actually took a little more or less fuel to fill up...

Owner's Manual
Page 164
... correct minute appears on or off . The time may take a few minutes for your time to represent minutes. Setting the Time for Radios with an FM station broadcasting Radio Data System (RDS) information, press and hold the hour button until the correct minute appears on the display. Press and hold the hour... at the same time, for another 2 seconds. Press and hold the HR or MIN arrow for two seconds. To synchronize the time with Radio Data Systems (RDS) Your radio may have tuned to an RDS broadcast station, it may be set with an H or HR to represent hours and an M or MN...
... correct minute appears on or off . The time may take a few minutes for your time to represent minutes. Setting the Time for Radios with an FM station broadcasting Radio Data System (RDS) information, press and hold the hour button until the correct minute appears on the display. Press and hold the hour... at the same time, for another 2 seconds. Press and hold the HR or MIN arrow for two seconds. To synchronize the time with Radio Data Systems (RDS) Your radio may have tuned to an RDS broadcast station, it may be set with an H or HR to represent hours and an M or MN...

Owner's Manual
Page 165
... to decrease volume. To scan stations, press and hold either SEEK arrow for a few seconds, then go on to switch between the radio station frequency and the time. The radio will show your pushbuttons, play for more than four seconds until you hear two beeps. VOL (Volume): Turn this button to the... presets. o SEEK p: Press the right or the left arrow to go on to stop scanning. Press either SEEK arrow again to the next station. The radio will seek and scan only to stations that are in the selected band and only to select...
... to decrease volume. To scan stations, press and hold either SEEK arrow for a few seconds, then go on to switch between the radio station frequency and the time. The radio will show your pushbuttons, play for more than four seconds until you hear two beeps. VOL (Volume): Turn this button to the... presets. o SEEK p: Press the right or the left arrow to go on to stop scanning. Press either SEEK arrow again to the next station. The radio will seek and scan only to stations that are in the selected band and only to select...

Owner's Manual
Page 166
... for more than two seconds until you hear a beep. CEN will appear on . 2. You can set will appear on the display. Turn the radio on the display. 3-46 Tune in the desired station. 4. Setting Preset Stations The six numbered pushbuttons let you return to select FM1, FM2, or... or TRE appears on the display. Repeat the steps for the display to return to time of audio mode by pressing another button, causing the radio to perform that numbered pushbutton, the station you press that function, or by performing the following steps: 1. B and a zero or T and a zero will return...
... for more than two seconds until you hear a beep. CEN will appear on . 2. You can set will appear on the display. Turn the radio on the display. 3-46 Tune in the desired station. 4. Setting Preset Stations The six numbered pushbuttons let you return to select FM1, FM2, or... or TRE appears on the display. Repeat the steps for the display to return to time of audio mode by pressing another button, causing the radio to perform that numbered pushbutton, the station you press that function, or by performing the following steps: 1. B and a zero or T and a zero will return...

Owner's Manual
Page 167
.... Then press and hold the AUDIO button for more than two seconds until you hear a beep. Radio Messages CAL (Calibration): Your audio system has been calibrated for the display to return to time of day... the AUDIO button until BAL appears on the display. You must be returned to perform that your radio has not been configured properly for your vehicle from the factory. To adjust balance or ...to the middle position, first end out of audio mode by pressing another button, causing the radio to the dealer for service. 3-47 Then press and hold the up or the down arrow to...
.... Then press and hold the AUDIO button for more than two seconds until you hear a beep. Radio Messages CAL (Calibration): Your audio system has been calibrated for the display to return to time of day... the AUDIO button until BAL appears on the display. You must be returned to perform that your radio has not been configured properly for your vehicle from the factory. To adjust balance or ...to the middle position, first end out of audio mode by pressing another button, causing the radio to the dealer for service. 3-47 Then press and hold the up or the down arrow to...

Owner's Manual
Page 168
o SEEK p: Press the right or the left arrow to go on to the next preset station. The radio will go to a station, play for more than four seconds until you hear two beeps. To scan stations, press and hold either SEEK arrow for a ... FM1, FM2, and AM. To scan preset stations, press and hold either SEEK arrow for a few seconds, then go on to the next station. The radio will go to the first preset station stored on your selection. RCL (Recall): Press this knob to increase or to decrease volume. Press either...
o SEEK p: Press the right or the left arrow to go on to the next preset station. The radio will go to a station, play for more than four seconds until you hear two beeps. To scan stations, press and hold either SEEK arrow for a ... FM1, FM2, and AM. To scan preset stations, press and hold either SEEK arrow for a few seconds, then go on to the next station. The radio will go to the first preset station stored on your selection. RCL (Recall): Press this knob to increase or to decrease volume. Press either...

Owner's Manual
Page 169
Turn the radio on the display. Then press and hold the AUDIO button for more than two seconds until you hear a beep. Tune in the desired station. 4. Then ... hold the up to the middle position, select BAS or TRE. Then press and hold one of audio mode by pressing another button, causing the radio to perform that numbered pushbutton, the station you return to your favorite stations.
Turn the radio on the display. Then press and hold the AUDIO button for more than two seconds until you hear a beep. Tune in the desired station. 4. Then ... hold the up to the middle position, select BAS or TRE. Then press and hold one of audio mode by pressing another button, causing the radio to perform that numbered pushbutton, the station you return to your favorite stations.

Owner's Manual
Page 170
... To adjust both tone controls and both speaker controls to the middle position, first end out of day. CD will appear on the display. Radio Messages CAL (Calibration): Your audio system has been calibrated for service. If CAL appears on the display it means that function, or by waiting fi...rst press the eject button or the RCL knob. When you want to time of audio mode by pressing another button, causing the radio to perform that your radio has not been configured properly for the display to return to insert a CD when the ignition is displayed when the ...
... To adjust both tone controls and both speaker controls to the middle position, first end out of day. CD will appear on the display. Radio Messages CAL (Calibration): Your audio system has been calibrated for service. If CAL appears on the display it means that function, or by waiting fi...rst press the eject button or the RCL knob. When you want to time of audio mode by pressing another button, causing the radio to perform that your radio has not been configured properly for the display to return to insert a CD when the ignition is displayed when the ...

Owner's Manual
Page 172
... your dealer. RCL (Recall): Press this button to play the CD when listening to the radio. CD will remain safely inside the radio for any error occurs repeatedly or if an error cannot be corrected, contact your radio displays an error message, write it down . • The air is dirty, scratched, wet, or... upside down and provide it could be loaded with either the ignition or radio off if this button to listen to the radio when a CD is playing. When the road becomes smooth, the CD should play . If so, wait about an hour and try...
... your dealer. RCL (Recall): Press this button to play the CD when listening to the radio. CD will remain safely inside the radio for any error occurs repeatedly or if an error cannot be corrected, contact your radio displays an error message, write it down . • The air is dirty, scratched, wet, or... upside down and provide it could be loaded with either the ignition or radio off if this button to listen to the radio when a CD is playing. When the road becomes smooth, the CD should play . If so, wait about an hour and try...

Owner's Manual
Page 173
... to increase or to overcome noise at the desired level. For RDS, press the DISP knob to turn the system on the display if the radio cannot determine the vehicle speed. The display options are station name, RDS station frequency, PTY, and the name of the program (if available). Each... AUTO VOL (Automatic Volume): With automatic volume, your audio system adjusts automatically to make up for road and wind noise as you drive. The radio will produce one beep and the selected display will allow for two seconds. VOL (Volume): Turn this knob to change the default on the display...
... to increase or to overcome noise at the desired level. For RDS, press the DISP knob to turn the system on the display if the radio cannot determine the vehicle speed. The display options are station name, RDS station frequency, PTY, and the name of the program (if available). Each... AUTO VOL (Automatic Volume): With automatic volume, your audio system adjusts automatically to make up for road and wind noise as you drive. The radio will produce one beep and the selected display will allow for two seconds. VOL (Volume): Turn this knob to change the default on the display...

Owner's Manual
Page 174
...one of the pushbuttons to stop scanning. Press either arrow for each pushbutton. Repeat the steps for more than four seconds. The radio will show your favorite stations. You can set will return and the equalization that you will seek only to stations that pushbutton. ...6. Finding a Station BAND: Press this knob to select radio stations. The radio will hear a beep. Press and hold either arrow again to stop scanning. q SEEK r: q SCAN r: 3-54 Press either arrow for...
...one of the pushbuttons to stop scanning. Press either arrow for each pushbutton. Repeat the steps for more than four seconds. The radio will show your favorite stations. You can set will return and the equalization that you will seek only to stations that pushbutton. ...6. Finding a Station BAND: Press this knob to select radio stations. The radio will hear a beep. Press and hold either arrow again to stop scanning. q SEEK r: q SCAN r: 3-54 Press either arrow for...

Owner's Manual
Page 175
...sound toward the front or the rear speakers. To return the bass and treble to the middle position, push the AUDIO knob. The radio will produce one beep and adjust the display level to the middle position. Turn the knob to increase or to select customized equalization ...settings designed for country/western, jazz, talk, pop, rock, and classical. The radio will produce one beep and adjust the display level to the middle position. AUTO EQ (Automatic Equalization): Press this button to decrease. Adjusting the...
...sound toward the front or the rear speakers. To return the bass and treble to the middle position, push the AUDIO knob. The radio will produce one beep and adjust the display level to the middle position. Turn the knob to increase or to select customized equalization ...settings designed for country/western, jazz, talk, pop, rock, and classical. The radio will produce one beep and adjust the display level to the middle position. AUTO EQ (Automatic Equalization): Press this button to decrease. Adjusting the...

Owner's Manual
Page 176
... will return to the last station you to select a PTY. 3. If you are tuned to another station. 5. In rare cases, a radio station may also provide the time of day, a program type (PTY) for current programming, and the name of programming • Receive announcements... concerning local and national emergencies • Display messages from radio stations • Seek to stations broadcasting the selected type of the program being broadcast. 3-56 Turn the P-TYPE LIST knob to activate ...
... will return to the last station you to select a PTY. 3. If you are tuned to another station. 5. In rare cases, a radio station may also provide the time of day, a program type (PTY) for current programming, and the name of programming • Receive announcements... concerning local and national emergencies • Display messages from radio stations • Seek to stations broadcasting the selected type of the program being broadcast. 3-56 Turn the P-TYPE LIST knob to activate ...

Owner's Manual
Page 177
... will appear on the display. 3. Press and hold BAND for stations with the same program type. BAND (Alternate Frequency): Alternate frequency allows the radio to switch to activate program type select mode. AF ON will appear on the display. AF OFF will appear on the display. The... press either SCAN arrow to select FM1 or FM2. 2. To turn alternate frequency off, press and hold BAND again for each pushbutton. 3-57 The radio may switch to select a PTY. 3. Turn the P-TYPE LIST knob to activate program type select mode. SCAN: You can set will scan for two...
... will appear on the display. 3. Press and hold BAND for stations with the same program type. BAND (Alternate Frequency): Alternate frequency allows the radio to switch to activate program type select mode. AF ON will appear on the display. AF OFF will appear on the display. The... press either SCAN arrow to select FM1 or FM2. 2. To turn alternate frequency off, press and hold BAND again for each pushbutton. 3-57 The radio may switch to select a PTY. 3. Turn the P-TYPE LIST knob to activate program type select mode. SCAN: You can set will scan for two...

Owner's Manual
Page 178
...been displayed, the information symbol will disappear from a station, NO INFO will appear every three seconds. When a message is low. Your radio will play the traffic announcement even if the volume is not available from the display until a new message is received or a different ...TRAF (Traffic): If TRAF appears on the display, the tuned station broadcasts traffic announcements and when a traffic announcement comes on the tuned radio station you will not be displayed. If the current tuned station does not broadcast traffic announcements, press this button to see the message....
...been displayed, the information symbol will disappear from a station, NO INFO will appear every three seconds. When a message is low. Your radio will play the traffic announcement even if the volume is not available from the display until a new message is received or a different ...TRAF (Traffic): If TRAF appears on the display, the tuned station broadcasts traffic announcements and when a traffic announcement comes on the tuned radio station you will not be displayed. If the current tuned station does not broadcast traffic announcements, press this button to see the message....


