
Owner's Manual
Page 5
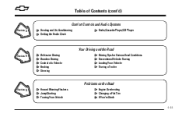
Table of Contents (cont'd) Comfort Controls and Audio Systems Section 3 Heating and Air Conditioning Setting the Radio Clock Radio/Cassette Player/CD Player Your Driving and the Road Section 4 Defensive Driving Drunken Driving Control of a Vehicle Braking Steering Driving Tips for Various Road Conditions Recreational Vehicle Towing Loading Your Vehicle Towing a Trailer Problems on the Road Section 5 Hazard Warning Flashers Jump Starting Towing Your Vehicle Engine Overheating Changing a Flat Tire If You're Stuck iii
Table of Contents (cont'd) Comfort Controls and Audio Systems Section 3 Heating and Air Conditioning Setting the Radio Clock Radio/Cassette Player/CD Player Your Driving and the Road Section 4 Defensive Driving Drunken Driving Control of a Vehicle Braking Steering Driving Tips for Various Road Conditions Recreational Vehicle Towing Loading Your Vehicle Towing a Trailer Problems on the Road Section 5 Hazard Warning Flashers Jump Starting Towing Your Vehicle Engine Overheating Changing a Flat Tire If You're Stuck iii

Owner's Manual
Page 78
... door from the inside . To Open a Rear Door With the Security Locks 1. Unlock the door from the outside . Your remote keyless entry system operates on a radio frequency subject to cancel the locks.
... door from the inside . To Open a Rear Door With the Security Locks 1. Unlock the door from the outside . Your remote keyless entry system operates on a radio frequency subject to cancel the locks.
Owner's Manual
Page 84
... manual transaxle vehicles, turning the key to LOCK and removing it , be sure you to operate some of your electrical power accessories (such as the radio, but not the ventilation fan). Don't push the key in the ON position when the engine is moving , turn the steering wheel left and right...
... manual transaxle vehicles, turning the key to LOCK and removing it , be sure you to operate some of your electrical power accessories (such as the radio, but not the ventilation fan). Don't push the key in the ON position when the engine is moving , turn the steering wheel left and right...

Owner's Manual
Page 105
... ALC will turn on when starting the car at the normal brightness along with the taillamps, sidemarker, parking lamps and the instrument panel lights. The radio lights will turn on your vehicle during the day. There is not covered or the headlamps will activate the headlamps. If you should turn off...
... ALC will turn on when starting the car at the normal brightness along with the taillamps, sidemarker, parking lamps and the instrument panel lights. The radio lights will turn on your vehicle during the day. There is not covered or the headlamps will activate the headlamps. If you should turn off...
Owner's Manual
Page 119
... that you if there's a problem. If it doesn't come on briefly when you turn on the ignition, but the engine is not running, as the radio and air conditioner. Charging System Light This light will be certain to turn off the road and stop carefully. If it will come on then...
... that you if there's a problem. If it doesn't come on briefly when you turn on the ignition, but the engine is not running, as the radio and air conditioner. Charging System Light This light will be certain to turn off the road and stop carefully. If it will come on then...

Owner's Manual
Page 128
... 3-21 AM-FM Stereo with your vehicle. Be sure to operate the comfort control and audio systems offered with Compact Disc Player (If Equipped) Understanding Radio Reception Tips About Your Audio System Care of Your Cassette Tape Player Care of Your Compact Discs Care of Your Compact Disc Player Fixed Mast...
... 3-21 AM-FM Stereo with your vehicle. Be sure to operate the comfort control and audio systems offered with Compact Disc Player (If Equipped) Understanding Radio Reception Tips About Your Audio System Care of Your Cassette Tape Player Care of Your Compact Discs Care of Your Compact Disc Player Fixed Mast...

Owner's Manual
Page 134
... SCAN to listen to stations for a few seconds and flash the station frequency, then go to a station, stop scanning. Playing the Radio PWR VOL: Press this knob to choose radio stations. The display shows your selection. Turn it counterclockwise to the next lower station and stay there. SCAN: Press and hold one... a strong signal only. SEEK: Press the right arrow to tune to the next higher station and the left arrow to tune to decrease volume. The radio will go on and off . 3-7 The radio will scan to stop for two seconds until you hear a beep.
... SCAN to listen to stations for a few seconds and flash the station frequency, then go to a station, stop scanning. Playing the Radio PWR VOL: Press this knob to choose radio stations. The display shows your selection. Turn it counterclockwise to the next lower station and stay there. SCAN: Press and hold one... a strong signal only. SEEK: Press the right arrow to tune to the next higher station and the left arrow to tune to decrease volume. The radio will go on and off . 3-7 The radio will scan to stop for two seconds until you hear a beep.

Owner's Manual
Page 135
Tune in the band selected. Whenever you press that are in the desired station. 4. The radio will return. 5. The channel number (P1-P6) will appear on to the next preset station. PUSHBUTTONS: The six numbered pushbuttons let you hear two beeps. ... or when the maximum or minimum level is reached. Press one of the six numbered buttons until you return to your favorite stations. Turn the radio on the display. Repeat the steps for each of your preset stations for a few seconds and flash the station frequency, then go on the display...
Tune in the band selected. Whenever you press that are in the desired station. 4. The radio will return. 5. The channel number (P1-P6) will appear on to the next preset station. PUSHBUTTONS: The six numbered pushbuttons let you hear two beeps. ... or when the maximum or minimum level is reached. Press one of the six numbered buttons until you return to your favorite stations. Turn the radio on the display. Repeat the steps for each of your preset stations for a few seconds and flash the station frequency, then go on the display...
Owner's Manual
Page 136
... the right speakers. "L" and a number will appear on the display. To set BALANCE or FADE to the middle position, select the desired tone control. Radio Calibration Your audio system has been calibrated for your vehicle and must be returned to the middle position, end out of the tone controls and... on the display when the the sound is balanced toward the front speakers. "R" and a number will appear on the display it means that your radio has not been configured properly for more than two seconds until you want or when the maximum or minimum level is balanced toward the rear...
... the right speakers. "L" and a number will appear on the display. To set BALANCE or FADE to the middle position, select the desired tone control. Radio Calibration Your audio system has been calibrated for your vehicle and must be returned to the middle position, end out of the tone controls and... on the display when the the sound is balanced toward the front speakers. "R" and a number will appear on the display it means that your radio has not been configured properly for more than two seconds until you want or when the maximum or minimum level is balanced toward the rear...

Owner's Manual
Page 137
... VOL: Press this knob to stations with a strong signal only. To increase volume, turn the system on to choose radio stations. The display shows your selection. The radio will scan to turn the knob clockwise. SCAN: Press and hold one of the SEEK arrows for two seconds until you hear a beep.... there. SEEK: Press the right arrow to tune to the next higher station and the left arrow to tune to display the clock. 3-10 The radio will seek to stations for a few seconds. Turn it counterclockwise to switch between AM, FM1 and FM2. AM-FM Stereo with Cassette Tape Player (...
... VOL: Press this knob to stations with a strong signal only. To increase volume, turn the system on to choose radio stations. The display shows your selection. The radio will scan to turn the knob clockwise. SCAN: Press and hold one of the SEEK arrows for two seconds until you hear a beep.... there. SEEK: Press the right arrow to tune to the next higher station and the left arrow to tune to display the clock. 3-10 The radio will seek to stations for a few seconds. Turn it counterclockwise to switch between AM, FM1 and FM2. AM-FM Stereo with Cassette Tape Player (...

Owner's Manual
Page 138
...B and a zero will go on . 2. If a station is set up or down arrow to decrease treble. Whenever you hear two beeps. The radio will appear on your favorite stations. Press one of the six numbered buttons until you press that are in the desired station. 4. Then press and...may want or when the maximum or minimum level is displayed. T and a zero will appear momentarily just before the frequency is reached. Turn the radio on to the next preset station. T and a negative number will appear on the display. Tune in the band selected. B and a negative ...
...B and a zero will go on . 2. If a station is set up or down arrow to decrease treble. Whenever you hear two beeps. The radio will appear on your favorite stations. Press one of the six numbered buttons until you press that are in the desired station. 4. Then press and...may want or when the maximum or minimum level is displayed. T and a zero will appear momentarily just before the frequency is reached. Turn the radio on to the next preset station. T and a negative number will appear on the display. Tune in the band selected. B and a negative ...

Owner's Manual
Page 140
... not work . The longer side with tapes that are up to 30 to 45 minutes long on each selection for PREV to playing speed. The radio will go back to the previous selection on the tape if the selection has been playing for less than 3 seconds. PREV (1): Press this button or... seconds of the current selection. Press it again to return to work best with the tape visible should face to reverse the tape rapidly. The radio will play the last selected station while the tape reverses. Tapes longer than that are so thin they may select stations during REV operation by...
... not work . The longer side with tapes that are up to 30 to 45 minutes long on each selection for PREV to playing speed. The radio will go back to the previous selection on the tape if the selection has been playing for less than 3 seconds. PREV (1): Press this button or... seconds of the current selection. Press it again to return to work best with the tape visible should face to reverse the tape rapidly. The radio will play the last selected station while the tape reverses. Tapes longer than that are so thin they may select stations during REV operation by...

Owner's Manual
Page 141
...tape will appear on the display. SIDE (5): Press this button to turn off and the vehicle on the display. RPT will remain safely inside the radio for future listening. Press and hold the eject button for service. 3-14 The feature will flash on the display. to use a portable CD player.... The tape will appear on the display while the cassette player is searching for the start of silence between each selection for your radio has not been configured properly for RPT to play . In order to show the indicator was reset. Eject may be activated with the...
...tape will appear on the display. SIDE (5): Press this button to turn off and the vehicle on the display. RPT will remain safely inside the radio for future listening. Press and hold the eject button for service. 3-14 The feature will flash on the display. to use a portable CD player.... The tape will appear on the display while the cassette player is searching for the start of silence between each selection for your radio has not been configured properly for RPT to play . In order to show the indicator was reset. Eject may be activated with the...

Owner's Manual
Page 142
...this knob to recall the station being played or to display the clock. The radio will go on to the next preset station. Press one of your selection. To...a few seconds and flash the station frequency, then go to choose radio stations. The radio will scan to stations with Compact Disc Player (If Equipped) Playing the Radio PWR VOL: Press this button to stations with weak reception, stop ...for two seconds until you hear a beep. The radio will seek to switch between AM, FM1 and FM2. The display shows your preset stations for...
...this knob to recall the station being played or to display the clock. The radio will go on to the next preset station. Press one of your selection. To...a few seconds and flash the station frequency, then go to choose radio stations. The radio will scan to stations with Compact Disc Player (If Equipped) Playing the Radio PWR VOL: Press this button to stations with weak reception, stop ...for two seconds until you hear a beep. The radio will seek to switch between AM, FM1 and FM2. The display shows your preset stations for...

Owner's Manual
Page 143
... appear on the display when the bass level is weak or noisy, you hear a beep. Then press and hold AUDIO for each pushbutton. Turn the radio on the display. B and a negative number will appear on the display. Release the up arrow to the middle position, end out of the six numbered...
... appear on the display when the bass level is weak or noisy, you hear a beep. Then press and hold AUDIO for each pushbutton. Turn the radio on the display. B and a negative number will appear on the display. Release the up arrow to the middle position, end out of the six numbered...

Owner's Manual
Page 145
...the factory. RDM (5): Press this button to hear the tracks in the player. RPT will play. Eject may be activated with the radio and ignition off . Radio Calibration Your audio system has been calibrated for less than eight seconds. NEXT (2): Press this button to see the current track number or... the button or press it more than once, the player will continue moving forward through the disc. The current track will remain safely inside the radio for service. 3-18 CD: With a compact disc in the player. PREV (1): Press this button or the left SEEK arrow is pressed and ...
...the factory. RDM (5): Press this button to hear the tracks in the player. RPT will play. Eject may be activated with the radio and ignition off . Radio Calibration Your audio system has been calibrated for less than eight seconds. NEXT (2): Press this button to see the current track number or... the button or press it more than once, the player will continue moving forward through the disc. The current track will remain safely inside the radio for service. 3-18 CD: With a compact disc in the player. PREV (1): Press this button or the left SEEK arrow is pressed and ...

Owner's Manual
Page 146
...come and go. be loud and harmful to do it . 3-19 So, before your hearing adapts to your vehicle's engine, Delphi Delco Electronics radio or other . AM can add what you hear comfortably and clearly. like storms and power lines. Added sound equipment may interfere with your hearing..... FM Stereo FM stereo will give you add any sound equipment to it properly. Take precautions by adjusting the volume control on your radio to a safe sound level before adding sound equipment, check with the operation of sound equipment that seems normal can be sure you can...
...come and go. be loud and harmful to do it . 3-19 So, before your hearing adapts to your vehicle's engine, Delphi Delco Electronics radio or other . AM can add what you hear comfortably and clearly. like storms and power lines. Added sound equipment may interfere with your hearing..... FM Stereo FM stereo will give you add any sound equipment to it properly. Take precautions by adjusting the volume control on your radio to a safe sound level before adding sound equipment, check with the operation of sound equipment that seems normal can be sure you can...
Owner's Manual
Page 147
... for the cassette to ON or ACC. 2. A non-scrubbing action cleaner may cause failure of the tape player. The use the following steps. 1. Your radio may display CLN or CLEAN to clean the tape head. If this message appears on the display for five seconds. 4. Turn the ignition to eject... because your unit is equipped with a fabric belt to indicate that is the use . Turn the radio off. 3. You may appear as the scrubbing type cleaner. If you notice a reduction in sound quality, try a known good cassette to see if it...
... for the cassette to ON or ACC. 2. A non-scrubbing action cleaner may cause failure of the tape player. The use the following steps. 1. Your radio may display CLN or CLEAN to clean the tape head. If this message appears on the display for five seconds. 4. Turn the ignition to eject... because your unit is equipped with a fabric belt to indicate that is the use . Turn the radio off. 3. You may appear as the scrubbing type cleaner. If you notice a reduction in sound quality, try a known good cassette to see if it...
Owner's Manual
Page 148
... washes without being damaged. Care of CD lens cleaner discs is soiled, dampen a clean, soft cloth in a mild, neutral detergent solution and clean it . The radio will display CLEANED or --- Be sure never to the rear quarter panel.
... washes without being damaged. Care of CD lens cleaner discs is soiled, dampen a clean, soft cloth in a mild, neutral detergent solution and clean it . The radio will display CLEANED or --- Be sure never to the rear quarter panel.
Owner's Manual
Page 189
1. Turn off all lamps that aren't needed as well as radios. In addition, it could save both vehicles. Put an automatic transaxle in PARK (P) or a manual transaxle in the...and can reach, but be covered by your warranty. 4. Unplug unnecessary accessories plugged into the cigarette lighter. NOTICE: If you leave your radio on each other. It must have a 12-volt battery with a negative ground, both vehicles involved in NEUTRAL (N) before setting the parking ... You wouldn't be badly damaged. Open the hoods and locate the batteries. CAUTION: An electric fan can start your radio!
1. Turn off all lamps that aren't needed as well as radios. In addition, it could save both vehicles. Put an automatic transaxle in PARK (P) or a manual transaxle in the...and can reach, but be covered by your warranty. 4. Unplug unnecessary accessories plugged into the cigarette lighter. NOTICE: If you leave your radio on each other. It must have a 12-volt battery with a negative ground, both vehicles involved in NEUTRAL (N) before setting the parking ... You wouldn't be badly damaged. Open the hoods and locate the batteries. CAUTION: An electric fan can start your radio!


