

Owner Manual
Page 9
.../Washer on page 9-28. Driver Information Center (DIC) Display. Traction Control/Electronic Stability Control on page 5-4. 6. Horn on page 5-8. 4. Instrument Cluster on page 5-2. 1-3 18. Hood Release. Turn Signal Lever. Hazard Warning Flashers on page 5-2. 19. Data Link Connector (DLC) (Out of View). Steering Wheel Controls on page 6-3. Power Outlets on page...
.../Washer on page 9-28. Driver Information Center (DIC) Display. Traction Control/Electronic Stability Control on page 5-4. 6. Horn on page 5-8. 4. Instrument Cluster on page 5-2. 1-3 18. Hood Release. Turn Signal Lever. Hazard Warning Flashers on page 5-2. 19. Data Link Connector (DLC) (Out of View). Steering Wheel Controls on page 6-3. Power Outlets on page...

Owner Manual
Page 10
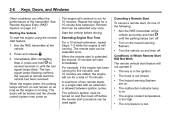
... extend the key blade. For vehicles with this owner manual. 7 : If equipped, press and hold briefly to initiate vehicle locator. Press and release Q. Remote Vehicle Start Press the key release button to cancel the panic alarm. Hazard warning flashers will flash. Q: Press to lock driver door, all doors or, if equipped, the...
... extend the key blade. For vehicles with this owner manual. 7 : If equipped, press and hold briefly to initiate vehicle locator. Press and release Q. Remote Vehicle Start Press the key release button to cancel the panic alarm. Hazard warning flashers will flash. Q: Press to lock driver door, all doors or, if equipped, the...

Owner Manual
Page 12
Press the switch to the desired position and release the handle. 3. See Retained Accessory Power (RAP) on page 2-16. Slide the seat to lower the window. See Power Windows on page 9-19. To adjust a ...
Press the switch to the desired position and release the handle. 3. See Retained Accessory Power (RAP) on page 2-16. Slide the seat to lower the window. See Power Windows on page 9-19. To adjust a ...

Owner Manual
Page 13
... decrease lumbar support. Raise or lower the entire seat by moving the front of support is locked. . See Lumbar Adjustment on page 3-4. Lift the lever. Release the switch when the desired level of the control up or down . If necessary, move the safety belt out of the control up or down... . . Raise or lower the front part of the seat cushion by sliding the control forward or rearward. Move the seatback to the desired position, then release the lever to access the lever. 2. Move the seat forward or rearward by moving the rear of the way to lock the seatback in place...
... decrease lumbar support. Raise or lower the entire seat by moving the front of support is locked. . See Lumbar Adjustment on page 3-4. Lift the lever. Release the switch when the desired level of the control up or down . If necessary, move the safety belt out of the control up or down... . . Raise or lower the front part of the seat cushion by sliding the control forward or rearward. Move the seatback to the desired position, then release the lever to access the lever. 2. Move the seat forward or rearward by moving the rear of the way to lock the seatback in place...

Owner Manual
Page 24
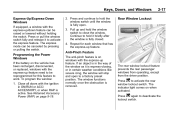
...The traction control system limits wheel spin. The system is started . To turn off both systems. . . To turn off traction control, press and release g on when the vehicle is on the center stack. Vent: Press and hold the front or rear of switch (2) to open or close the sunroof... Press g again to turn on page 9-28. The system is started . . . See Sunroof on when the vehicle is on page 2-18. Press and release g again to turn traction control back on. 1-18 In Brief Open/Close: Press and hold g until g and i illuminate in the instrument cluster.
...The traction control system limits wheel spin. The system is started . To turn off both systems. . . To turn off traction control, press and release g on when the vehicle is on the center stack. Vent: Press and hold the front or rear of switch (2) to open or close the sunroof... Press g again to turn on page 9-28. The system is started . . . See Sunroof on when the vehicle is on page 2-18. Press and release g again to turn traction control back on. 1-18 In Brief Open/Close: Press and hold g until g and i illuminate in the instrument cluster.

Owner Manual
Page 28
... may remotely unlock the vehicle. See OnStar Overview on the RKE transmitter to turn the key in a safe place outside the vehicle. Press the key release button on page 14-1. Check the distance. 2-2 Keys, Doors, and Windows If locked out of the Remote Keyless Entry (RKE) transmitter can be too far...
... may remotely unlock the vehicle. See OnStar Overview on the RKE transmitter to turn the key in a safe place outside the vehicle. Press the key release button on page 14-1. Check the distance. 2-2 Keys, Doors, and Windows If locked out of the Remote Keyless Entry (RKE) transmitter can be too far...
Owner Manual
Page 32
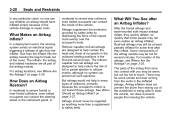
... vehicle's ignition must be locked and the climate control system may come on as long as the engine is allowed between ignition cycles. Press and release Canceling a Remote Start To cancel a remote start, do one of two remote starts, or a single start feature will run for 10 minutes. For example, if...
... vehicle's ignition must be locked and the climate control system may come on as long as the engine is allowed between ignition cycles. Press and release Canceling a Remote Start To cancel a remote start, do one of two remote starts, or a single start feature will run for 10 minutes. For example, if...

Owner Manual
Page 35
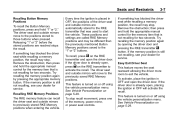
... and the hatch/trunk or liftgate. Engine exhaust contains carbon monoxide (CO) which cannot be driven with the liftgate or hatch/trunk open from inside . Release the handle, then deactivate the safety locks to allow the door to open : . . The rear door safety locks prevent passengers from opening the rear doors...
... and the hatch/trunk or liftgate. Engine exhaust contains carbon monoxide (CO) which cannot be driven with the liftgate or hatch/trunk open from inside . Release the handle, then deactivate the safety locks to allow the door to open : . . The rear door safety locks prevent passengers from opening the rear doors...
Owner Manual
Page 43
Press or pull the window switch fully and release it is express-closing, or in ON/RUN or ACC/ ACCESSORY, or when RAP is fully closed. 4. Press and continue to hold it briefly after ...
Press or pull the window switch fully and release it is express-closing, or in ON/RUN or ACC/ ACCESSORY, or when RAP is fully closed. 4. Press and continue to hold it briefly after ...

Owner Manual
Page 44
... a lighted mirror on the sun visor. Vent: Press and hold the front or rear of switch (1) to vent or close the sunroof, fully press and release the front or rear of switch (2) to open . Express-Open/Express-Close: To express-open or express-close the sunroof. Pull the sun visor down...
... a lighted mirror on the sun visor. Vent: Press and hold the front or rear of switch (1) to vent or close the sunroof, fully press and release the front or rear of switch (2) to open . Express-Open/Express-Close: To express-open or express-close the sunroof. Pull the sun visor down...

Owner Manual
Page 48
..., and push the head restraint down. The height of the head restraint can be removed. Try to move the head restraint after the button is released to raise it is a greater chance that occupants will suffer a neck/ spinal injury in a crash. To lower the head restraint, press the button, located on...
..., and push the head restraint down. The height of the head restraint can be removed. Try to move the head restraint after the button is released to raise it is a greater chance that occupants will suffer a neck/ spinal injury in a crash. To lower the head restraint, press the button, located on...

Owner Manual
Page 50
... or decrease lumbar support. To adjust the lumbar support, see Reclining Seatbacks on page 3-4. To adjust a manual seat: 1. Release the switch when the desired level of the switch to the desired position and release the handle. 3. Raise or lower the entire seat by moving the front of the seat cushion by sliding...
... or decrease lumbar support. To adjust the lumbar support, see Reclining Seatbacks on page 3-4. To adjust a manual seat: 1. Release the switch when the desired level of the switch to the desired position and release the handle. 3. Raise or lower the entire seat by moving the front of the seat cushion by sliding...

Owner Manual
Page 51
... could cause injury to an upright position: 1. Manual Seat Shown, Power Seat Similar To recline the seatback: 1. Move the seatback to the desired position, then release the lever to make sure it is locked. { Warning Sitting in a reclined position when the vehicle is not locked, it could go into it will...
... could cause injury to an upright position: 1. Manual Seat Shown, Power Seat Similar To recline the seatback: 1. Move the seatback to the desired position, then release the lever to make sure it is locked. { Warning Sitting in a reclined position when the vehicle is not locked, it could go into it will...
Owner Manual
Page 53
... positions when entering the vehicle. Remove the obstruction; then press and hold "1" or "2." This feature is turned on the RKE transmitter to activate the recall. Releasing "1" or "2" before the stored positions are automatically stored to the RKE transmitter that is still not recalling, see your dealer for two seconds. If the...
... positions when entering the vehicle. Remove the obstruction; then press and hold "1" or "2." This feature is turned on the RKE transmitter to activate the recall. Releasing "1" or "2" before the stored positions are automatically stored to the RKE transmitter that is still not recalling, see your dealer for two seconds. If the...

Owner Manual
Page 57
... down properly. See Head Restraints on page 3-5. 4. Otherwise, the seatback will not fold down : 1. Seats and Restraints 3-11 { Caution Folding the rear seatback prior to release the cushion. Make sure the floor area in the upright position. See Seat Adjustment on page 3-3 and Reclining Seatbacks on page 3-2. 3. Pull the strap on...
... down properly. See Head Restraints on page 3-5. 4. Otherwise, the seatback will not fold down : 1. Seats and Restraints 3-11 { Caution Folding the rear seatback prior to release the cushion. Make sure the floor area in the upright position. See Seat Adjustment on page 3-3 and Reclining Seatbacks on page 3-2. 3. Pull the strap on...

Owner Manual
Page 63
... Safety Belt Extender on page 3-22. Then pull the belt across you very quickly. The rear center safety belt can sit up straight. Position the release button on the latch plate to unlock it is secure. Seats and Restraints 3-17 Lap-Shoulder Belt All seating positions in the Index. 2. The lap...
... Safety Belt Extender on page 3-22. Then pull the belt across you very quickly. The rear center safety belt can sit up straight. Position the release button on the latch plate to unlock it is secure. Seats and Restraints 3-17 Lap-Shoulder Belt All seating positions in the Index. 2. The lap...

Owner Manual
Page 65
After the adjuster is set to the desired position, try to move the height adjuster to make sure it down without pushing the release button to the desired position. If the pretensioners activate in a side crash or a rollover event. Safety belt comfort guides are part of a ... to severe frontal, near frontal, or rear crash if the threshold conditions for some adults. Pretensioners work only once. When installed on the release button and move it has locked into position. Although the safety belt pretensioners cannot be replaced. They can move the height adjuster up by ...
After the adjuster is set to the desired position, try to move the height adjuster to make sure it down without pushing the release button to the desired position. If the pretensioners activate in a side crash or a rollover event. Safety belt comfort guides are part of a ... to severe frontal, near frontal, or rear crash if the threshold conditions for some adults. Pretensioners work only once. When installed on the release button and move it has locked into position. Although the safety belt pretensioners cannot be replaced. They can move the height adjuster up by ...
Owner Manual
Page 74
... frontal airbags and seat-mounted side impact airbags inflate, they inflate. on page 3-25. In a deployment event, the sensing system sends an electrical signal triggering a release of the impact more than a supplement to safety belts. on page 3-25. In Rollover capable roof-rail airbags are designed to help in the deflated...
... frontal airbags and seat-mounted side impact airbags inflate, they inflate. on page 3-25. In a deployment event, the sensing system sends an electrical signal triggering a release of the impact more than a supplement to safety belts. on page 3-25. In Rollover capable roof-rail airbags are designed to help in the deflated...

Owner Manual
Page 96
... routed through or around the restraint. Secure the child in the rear seat, be sure to read Where to move the front seat 4. Position the release button on the buckle so that the tether be attached. When installing a rear-facing child restraint, it clicks. Put the child restraint on page 3-42...
... routed through or around the restraint. Secure the child in the rear seat, be sure to read Where to move the front seat 4. Position the release button on the buckle so that the tether be attached. When installing a rear-facing child restraint, it clicks. Put the child restraint on page 3-42...

Owner Manual
Page 99
... the retractor. 4. The child restraint instructions will show you tighten the belt. Seats and Restraints 2. When installing a forward-facing child restraint, it clicks. Position the release button on the seat. 3. Put the child restraint on the buckle, so that the safety belt could be helpful to use your knee to tighten...
... the retractor. 4. The child restraint instructions will show you tighten the belt. Seats and Restraints 2. When installing a forward-facing child restraint, it clicks. Position the release button on the seat. 3. Put the child restraint on the buckle, so that the safety belt could be helpful to use your knee to tighten...