

Owner Manual
Page 7
...1-17 In Brief Instrument Panel Instrument Panel ...1-2 Initial Drive Information Initial Drive Information ...1-4 Remote Keyless Entry (RKE) System ...1-4 Remote Vehicle Start ...1-4 Door Locks ...1-5 Liftgate ...1-5 Windows ...1-6 Seat Adjustment ...1-6 Memory Features ...1-8 Second Row Seats ...1-8 Heated Seats ...1-8 Head Restraint Adjustment ...1-9 Safety Belts ...1-9 Passenger Sensing System ...1-9 Mirror Adjustment ...12 Climate Controls ...1-13 Transmission ...1-14 Side Blind Zone Alert (SBZA) ...Rear Vision Camera (RVC) ...Ultrasonic Parking Assist ...Power Outlets ...Sunroof ...
...1-17 In Brief Instrument Panel Instrument Panel ...1-2 Initial Drive Information Initial Drive Information ...1-4 Remote Keyless Entry (RKE) System ...1-4 Remote Vehicle Start ...1-4 Door Locks ...1-5 Liftgate ...1-5 Windows ...1-6 Seat Adjustment ...1-6 Memory Features ...1-8 Second Row Seats ...1-8 Heated Seats ...1-8 Head Restraint Adjustment ...1-9 Safety Belts ...1-9 Passenger Sensing System ...1-9 Mirror Adjustment ...12 Climate Controls ...1-13 Transmission ...1-14 Side Blind Zone Alert (SBZA) ...Rear Vision Camera (RVC) ...Ultrasonic Parking Assist ...Power Outlets ...Sunroof ...

Owner Manual
Page 11
...inside , press Q or K on as long as the engine is running. Liftgate To lock or unlock the liftgate from outside , turn the key toward the front or rear of the vehicle, or press K or Q on the top of the following: . Power Door Locks Aim the RKE transmitter at the vehicle and press and... the parking lamps turn off . . . In Brief When the engine starts, the parking lamps will turn on and remain on the power door locks. To lock or unlock the liftgate from inside , to run for a 10-minute time extension. The doors will continue to lock the door, use the lock knob on...
...inside , press Q or K on as long as the engine is running. Liftgate To lock or unlock the liftgate from outside , turn the key toward the front or rear of the vehicle, or press K or Q on the top of the following: . Power Door Locks Aim the RKE transmitter at the vehicle and press and... the parking lamps turn off . . . In Brief When the engine starts, the parking lamps will turn on and remain on the power door locks. To lock or unlock the liftgate from inside , to run for a 10-minute time extension. The doors will continue to lock the door, use the lock knob on...

Owner Manual
Page 12
... the seat to lower the window. To adjust a manual seat: 1. 1-6 In Brief Windows Seat Adjustment Manual Seats To open the liftgate, press the touch pad in place. See Retained Accessory Power (RAP) on page 2-16. Pull the handle at the front of the switch to be sure it . Press the switch to... the handle. 3. Pull up on the front edge of the seat. 2. Try to move the seat back and forth to raise it is active. See Liftgate on page 3-3. See Seat Adjustment on page 2-9. The switches work when the vehicle is in ON/RUN or ACC/ ACCESSORY, or when Retained Accessory...
... the seat to lower the window. To adjust a manual seat: 1. 1-6 In Brief Windows Seat Adjustment Manual Seats To open the liftgate, press the touch pad in place. See Retained Accessory Power (RAP) on page 2-16. Pull the handle at the front of the switch to be sure it . Press the switch to... the handle. 3. Pull up on the front edge of the seat. 2. Try to move the seat back and forth to raise it is active. See Liftgate on page 3-3. See Seat Adjustment on page 2-9. The switches work when the vehicle is in ON/RUN or ACC/ ACCESSORY, or when Retained Accessory...

Owner Manual
Page 27
... make the vehicle move. Interior Mirrors Interior Rearview Mirrors ...2-15 Manual Rearview Mirror ...2-15 Automatic Dimming Rearview Mirror ...2-15 Windows Windows ...2-16 Power Windows ...2-16 Sun Visors ...2-18 Doors Liftgate ...2-9 Roof Sunroof ...2-18 Vehicle Security Vehicle Security ...2-11 Vehicle Alarm System ...2-11 Immobilizer ...2-12 Immobilizer Operation ...2-12 Keys, Doors, and Windows 2-1 Keys...
... make the vehicle move. Interior Mirrors Interior Rearview Mirrors ...2-15 Manual Rearview Mirror ...2-15 Automatic Dimming Rearview Mirror ...2-15 Windows Windows ...2-16 Power Windows ...2-16 Sun Visors ...2-18 Doors Liftgate ...2-9 Roof Sunroof ...2-18 Vehicle Security Vehicle Security ...2-11 Vehicle Alarm System ...2-11 Immobilizer ...2-12 Immobilizer Operation ...2-12 Keys, Doors, and Windows 2-1 Keys...
Owner Manual
Page 36
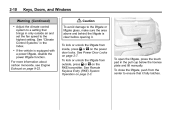
... latches. . 2-10 Keys, Doors, and Windows Warning (Continued) { Caution To avoid damage to the liftgate or liftgate glass, make sure the area above and behind the liftgate is equipped with a power liftgate, disable the power liftgate function. . To lock or unlock the liftgate from outside air and set the fan speed to a setting that it . For more information...
... latches. . 2-10 Keys, Doors, and Windows Warning (Continued) { Caution To avoid damage to the liftgate or liftgate glass, make sure the area above and behind the liftgate is equipped with a power liftgate, disable the power liftgate function. . To lock or unlock the liftgate from outside air and set the fan speed to a setting that it . For more information...
Owner Manual
Page 37
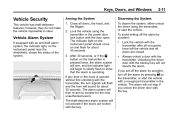
...the doors are closed. Arming the System 1. Disarming the System To disarm the system, either unlock the doors using the transmitter or the power door lock button with an anti-theft alarm system, the indicator light, on the transmitter, or start the vehicle. Vehicle Alarm System ...for about 30 seconds. Always unlock a door with the transmitter after all occupants have left the vehicle and all doors, the hood, and the liftgate. 2. Lock the vehicle with the transmitter. Keys, Doors, and Windows 2-11 Vehicle Security This vehicle has theft-deterrent features; After 30 seconds,...
...the doors are closed. Arming the System 1. Disarming the System To disarm the system, either unlock the doors using the transmitter or the power door lock button with an anti-theft alarm system, the indicator light, on the transmitter, or start the vehicle. Vehicle Alarm System ...for about 30 seconds. Always unlock a door with the transmitter after all occupants have left the vehicle and all doors, the hood, and the liftgate. 2. Lock the vehicle with the transmitter. Keys, Doors, and Windows 2-11 Vehicle Security This vehicle has theft-deterrent features; After 30 seconds,...

Owner Manual
Page 235
... Logic Ignition Switch Sensing Diagnostic Module Battery Data Link Connector Mini Fuses 12 Usage Heater, Ventilation, and Air Conditioning MDL/ICS Liftgate Relay UPA Module LDW Module/Inside Rearview Mirror Adaptive Forward Lighting Module Power WNDWSW DR Rain Sensor Body Control Module Regulated Voltage Control Steering Wheel Switch Backlighting A/C Accessory.../ PRNDL 29 30 31 32 33 34 Mini Fuses 22 Usage 10-33 Cigar Lighter/DC Accessory Power Outlet Spare Spare Spare Automatic Occupant Sensing Display IPC/PTC Control/ Clutch Switch Headlamp Switch/ AFL/DC Converter Spare Spare IPC Battery ...
... Logic Ignition Switch Sensing Diagnostic Module Battery Data Link Connector Mini Fuses 12 Usage Heater, Ventilation, and Air Conditioning MDL/ICS Liftgate Relay UPA Module LDW Module/Inside Rearview Mirror Adaptive Forward Lighting Module Power WNDWSW DR Rain Sensor Body Control Module Regulated Voltage Control Steering Wheel Switch Backlighting A/C Accessory.../ PRNDL 29 30 31 32 33 34 Mini Fuses 22 Usage 10-33 Cigar Lighter/DC Accessory Power Outlet Spare Spare Spare Automatic Occupant Sensing Display IPC/PTC Control/ Clutch Switch Headlamp Switch/ AFL/DC Converter Spare Spare IPC Battery ...
Owner Manual
Page 236
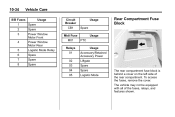
Spare Usage Usage S/B Fuses 1 2 3 4 5 6 7 8 Rear Compartment Fuse Block The vehicle may not be equipped with all of the rear compartment. 10-34 Vehicle Care Usage Spare Spare Power Window Motor Front Power Window Motor Rear Logistic Mode Relay Spare Spare Spare Circuit Breaker CB1 Midi Fuse M01 Relays 01 02 03 04 05 PTC Usage Accessory/Retained Accessory Power Liftgate Spare Spare Logistic Mode The rear compartment fuse block is behind a cover on the left side of the fuses, relays, and features shown. To access the fuses, remove the cover.
Spare Usage Usage S/B Fuses 1 2 3 4 5 6 7 8 Rear Compartment Fuse Block The vehicle may not be equipped with all of the rear compartment. 10-34 Vehicle Care Usage Spare Spare Power Window Motor Front Power Window Motor Rear Logistic Mode Relay Spare Spare Spare Circuit Breaker CB1 Midi Fuse M01 Relays 01 02 03 04 05 PTC Usage Accessory/Retained Accessory Power Liftgate Spare Spare Logistic Mode The rear compartment fuse block is behind a cover on the left side of the fuses, relays, and features shown. To access the fuses, remove the cover.

Owner Manual
Page 274
... constant velocity joints, rubber boots, and axle seals for conditions such as ice and dust. Body Component Lubrication Lubricate all key lock cylinders, hood hinges, liftgate hinges, and the fuel door hinge unless the components are used on weatherstrips with a clean cloth will make sure the body repair shop applies anti... or squeak. { Caution Chrome wheels and other chrome trim may then be applied. { Caution To avoid surface damage, do this. If equipped, inspect the hydraulic power steering for damaged, loose, or missing parts or signs of wear.
... constant velocity joints, rubber boots, and axle seals for conditions such as ice and dust. Body Component Lubrication Lubricate all key lock cylinders, hood hinges, liftgate hinges, and the fuel door hinge unless the components are used on weatherstrips with a clean cloth will make sure the body repair shop applies anti... or squeak. { Caution Chrome wheels and other chrome trim may then be applied. { Caution To avoid surface damage, do this. If equipped, inspect the hydraulic power steering for damaged, loose, or missing parts or signs of wear.