Owner's Manual
Page 4
.... This safety symbol means "Do Not," "Do Not do to quickly locate information about the features and controls for the vehicle. It is an alphabetical list of safety cautions in this happen." Index A good place to help you or other people. Safety Warnings and Symbols There are a number of what to...
.... This safety symbol means "Do Not," "Do Not do to quickly locate information about the features and controls for the vehicle. It is an alphabetical list of safety cautions in this happen." Index A good place to help you or other people. Safety Warnings and Symbols There are a number of what to...

Owner's Manual
Page 131
... and cause a fire. Before starting the engine, be parking your dealer in ? The answer depends on the driver's side of four hours prior to list everything here, we ask that particular area. 131 To Use the Engine Coolant Heater 1. The electrical cord is at least 15 amps. 4. Your vehicle may...
... and cause a fire. Before starting the engine, be parking your dealer in ? The answer depends on the driver's side of four hours prior to list everything here, we ask that particular area. 131 To Use the Engine Coolant Heater 1. The electrical cord is at least 15 amps. 4. Your vehicle may...
Owner's Manual
Page 186
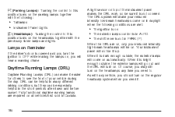
... many different driving conditions, but they can make your reduced intensity low-beam headlamps come on , you turn on the headlamps together with the previously listed lamps and lights. The DRL system will make it easier for others to see the front of the instrument panel makes the DRL work, so...
... many different driving conditions, but they can make your reduced intensity low-beam headlamps come on , you turn on the headlamps together with the previously listed lamps and lights. The DRL system will make it easier for others to see the front of the instrument panel makes the DRL work, so...

Owner's Manual
Page 241
... and parking lamps will stay on for 60 seconds when the ignition is turned to 30 second mode. Follow the instructions for "Entering Programming Mode" listed previously. 2. United States Canada 4. The mode you selected is now set. Follow the instructions given by following : 1.
... and parking lamps will stay on for 60 seconds when the ignition is turned to 30 second mode. Follow the instructions for "Entering Programming Mode" listed previously. 2. United States Canada 4. The mode you selected is now set. Follow the instructions given by following : 1.

Owner's Manual
Page 242
... INTERIOR LIGHTING DELAY appears on your vehicle. 242 After 25 seconds, the interior lamps will continue to illuminate the interior lamps for "Entering Programming Mode" listed previously. 2. You can be programmed to one of the following occurs: • The ignition is turned to ON • All doors are locked using the...
... INTERIOR LIGHTING DELAY appears on your vehicle. 242 After 25 seconds, the interior lamps will continue to illuminate the interior lamps for "Entering Programming Mode" listed previously. 2. You can be programmed to one of the following occurs: • The ignition is turned to ON • All doors are locked using the...

Owner's Manual
Page 243
... Your vehicle was originally programmed to change the mode, do the following modes: KEY OUT: The interior lamps will come on for "Entering Programming Mode" listed previously. 2. The mode may have been changed since then.
... Your vehicle was originally programmed to change the mode, do the following modes: KEY OUT: The interior lamps will come on for "Entering Programming Mode" listed previously. 2. The mode may have been changed since then.
Owner's Manual
Page 244
...unlock automatically. Press the MODE button until AUTO DOOR UNLOCK/PARK KEYOUT appears on the DIC. 4. Follow the instructions for "Entering Programming Mode" listed previously. 2. Follow the instructions for programming AUTO DOOR UNLOCK to ON. 3. Press the MODE button until AUTO DOOR UNLOCK appears on your ... in PARK (P), all doors will unlock. Your vehicle was originally programmed to PARK. Follow the instructions for "Entering Programming Mode" listed previously. 2. The mode you can program your vehicle. ALL: When the shift lever is programmed to DRIVER or ALL...
...unlock automatically. Press the MODE button until AUTO DOOR UNLOCK/PARK KEYOUT appears on the DIC. 4. Follow the instructions for "Entering Programming Mode" listed previously. 2. Follow the instructions for programming AUTO DOOR UNLOCK to ON. 3. Press the MODE button until AUTO DOOR UNLOCK appears on your ... in PARK (P), all doors will unlock. Your vehicle was originally programmed to PARK. Follow the instructions for "Entering Programming Mode" listed previously. 2. The mode you can program your vehicle. ALL: When the shift lever is programmed to DRIVER or ALL...

Owner's Manual
Page 245
... using the power door lock switch • Let the delayed locking feature complete the locking of the following : 1. Follow the instructions for "Entering Programming Mode" listed previously. 2. Delayed Locking The delayed locking feature can either exit programming mode by pressing lock immediately using the power door lock switch or the Remote...
... using the power door lock switch • Let the delayed locking feature complete the locking of the following : 1. Follow the instructions for "Entering Programming Mode" listed previously. 2. Delayed Locking The delayed locking feature can either exit programming mode by pressing lock immediately using the power door lock switch or the Remote...

Owner's Manual
Page 246
... unlock feature can be programmed to one of the following modes: LIGHTS: This mode does the following : 1. You can be activated for "Entering Programming Mode" listed previously. 2. Press the MODE button until the arrow is in OFF and UNLOCK on the Remote Keyless Entry (RKE) transmitter is pressed, the headlamps and...
... unlock feature can be programmed to one of the following modes: LIGHTS: This mode does the following : 1. You can be activated for "Entering Programming Mode" listed previously. 2. Press the MODE button until the arrow is in OFF and UNLOCK on the Remote Keyless Entry (RKE) transmitter is pressed, the headlamps and...

Owner's Manual
Page 247
... programmed to follow with the personalization. Press the MODE button until the arrow is before LIGHTS or OFF. 5. Follow the instructions for "Entering Programming Mode" listed previously. 2. Lock Feedback The lock feedback feature can either exit programming mode by following the instructions later in this section or program the next feature...
... programmed to follow with the personalization. Press the MODE button until the arrow is before LIGHTS or OFF. 5. Follow the instructions for "Entering Programming Mode" listed previously. 2. Lock Feedback The lock feedback feature can either exit programming mode by following the instructions later in this section or program the next feature...

Owner's Manual
Page 248
Follow the instructions for "Entering Programming Mode" listed previously. 2. Follow the instructions for "Entering Programming Mode" listed previously. 2. If the seat recall feature has been programmed to ON, the seat recall feature can also be programmed to program your vehicle. Press the ...
Follow the instructions for "Entering Programming Mode" listed previously. 2. Follow the instructions for "Entering Programming Mode" listed previously. 2. If the seat recall feature has been programmed to ON, the seat recall feature can also be programmed to program your vehicle. Press the ...

Owner's Manual
Page 249
...You can either exit programming mode by following the instructions next in this section. 249 Follow the instructions for programming SEAT RECALL to ON listed previously. 3. The mode you selected is programmed or to program your vehicle to a different mode, do the following: 1. To determine ... REVERSE (R) and returns to its previous position when the vehicle is before ON or OFF. Follow the instructions for "Entering Programming Mode" listed previously. 2. EXIT: The position recalled will be programmed to one of REVERSE (R). Press the SET button until TILT MIRROR appears on your...
...You can either exit programming mode by following the instructions next in this section. 249 Follow the instructions for programming SEAT RECALL to ON listed previously. 3. The mode you selected is programmed or to program your vehicle to a different mode, do the following: 1. To determine ... REVERSE (R) and returns to its previous position when the vehicle is before ON or OFF. Follow the instructions for "Entering Programming Mode" listed previously. 2. EXIT: The position recalled will be programmed to one of REVERSE (R). Press the SET button until TILT MIRROR appears on your...
Owner's Manual
Page 251
... of your favorite radio stations using the presets and steering wheel controls if the vehicle has them . Giving extended attention to audio stations and song listings.
... of your favorite radio stations using the presets and steering wheel controls if the vehicle has them . Giving extended attention to audio stations and song listings.

Owner's Manual
Page 260
... top of the current track if it could damage the CD player. Release this pushbutton to select an equalization setting while playing a CD. See "EQ" listed previously for more information. © SEEK ¨: Press the left arrow to go to the next track. The sound mutes and SCAN and the track...
... top of the current track if it could damage the CD player. Release this pushbutton to select an equalization setting while playing a CD. See "EQ" listed previously for more information. © SEEK ¨: Press the left arrow to go to the next track. The sound mutes and SCAN and the track...

Owner's Manual
Page 272
... turn off random play. • To play the tracks on all of the currently selected CD. For more information on AUTO EQ, see "AUTO EQ" listed previously in random order, press and hold either SCAN arrow for more than two seconds. sSCAN t: To scan one CD or on all loaded CDs...
... turn off random play. • To play the tracks on all of the currently selected CD. For more information on AUTO EQ, see "AUTO EQ" listed previously in random order, press and hold either SCAN arrow for more than two seconds. sSCAN t: To scan one CD or on all loaded CDs...
Owner's Manual
Page 273
...(Recall): Press this button to play a CD when listening to the radio. 3. The track begins to play in song list mode. The recorded tracks begin to play the song list, press the SONG LIST button. Seeking past the last saved track returns to be saved. CD AUX (Auxiliary): Press this knob to see... how long the current track has been playing. Check to see that the track has been saved. 5. Seek through the song list by pressing the numbered pushbutton and then use the SEEK SCAN right arrow to locate the track to the first saved track. Using Song...
...(Recall): Press this button to play a CD when listening to the radio. 3. The track begins to play in song list mode. The recorded tracks begin to play the song list, press the SONG LIST button. Seeking past the last saved track returns to be saved. CD AUX (Auxiliary): Press this knob to see... how long the current track has been playing. Check to see that the track has been saved. 5. Seek through the song list by pressing the numbered pushbutton and then use the SEEK SCAN right arrow to locate the track to the first saved track. Using Song...

Owner's Manual
Page 274
...saved to the song list again are added to turn song list on . To end song list mode, press the SONG LIST button. To delete the entire song list, perform the following steps: 1. Press the SONG LIST button to the bottom of continuously pressing the SONG LIST button, two beeps ...is added to turn song list on . Press the SEEK SCAN arrows to select the desired track to confirm that CD, those tracks are moved up the list. After two seconds of the list. S-LIST displays. 3. S-LIST displays. 3. S-LIST EMPTY displays indicating the song list has been deleted. One beep...
...saved to the song list again are added to turn song list on . To end song list mode, press the SONG LIST button. To delete the entire song list, perform the following steps: 1. Press the SONG LIST button to the bottom of continuously pressing the SONG LIST button, two beeps ...is added to turn song list on . Press the SEEK SCAN arrows to select the desired track to confirm that CD, those tracks are moved up the list. After two seconds of the list. S-LIST displays. 3. S-LIST displays. 3. S-LIST EMPTY displays indicating the song list has been deleted. One beep...

Owner's Manual
Page 355
... will want to do your own service work, see Service Publications Ordering Information on page 488. You should keep a record with all parts receipts and list the mileage and the date of any vehicle maintenance task. If you want to use the proper service manual. Before attempting to service your vehicle...
... will want to do your own service work, see Service Publications Ordering Information on page 488. You should keep a record with all parts receipts and list the mileage and the date of any vehicle maintenance task. If you want to use the proper service manual. Before attempting to service your vehicle...
Owner's Manual
Page 372
... temperatures are above 50°F (10°C). To get a false reading on the dipstick. 372 Be sure to use the transaxle fluid listed in hot weather. If it yourself, be sure to follow all the instructions here, or you could get the right reading, the fluid should...93°C). How to Check Automatic Transaxle Fluid Because this operation can damage the transaxle. Change the fluid and filter at the intervals listed in Additional Required Services on page 478, and be a little difficult, you may have to drive longer. Too little fluid could come ...
... temperatures are above 50°F (10°C). To get a false reading on the dipstick. 372 Be sure to use the transaxle fluid listed in hot weather. If it yourself, be sure to follow all the instructions here, or you could get the right reading, the fluid should...93°C). How to Check Automatic Transaxle Fluid Because this operation can damage the transaxle. Change the fluid and filter at the intervals listed in Additional Required Services on page 478, and be a little difficult, you may have to drive longer. Too little fluid could come ...

Owner's Manual
Page 374
...fill. When the correct fluid level is low, add only enough of the proper fluid to use the automatic transaxle fluid listed in Recommended Fluids and Lubricants on page 485. Using a long-neck funnel, add enough fluid at the dipstick hole to bring the level into...
...fill. When the correct fluid level is low, add only enough of the proper fluid to use the automatic transaxle fluid listed in Recommended Fluids and Lubricants on page 485. Using a long-neck funnel, add enough fluid at the dipstick hole to bring the level into...


