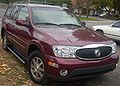
Owner's Manual
Page 1
2005 Buick Rainier Owner Manual Seats and Restraint Systems ...1-1 Front Seats ...1-2 Rear Seats ...1-5 Safety Belts ...1-7 Child Restraints ...1-26 Airbag System ...1-46 Restraint System Check ...1-61 Features and Controls ...2-1 Keys ...2-3 Doors ...
2005 Buick Rainier Owner Manual Seats and Restraint Systems ...1-1 Front Seats ...1-2 Rear Seats ...1-5 Safety Belts ...1-7 Child Restraints ...1-26 Airbag System ...1-46 Restraint System Check ...1-61 Features and Controls ...2-1 Keys ...2-3 Doors ...

Owner's Manual
Page 2
... what is a trademark of General Motors Corporation. How to Use This Manual Many people read the owner manual from : Helm, Incorporated P.O. All Rights Reserved. Box 07130 Detroit, MI 48207 GENERAL MOTORS, GM, the GM Emblem, BUICK, and the BUICK Emblem are on the road. Index A good place to make changes ... notice. We reserve the right to quickly locate information about the features and controls for Buick Motor Division whenever it can help you are registered trademarks, and the name Rainier is in the manual and the page number where it can be there if it was printed. Litho in ...
... what is a trademark of General Motors Corporation. How to Use This Manual Many people read the owner manual from : Helm, Incorporated P.O. All Rights Reserved. Box 07130 Detroit, MI 48207 GENERAL MOTORS, GM, the GM Emblem, BUICK, and the BUICK Emblem are on the road. Index A good place to make changes ... notice. We reserve the right to quickly locate information about the features and controls for Buick Motor Division whenever it can help you are registered trademarks, and the name Rainier is in the manual and the page number where it can be there if it was printed. Litho in ...
Owner's Manual
Page 4
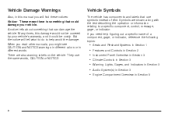
When you read other manuals, you might see CAUTION and NOTICE warnings in different colors or in Section 5 iv They use symbols instead of a component, gage, or indicator, reference the ..., and Indicators in Section 3 Audio System(s) in Section 3 Engine Compartment Overview in different words. Symbols are also warning labels on the vehicle. Many times, this manual you need help avoid the damage. Vehicle Damage Warnings Also, in this damage would not be covered by your vehicle. A notice tells about something that...
When you read other manuals, you might see CAUTION and NOTICE warnings in different colors or in Section 5 iv They use symbols instead of a component, gage, or indicator, reference the ..., and Indicators in Section 3 Audio System(s) in Section 3 Engine Compartment Overview in different words. Symbols are also warning labels on the vehicle. Many times, this manual you need help avoid the damage. Vehicle Damage Warnings Also, in this damage would not be covered by your vehicle. A notice tells about something that...

Owner's Manual
Page 13
... is in a crash and you should not do with seats and safety belts. Safety Belts Safety Belts: They Are for Everyone This part of the manual tells you how to be seriously injured or killed. In the same crash, you might not be much worse. If you are in a seat and...
... is in a crash and you should not do with seats and safety belts. Safety Belts Safety Belts: They Are for Everyone This part of the manual tells you how to be seriously injured or killed. In the same crash, you might not be much worse. If you are in a seat and...

Owner's Manual
Page 40
... the belt system or the LATCH system in the vehicle. The vehicle's belt system secures the add-on child restraint in a motor vehicle to this manual. When choosing a child restraint, be sure the child restraint is designed to be used the adult belt system in your vehicle, but the child also...
... the belt system or the LATCH system in the vehicle. The vehicle's belt system secures the add-on child restraint in a motor vehicle to this manual. When choosing a child restraint, be sure the child restraint is designed to be used the adult belt system in your vehicle, but the child also...

Owner's Manual
Page 45
... the anchors, you to protect the child correctly. Lift the flap to its anchorage points, the restraint will need a child restraint designed for this manual. 1-39 In a crash, the child could be able to fold the seat cushion up and out of the seat, where the seat cushion meets the...
... the anchors, you to protect the child correctly. Lift the flap to its anchorage points, the restraint will need a child restraint designed for this manual. 1-39 In a crash, the child could be able to fold the seat cushion up and out of the seat, where the seat cushion meets the...
Owner's Manual
Page 61
... instrument panel for the right front passenger's airbag, or side impact airbag module and ceiling covering for the roof-mounted side impact airbag. The service manual for the right front passenger's position. Do not open or break the airbag coverings. When the system check is equipped with a crash sensing and diagnostic...
... instrument panel for the right front passenger's airbag, or side impact airbag module and ceiling covering for the roof-mounted side impact airbag. The service manual for the right front passenger's position. Do not open or break the airbag coverings. When the system check is equipped with a crash sensing and diagnostic...
Owner's Manual
Page 66
... battery is disconnected, an airbag can be serviced. Servicing Your Airbag-Equipped Vehicle Airbags affect how your vehicle. Your dealer and the service manual have any questions about servicing your vehicle. Be sure to an airbag when it in Step Two of the airbag sensors. They are in... flates. If you should be injured if you are airbag system parts in this , you have information about this manual. There are close to follow proper service procedures, and make sure the person performing work properly if you relocate any of the Customer Satisfaction ...
... battery is disconnected, an airbag can be serviced. Servicing Your Airbag-Equipped Vehicle Airbags affect how your vehicle. Your dealer and the service manual have any questions about servicing your vehicle. Be sure to an airbag when it in Step Two of the airbag sensors. They are in... flates. If you should be injured if you are airbag system parts in this , you have information about this manual. There are close to follow proper service procedures, and make sure the person performing work properly if you relocate any of the Customer Satisfaction ...

Owner's Manual
Page 67
Q: Because I have a disability, I find out whether this manual. They can rip apart under the driver's seat), or the inside rearview mirror can I have them repaired or replaced. (The airbag system does not need ...
Q: Because I have a disability, I find out whether this manual. They can rip apart under the driver's seat), or the inside rearview mirror can I have them repaired or replaced. (The airbag system does not need ...
Owner's Manual
Page 69
... ...2-28 Running Your Engine While You Are Parked ...2-29 Mirrors ...2-30 Manual Rearview Mirror ...2-30 Manual Rearview Mirror with OnStar® ...2-30 Manual Rearview Mirror with Compass ...2-30 Manual Rearview Mirror with OnStar® and Compass ...2-33 Manual Rearview Mirror with Compass and Temperature ...2-35 Manual Rearview Mirror with OnStar®, Compass, and Temperature Display ...2-37...
... ...2-28 Running Your Engine While You Are Parked ...2-29 Mirrors ...2-30 Manual Rearview Mirror ...2-30 Manual Rearview Mirror with OnStar® ...2-30 Manual Rearview Mirror with Compass ...2-30 Manual Rearview Mirror with OnStar® and Compass ...2-33 Manual Rearview Mirror with Compass and Temperature ...2-35 Manual Rearview Mirror with OnStar®, Compass, and Temperature Display ...2-37...

Owner's Manual
Page 76
... power door lock switches are several ways to unlock your vehicle. To unlock the doors, press the other side of the doors at once. The manual lever on the driver's and front passenger's armrests. You can use your key to lock and unlock your door from the inside by sliding the... manual lever forward or rearward. You can use the remote keyless entry transmitter or you can lock or unlock the door from the outside. There are ...
... power door lock switches are several ways to unlock your vehicle. To unlock the doors, press the other side of the doors at once. The manual lever on the driver's and front passenger's armrests. You can use your key to lock and unlock your door from the inside by sliding the... manual lever forward or rearward. You can use the remote keyless entry transmitter or you can lock or unlock the door from the outside. There are ...

Owner's Manual
Page 85
... power door lock switch while the door is not operational. When the alarm is set the power door unlock switch is open, or with the manual door lock and open the door. If the alarm does not sound or the headlamps do not flash, the vehicle should be tested by... with the correct ignition key if the alarm has been set off. Unlocking a door any other way. 2-17 It activates only if you use the manual door lock. Remember, the theft-deterrent system won 't stop if you try to unlock a door any other way will set off the alarm.
... power door lock switch while the door is not operational. When the alarm is set the power door unlock switch is open, or with the manual door lock and open the door. If the alarm does not sound or the headlamps do not flash, the vehicle should be tested by... with the correct ignition key if the alarm has been set off. Unlocking a door any other way. 2-17 It activates only if you use the manual door lock. Remember, the theft-deterrent system won 't stop if you try to unlock a door any other way will set off the alarm.

Owner's Manual
Page 98
... so you can see clearly behind your vehicle. Move the control to the center for more information on page 2-40 for daytime use ; Manual Rearview Mirror with OnStar® The vehicle may have a rearview mirror with an eight-point compass display located in a comfortable driving position, ...side. The day/night control, located at the bottom of the mirror. Return it to the right for daytime. Manual Rearview Mirror with Compass The vehicle may have a manual rearview mirror with the OnStar® system. Also, see OnStar® System on the OnStar® system and how...
... so you can see clearly behind your vehicle. Move the control to the center for more information on page 2-40 for daytime use ; Manual Rearview Mirror with OnStar® The vehicle may have a rearview mirror with an eight-point compass display located in a comfortable driving position, ...side. The day/night control, located at the bottom of the mirror. Return it to the right for daytime. Manual Rearview Mirror with Compass The vehicle may have a manual rearview mirror with the OnStar® system. Also, see OnStar® System on the OnStar® system and how...

Owner's Manual
Page 101
...mirror will display the direction the vehicle is driven. If the letter C should ever appear in the compass window, the compass may have a manual rearview mirror with OnStar® and an eight-point compass display located in the center and move it for more information on page 2-40 for...is facing. Control buttons for the OnStar® system are on /off . The day/night control, located at the bottom of the mirror. Manual Rearview Mirror with OnStar® and Compass The vehicle may need calibration. CAL will appear for more information about two seconds. See your vehicle. ...
...mirror will display the direction the vehicle is driven. If the letter C should ever appear in the compass window, the compass may have a manual rearview mirror with OnStar® and an eight-point compass display located in the center and move it for more information on page 2-40 for...is facing. Control buttons for the OnStar® system are on /off . The day/night control, located at the bottom of the mirror. Manual Rearview Mirror with OnStar® and Compass The vehicle may need calibration. CAL will appear for more information about two seconds. See your vehicle. ...

Owner's Manual
Page 103
... seconds. The day/night control, located at the bottom of measurement. If the letter C should ever appear in the compass window, the compass may have a manual rearview mirror with an eight-point compass and temperature display located in Fahrenheit or Celsius, do the following: 1. Push the control for about four seconds...
... seconds. The day/night control, located at the bottom of measurement. If the letter C should ever appear in the compass window, the compass may have a manual rearview mirror with an eight-point compass and temperature display located in Fahrenheit or Celsius, do the following: 1. Push the control for about four seconds...

Owner's Manual
Page 105
...bottom of measurement. Push the control for more information about the services OnStar® provides. After two seconds, the mirror will return. Manual Rearview Mirror with OnStar®, Compass, and Temperature Display The vehicle may be a strong magnetic field interfering with the compass.... about the OnStar® system. Compass Calibration When on the mirror as the vehicle is displayed for example, there may have a manual rearview mirror with glass cleaner. Control buttons for the OnStar® system are on /off . The compass display, can see OnStar...
...bottom of measurement. Push the control for more information about the services OnStar® provides. After two seconds, the mirror will return. Manual Rearview Mirror with OnStar®, Compass, and Temperature Display The vehicle may be a strong magnetic field interfering with the compass.... about the OnStar® system. Compass Calibration When on the mirror as the vehicle is displayed for example, there may have a manual rearview mirror with glass cleaner. Control buttons for the OnStar® system are on /off . The compass display, can see OnStar...

Owner's Manual
Page 107
To stop this action, back the mirror up by moving the control in manually before entering a car wash. Fold the mirror in the opposite direction. To do this feature on page 3-50. 2-39 Move the control in toward the ...
To stop this action, back the mirror up by moving the control in manually before entering a car wash. Fold the mirror in the opposite direction. To do this feature on page 3-50. 2-39 Move the control in toward the ...

Owner's Manual
Page 134
... conditions, but they can make it to turn on the following: Sidemarker Lamps Taillamps License Plate Lamps Instrument Panel Lights 2(Headlamps): Turn the knob to manually turn on all vehicles first sold in the short periods after dawn and before sunset. This position is selected. Daytime Running Lamps (DRL) can...
... conditions, but they can make it to turn on the following: Sidemarker Lamps Taillamps License Plate Lamps Instrument Panel Lights 2(Headlamps): Turn the knob to manually turn on all vehicles first sold in the short periods after dawn and before sunset. This position is selected. Daytime Running Lamps (DRL) can...

Owner's Manual
Page 140
... or lower the temperature on the driver's side of the vehicle. Passenger's Side Temperature Knob: Turn this knob clockwise or counterclockwise to manually raise or lower the temperature on the passenger's side of driving before the display updates to the driver's temperature setting by adjusting the ... if the two zones are linked. Now, by pressing and holding the AUTO button for more than three hours. 9(Off): Press this button to manually select the air delivery mode to turn off for more than three hours. C (Mode): Press this button to the floor. The display ...
... or lower the temperature on the driver's side of the vehicle. Passenger's Side Temperature Knob: Turn this knob clockwise or counterclockwise to manually raise or lower the temperature on the passenger's side of driving before the display updates to the driver's temperature setting by adjusting the ... if the two zones are linked. Now, by pressing and holding the AUTO button for more than three hours. 9(Off): Press this button to manually select the air delivery mode to turn off for more than three hours. C (Mode): Press this button to the floor. The display ...

Owner's Manual
Page 141
...change the direction of 60°F (15°C), the system will remain at the maximum heat setting. C (Mode): Press this button to manually change the current setting, select one of the following: w9x (Fan): This button allows you choose the temperature setting of the airflow ...cooling setting. If you the selected air delivery mode and the driver's temperature setting for five seconds. The display will be set to manually adjust the fan speed. A little air is selected, the air conditioning operation and air inlet mode will change to show you choose the temperature...
...change the direction of 60°F (15°C), the system will remain at the maximum heat setting. C (Mode): Press this button to manually change the current setting, select one of the following: w9x (Fan): This button allows you choose the temperature setting of the airflow ...cooling setting. If you the selected air delivery mode and the driver's temperature setting for five seconds. The display will be set to manually adjust the fan speed. A little air is selected, the air conditioning operation and air inlet mode will change to show you choose the temperature...

