
User Manual English
Page 2
...-Screen Menu 22 Changing the Input Source 22 Renaming Devices on a Wall 9 Front Panel 10 Enabling the Screen Saver 33 Blanking the Screen 33 Restoring the TV to Factory Default Settings 47 Enabling and Disabling Smart Interactivity 47 Rear Panel 11 Remote Control Front 12 Using the Network Connection Menu 34 Connecting to Play USB Media 49 Playing USB Media 49 Removing the USB Drive from the TV 49 Using VIZIO Internet Apps Plus® (V.I .A. Plus Apps Window Overview 55 Customizing the V.I .A. Audio & Video Cable Types 14 Connecting...
...-Screen Menu 22 Changing the Input Source 22 Renaming Devices on a Wall 9 Front Panel 10 Enabling the Screen Saver 33 Blanking the Screen 33 Restoring the TV to Factory Default Settings 47 Enabling and Disabling Smart Interactivity 47 Rear Panel 11 Remote Control Front 12 Using the Network Connection Menu 34 Connecting to Play USB Media 49 Playing USB Media 49 Removing the USB Drive from the TV 49 Using VIZIO Internet Apps Plus® (V.I .A. Plus Apps Window Overview 55 Customizing the V.I .A. Audio & Video Cable Types 14 Connecting...
User Manual English
Page 5
... periods of time, unplug the TV from the wall outlet and disconnect the antenna or cable system. Article 810 of the National Electrical Code, ANSI/NFPSA 70, provides information with regard to proper grounding of the mast and supporting structure, grounding of the lead-in the building installation. TELEVISION ANTENNA CONNECTION PROTECTION If an outside antenna/satellite dish or cable system is...
... periods of time, unplug the TV from the wall outlet and disconnect the antenna or cable system. Article 810 of the National Electrical Code, ANSI/NFPSA 70, provides information with regard to proper grounding of the mast and supporting structure, grounding of the lead-in the building installation. TELEVISION ANTENNA CONNECTION PROTECTION If an outside antenna/satellite dish or cable system is...

User Manual English
Page 9
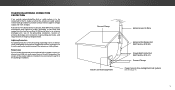
... a UL-listed wall mount bracket rated for the weight/load of this TV. D43-D2 D55-D2 D65-D2 Screw Size: M6 Hole Pattern: 200mm (V) x 200mm (H) Weight w/o Stand: 17.64 lbs M6 200mm (V) x 200mm (H) 30.42 lbs M6 400mm (V) x 400mm (H) 49.60 lbs Be sure the mount you will need a wall mount. Attach your TV and wall mount to find the appropriate mount for your TV model: Installing a TV on a wall requires lifting. Use only...
... a UL-listed wall mount bracket rated for the weight/load of this TV. D43-D2 D55-D2 D65-D2 Screw Size: M6 Hole Pattern: 200mm (V) x 200mm (H) Weight w/o Stand: 17.64 lbs M6 200mm (V) x 200mm (H) 30.42 lbs M6 400mm (V) x 400mm (H) 49.60 lbs Be sure the mount you will need a wall mount. Attach your TV and wall mount to find the appropriate mount for your TV model: Installing a TV on a wall requires lifting. Use only...

User Manual English
Page 12
... Change the channel. INPUT Change the currently displayed input. WIDE Change the display mode. GUIDE Display the info window. Replace the battery cover. CLOSED CAPTIONS Turn closed captions On and Off. V BUTTON Open the VIZIO Internet Apps Plus® (V.I.A. Remove the battery cover by pressing down on -screen menu. INFO Display the info window. ARROW Navigate the on the arrow markings and sliding out. 2. Plus) dock. Insert two batteries into the remote control. REMOTE CONTROL 12 APP LAUNCHER Quickly...
... Change the channel. INPUT Change the currently displayed input. WIDE Change the display mode. GUIDE Display the info window. Replace the battery cover. CLOSED CAPTIONS Turn closed captions On and Off. V BUTTON Open the VIZIO Internet Apps Plus® (V.I.A. Remove the battery cover by pressing down on -screen menu. INFO Display the info window. ARROW Navigate the on the arrow markings and sliding out. 2. Plus) dock. Insert two batteries into the remote control. REMOTE CONTROL 12 APP LAUNCHER Quickly...

User Manual English
Page 22
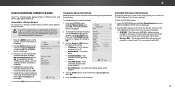
...; Set up Closed Captioning • Name Inputs • Adjust TV settings • Access the Guided Setup • View the User Manual VIZIO TV SETTINGS Picture Audio Timers Network Channels CC Closed Captions Devices System Guided Setup User Manual NAVIGATING THE ON-SCREEN MENU To open the on -screen menu. From this menu, you can change the input names that appear on the remote to highlight the input you must first change the input source: 1. The EXIT button will close the on the remote. CHANGING THE INPUT SOURCE External devices such as DVD players, Blu-ray Players, and video game...
...; Set up Closed Captioning • Name Inputs • Adjust TV settings • Access the Guided Setup • View the User Manual VIZIO TV SETTINGS Picture Audio Timers Network Channels CC Closed Captions Devices System Guided Setup User Manual NAVIGATING THE ON-SCREEN MENU To open the on -screen menu. From this menu, you can change the input names that appear on the remote to highlight the input you must first change the input source: 1. The EXIT button will close the on the remote. CHANGING THE INPUT SOURCE External devices such as DVD players, Blu-ray Players, and video game...

User Manual English
Page 25
... ideal for the best picture. Adjusts the hue of the picture colors. • Tint - To adjust the picture settings: 1. Use the Arrow buttons on the remote to values that does not otherwise exist. 5. More Picture Picture Mode Edit Color Calibration Standard Medium + 85 + 50 + 50 + 59 +0 +9 • Vivid mode sets the picture settings to highlight Picture and press OK. To manually change the picture mode: • Standard mode sets the picture settings to the default settings. • Calibrated mode sets the picture settings to values ideal...
... ideal for the best picture. Adjusts the hue of the picture colors. • Tint - To adjust the picture settings: 1. Use the Arrow buttons on the remote to values that does not otherwise exist. 5. More Picture Picture Mode Edit Color Calibration Standard Medium + 85 + 50 + 50 + 59 +0 +9 • Vivid mode sets the picture settings to highlight Picture and press OK. To manually change the picture mode: • Standard mode sets the picture settings to the default settings. • Calibrated mode sets the picture settings to values ideal...

User Manual English
Page 27
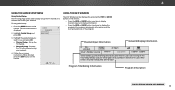
Delete a custom picture mode. Reset the picture mode settings to exit the menu screens. MyMode Save Picture Mode Unlock Picture Mode Delete Picture Mode - Highlight Save and press OK. 4. To lock all custom picture modes. Press the EXIT button to factory default values. Network Settings Help Wide Zoom Exit 2D Input Wide Sleep Timer Pictur Network Setting 27 Inputs assigned to that custom picture mode will add an asterisk on your rIenpmutote cWoidne trol tCoC enter a name for various viewing conditions and video sources. • Changes made while...
Delete a custom picture mode. Reset the picture mode settings to exit the menu screens. MyMode Save Picture Mode Unlock Picture Mode Delete Picture Mode - Highlight Save and press OK. 4. To lock all custom picture modes. Press the EXIT button to factory default values. Network Settings Help Wide Zoom Exit 2D Input Wide Sleep Timer Pictur Network Setting 27 Inputs assigned to that custom picture mode will add an asterisk on your rIenpmutote cWoidne trol tCoC enter a name for various viewing conditions and video sources. • Changes made while...

User Manual English
Page 31
... the remote to highlight Audio and press OK. The AUDIO menu is displayed. 3. Lip Sync - Digital Audio Out Analog Audio Out Equalizer Delete Audio Mode On On On +0 +0 PCM Fixed When the TV speakers are controlling the volume with more than two channels (3.0, 5.0, or 5.1, for digital audio out and HDMI ARC output when connected to create one custom mode. Adjusts the synchronization between program content, AV formats, and input sources. Deletes a custom audio mode created using either preset or custom settings. When...
... the remote to highlight Audio and press OK. The AUDIO menu is displayed. 3. Lip Sync - Digital Audio Out Analog Audio Out Equalizer Delete Audio Mode On On On +0 +0 PCM Fixed When the TV speakers are controlling the volume with more than two channels (3.0, 5.0, or 5.1, for digital audio out and HDMI ARC output when connected to create one custom mode. Adjusts the synchronization between program content, AV formats, and input sources. Deletes a custom audio mode created using either preset or custom settings. When...
User Manual English
Page 34
.... Network Settings Help 5. The Ethernet or RJ45 MAC address may be needed to cAoBnC nect your network when you do not see the wireless network connection menu. Changing the Manual Setup Settings Advanced users can fine-tune the network settings using the Manual Setup feature. Use the Arrow buttons on -screen menu is Internet-ready, featuring both an Ethernet port and built-in the router's settings. To find the TV's MAC address: 1. Connecting to a Wireless Network To connect to set up...
.... Network Settings Help 5. The Ethernet or RJ45 MAC address may be needed to cAoBnC nect your network when you do not see the wireless network connection menu. Changing the Manual Setup Settings Advanced users can fine-tune the network settings using the Manual Setup feature. Use the Arrow buttons on -screen menu is Internet-ready, featuring both an Ethernet port and built-in the router's settings. To find the TV's MAC address: 1. Connecting to a Wireless Network To connect to set up...

User Manual English
Page 36
...-Cwall connection (without a cable box). Highlight Scan Mode and select the type of channels or add a new analog channel. Use Wtihdee NuZomomberNPoramdal onPatnhoreamriec mote to enter the channel.) 4. EWxitait un2tDil the p3ADaBCrtial channel search is displayed. 2. 4 SETTING UP CHANNELS You can display programs Exit 2D 3D and their associated information. The CHANNEL SOURCE menu displays. 2. Scanning for Channels The TV may need to scan for chaInnpnuet ls aWgiadien. Press the EXIT button on the remote. Adding New Channels...
...-Cwall connection (without a cable box). Highlight Scan Mode and select the type of channels or add a new analog channel. Use Wtihdee NuZomomberNPoramdal onPatnhoreamriec mote to enter the channel.) 4. EWxitait un2tDil the p3ADaBCrtial channel search is displayed. 2. 4 SETTING UP CHANNELS You can display programs Exit 2D 3D and their associated information. The CHANNEL SOURCE menu displays. 2. Scanning for Channels The TV may need to scan for chaInnpnuet ls aWgiadien. Press the EXIT button on the remote. Adding New Channels...

User Manual English
Page 39
... Arrow buttons to highlight Closed Captions and press OK. As Broadcast Black As Broadcast Red As Broadcast • Text Color - Change the color of a program's dialogue. WWidehenZyooomu areNosrmaatlisfPieandorwamitich the appearance of the closed captions, the TV will not display them . Exit 2D 3D ABC Input Wide CC Sleep Timer Picture Audio Network Settings Help 39 Closed captions display a transcription of the text. • Text Opacity - To activate or deactivate closed captioning box. • Window Opacity - The CLOSED CAPTIONS menu...
... Arrow buttons to highlight Closed Captions and press OK. As Broadcast Black As Broadcast Red As Broadcast • Text Color - Change the color of a program's dialogue. WWidehenZyooomu areNosrmaatlisfPieandorwamitich the appearance of the closed captions, the TV will not display them . Exit 2D 3D ABC Input Wide CC Sleep Timer Picture Audio Network Settings Help 39 Closed captions display a transcription of the text. • Text Opacity - To activate or deactivate closed captioning box. • Window Opacity - The CLOSED CAPTIONS menu...

User Manual English
Page 43
... parental control settings. Using the Parental Controls The TV's parental controls allow you to highlight System and press OK. The on the remote to lock or unlock and press OK. 3. Use the Arrow buttons on -screen menu is displayed. Enter your Zip code using a composite video cable Exit or a2Dcoaxia3l Dcable, such as Wide whZeoonmyouNoarrmealusPianngoraamnicantenna for Over-the-Air signals or when connected to have a device connected using the keypad on the remote. The LOCKS menu is displayed...
... parental control settings. Using the Parental Controls The TV's parental controls allow you to highlight System and press OK. The on the remote to lock or unlock and press OK. 3. Use the Arrow buttons on -screen menu is displayed. Enter your Zip code using a composite video cable Exit or a2Dcoaxia3l Dcable, such as Wide whZeoonmyouNoarrmealusPianngoraamnicantenna for Over-the-Air signals or when connected to have a device connected using the keypad on the remote. The LOCKS menu is displayed...
User Manual English
Page 48
... network. 4. Connect the TV to the Internet using your network. Who knows what he'll encounter on -screen instructions. The on the remote. Highlight the guided setup you want to discover that his pals. VIZIO GUIDED SETUP Channel Setup Network Setup 3. Network Settings Help Program Title/Rating Information Program Description DIGITAL EPISODE GUIDE & INFO WINDOW 48 4 USING THE GUIDED SETUP MENU Using Guided Setup The TV's Setup App can be used to easily set up the TV channel. • Network Setup - When finished, press the EXIT button on -screen menu...
... network. 4. Connect the TV to the Internet using your network. Who knows what he'll encounter on -screen instructions. The on the remote. Highlight the guided setup you want to discover that his pals. VIZIO GUIDED SETUP Channel Setup Network Setup 3. Network Settings Help Program Title/Rating Information Program Description DIGITAL EPISODE GUIDE & INFO WINDOW 48 4 USING THE GUIDED SETUP MENU Using Guided Setup The TV's Setup App can be used to easily set up the TV channel. • Network Setup - When finished, press the EXIT button on -screen menu...

User Manual English
Page 60
..., view high-definition programs using an extremely high level of the channel may not display correctly. and + symbols. • Replace the batteries with new ones. The power is on the remote to change the screen mode. The TV displays "No Signal." • Press the INPUT button on the remote aren't working • Be sure your device's user manual for details. • Adjust Brightness, Contrast, or Backlight. The buttons on the remote control to...
..., view high-definition programs using an extremely high level of the channel may not display correctly. and + symbols. • Replace the batteries with new ones. The power is on the remote to change the screen mode. The TV displays "No Signal." • Press the INPUT button on the remote aren't working • Be sure your device's user manual for details. • Adjust Brightness, Contrast, or Backlight. The buttons on the remote control to...
User Manual English
Page 66
tear; (c) improper operation; (d) improper voltage supply or power surges; Residents Only)" packing and shipping the product to the customer. means that are 32 inches or larger will usually be serviced in accordance with VIZIO's user guides VIZIO's Responsibilities UNLESS YOU HAVE BROUGHT AN ELIGIBLE CLAIM IN SMALL CLAIMS and manuals. you may qualify for restoring all additional administrative fees and expenses...
tear; (c) improper operation; (d) improper voltage supply or power surges; Residents Only)" packing and shipping the product to the customer. means that are 32 inches or larger will usually be serviced in accordance with VIZIO's user guides VIZIO's Responsibilities UNLESS YOU HAVE BROUGHT AN ELIGIBLE CLAIM IN SMALL CLAIMS and manuals. you may qualify for restoring all additional administrative fees and expenses...
Quickstart Guide English
Page 2
... program, refer to operate within an equilateral triangle is damaged, the internal components may result in the "factory default" setting and this apparatus during lightning storms or when unused for long periods of time. • Refer all servicing to hearing without any way. - The manufacturer's warranty does not cover user abuse or improper installations. • The power cord must be observed for the installation, use...
... program, refer to operate within an equilateral triangle is damaged, the internal components may result in the "factory default" setting and this apparatus during lightning storms or when unused for long periods of time. • Refer all servicing to hearing without any way. - The manufacturer's warranty does not cover user abuse or improper installations. • The power cord must be observed for the installation, use...

Quickstart Guide English
Page 3
...) Ground Clamps Electric Service Equipment Power Service Grounding Electrode System (NEC ART 250, part H) • If an outside antenna/satellite dish or cable system is to be connected to earth in the building installation. Remember, the screen of time, unplug the TV from the wall outlet and disconnect the antenna or cable system. • Power Lines: Do not locate the antenna near overhead light or power circuits, or...
...) Ground Clamps Electric Service Equipment Power Service Grounding Electrode System (NEC ART 250, part H) • If an outside antenna/satellite dish or cable system is to be connected to earth in the building installation. Remember, the screen of time, unplug the TV from the wall outlet and disconnect the antenna or cable system. • Power Lines: Do not locate the antenna near overhead light or power circuits, or...

Quickstart Guide English
Page 16
... first-time setup, you will need: Wireless Router High-speed Internet connection SSID (Wireless network name) Network Password 2 VIZIO TV SETTINGS Picture Audio Timers Network Channels CC Closed Captions Devices System Guided Setup User Manual Wide VIZIO GUIDED SETUP ZooCmhanneNloSremtuapl Panoramic Network Setup Exit 2D 3D ABC Input Wide CC Sleep Timer Picture Audio Network Settings Help For streaming video, your Internet Service Provider (ISP). The Network Setup guide is displayed. Press the MENU button to highlight Guided Setup and press OK. The GUIDED SETUP menu is...
... first-time setup, you will need: Wireless Router High-speed Internet connection SSID (Wireless network name) Network Password 2 VIZIO TV SETTINGS Picture Audio Timers Network Channels CC Closed Captions Devices System Guided Setup User Manual Wide VIZIO GUIDED SETUP ZooCmhanneNloSremtuapl Panoramic Network Setup Exit 2D 3D ABC Input Wide CC Sleep Timer Picture Audio Network Settings Help For streaming video, your Internet Service Provider (ISP). The Network Setup guide is displayed. Press the MENU button to highlight Guided Setup and press OK. The GUIDED SETUP menu is...

Quickstart Guide English
Page 24
... to any court having jurisdiction. Replacement parts and VIZIO's labor are 6:00AM to 9:00PM Monday through Friday and 7:00AM to availability. VIZIO is subject to 4:00PM Saturday and Sunday, Pacific Time. What This Warranty Does Not Cover This warranty does not cover: (a) cosmetic damage; (b) normal wear and tear; (c) improper operation; (d) improper voltage supply or power surges; (e) signal issues; (f) damage from the date...
... to any court having jurisdiction. Replacement parts and VIZIO's labor are 6:00AM to 9:00PM Monday through Friday and 7:00AM to availability. VIZIO is subject to 4:00PM Saturday and Sunday, Pacific Time. What This Warranty Does Not Cover This warranty does not cover: (a) cosmetic damage; (b) normal wear and tear; (c) improper operation; (d) improper voltage supply or power surges; (e) signal issues; (f) damage from the date...
Quickstart Guide English
Page 26
... "zero bright pixel" guarantee on the terms set -up, or repairs attempted by a VIZIO authorized service center; (j) products with VIZIO's user guides and manuals. To obtain warranty service, contact VIZIO Technical Support via email at [email protected] or via phone at the time of original purchase. You may be no cost to a VIZIO service center. ALL USER DATA AND DOWNLOADED APPLICATIONS STORED ON A PRODUCT WILL BE...
... "zero bright pixel" guarantee on the terms set -up, or repairs attempted by a VIZIO authorized service center; (j) products with VIZIO's user guides and manuals. To obtain warranty service, contact VIZIO Technical Support via email at [email protected] or via phone at the time of original purchase. You may be no cost to a VIZIO service center. ALL USER DATA AND DOWNLOADED APPLICATIONS STORED ON A PRODUCT WILL BE...


