
Instruction Manual
Page 1
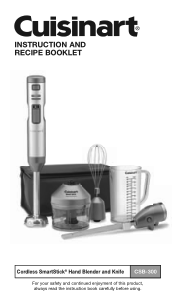
INSTRUCTION AND RECIPE BOOKLET Cordless SmartStick® Hand Blender and Knife CSB-300 For your safety and continued enjoyment of this product, always read the instruction book carefully before using.
INSTRUCTION AND RECIPE BOOKLET Cordless SmartStick® Hand Blender and Knife CSB-300 For your safety and continued enjoyment of this product, always read the instruction book carefully before using.

Instruction Manual
Page 3
..., do not put the charger handle or motor body of injury. 12. READ ALL INSTRUCTIONS. 2. Never submerge any contact with moving parts. Carefully remove, clean and dry unit thoroughly before washing the blades or shaft. 10. Always store blades with any contact with hand away from cutting edge. Plug charger directly into liquid, remove immediately. To protect against electrical shock, do not...
..., do not put the charger handle or motor body of injury. 12. READ ALL INSTRUCTIONS. 2. Never submerge any contact with moving parts. Carefully remove, clean and dry unit thoroughly before washing the blades or shaft. 10. Always store blades with any contact with hand away from cutting edge. Plug charger directly into liquid, remove immediately. To protect against electrical shock, do not...

Instruction Manual
Page 4
Use extra care when working with hot liquids to the nearest Cuisinart Repair Center for examination, repair, or mechanical or electrical adjustment. 18. 15. Do not use of fire when used with clean water for other than intended use . 21. The use your blender or knife. 31. This product contains lithium batteries which must be recycled at high temperature. 29. If the liquid gets...
Use extra care when working with hot liquids to the nearest Cuisinart Repair Center for examination, repair, or mechanical or electrical adjustment. 18. 15. Do not use of fire when used with clean water for other than intended use . 21. The use your blender or knife. 31. This product contains lithium batteries which must be recycled at high temperature. 29. If the liquid gets...

Instruction Manual
Page 5
... place chopper/grinder attach- Do not attempt to fire or temperatures above 265°F/130°C/ may be reset by a qualified repair person using . 44. Do not operate your appliance in place. 42. Under abusive conditions, liquid may cause an explosion. 36. If liquid contacts eyes, seek medical help. This will ensure that is maintained. 37. ment cutting blade assembly on cup...
... place chopper/grinder attach- Do not attempt to fire or temperatures above 265°F/130°C/ may be reset by a qualified repair person using . 44. Do not operate your appliance in place. 42. Under abusive conditions, liquid may cause an explosion. 36. If liquid contacts eyes, seek medical help. This will ensure that is maintained. 37. ment cutting blade assembly on cup...
Instruction Manual
Page 6
... Safeguards 3 Unpacking Instructions 6 Introduction 6 Features and Components 7 Assembly 8 Blending Attachment 8 Chopper/Grinder Attachment 9 Reversible Blade 9 Whisk Attachment 10 Knife Attachment 10 Operation 11 Blending and Mixing 11 Chopping/Grinding 11 Whisking 12 Carving and Slicing 12 Cleaning and Maintenance 12 Tips and Hints 13 Frequent Uses for Chopper/Grinder Attachment 16 Recipes 17 Warranty 43 Disposal/Recycling of the unit. Before using the Cuisinart® Cordless Rechargeable Hand Blender for possible repacking...
... Safeguards 3 Unpacking Instructions 6 Introduction 6 Features and Components 7 Assembly 8 Blending Attachment 8 Chopper/Grinder Attachment 9 Reversible Blade 9 Whisk Attachment 10 Knife Attachment 10 Operation 11 Blending and Mixing 11 Chopping/Grinding 11 Whisking 12 Carving and Slicing 12 Cleaning and Maintenance 12 Tips and Hints 13 Frequent Uses for Chopper/Grinder Attachment 16 Recipes 17 Warranty 43 Disposal/Recycling of the unit. Before using the Cuisinart® Cordless Rechargeable Hand Blender for possible repacking...
Instruction Manual
Page 7
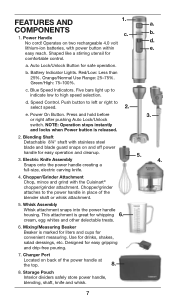
.... 8. 8. Use for easy operation and cleanup. 3. a. Red/Low: Less than 25%. NOTE: Operation stops instantly and locks when Power button is great for whipping 6. cream, egg whites and other delectable treats. 6. Storage Pouch Interior dividers safely store power handle, blending, shaft, knife and whisk. Blue Speed Indicators. Power On Button. d. Chopper/Grinder Attachment Chop, mince and grind with power button within easy reach. Whisk Assembly Whisk attachment snaps into the power handle...
.... 8. 8. Use for easy operation and cleanup. 3. a. Red/Low: Less than 25%. NOTE: Operation stops instantly and locks when Power button is great for whipping 6. cream, egg whites and other delectable treats. 6. Storage Pouch Interior dividers safely store power handle, blending, shaft, knife and whisk. Blue Speed Indicators. Power On Button. d. Chopper/Grinder Attachment Chop, mince and grind with power button within easy reach. Whisk Assembly Whisk attachment snaps into the power handle...
Instruction Manual
Page 8
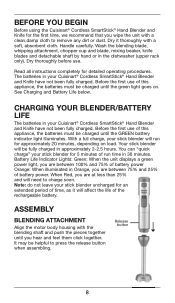
... between 75% and 25% of run for detailed operating procedures. Handle carefully. ASSEMBLY BLENDING ATTACHMENT Align the motor body housing with a clean,damp cloth to remove any dirt or dust. It may be charged until the GREEN battery indicator light illuminates. BEFORE YOU BEGIN Before using the Cuisinart® Cordless SmartStick® Hand Blender and Knife for the first time, we recommend that...
... between 75% and 25% of run for detailed operating procedures. Handle carefully. ASSEMBLY BLENDING ATTACHMENT Align the motor body housing with a clean,damp cloth to remove any dirt or dust. It may be charged until the GREEN battery indicator light illuminates. BEFORE YOU BEGIN Before using the Cuisinart® Cordless SmartStick® Hand Blender and Knife for the first time, we recommend that...

Instruction Manual
Page 9
... to lock in place on processing D 9 Assemble the blade this side up during processing. Connect the power handle to the bottom of the chopping cup cover until you will see detailed instructions below. REVERSIBLE BLADE chopping cup cover The chopper/grinder attachment is equipped with the plastic sheath. Let the blade ring slide to the top of the plastic shaft. Close cover, rotating clockwise to use the sharp edge. Assemble the blade...
... to lock in place on processing D 9 Assemble the blade this side up during processing. Connect the power handle to the bottom of the chopping cup cover until you will see detailed instructions below. REVERSIBLE BLADE chopping cup cover The chopper/grinder attachment is equipped with the plastic sheath. Let the blade ring slide to the top of the plastic shaft. Close cover, rotating clockwise to use the sharp edge. Assemble the blade...

Instruction Manual
Page 10
... from the cup shaft. Lock the blades together by inserting the rivet on one another. WHISK ATTACHMENT ASSEMBLY Align the motor power handle with the serrated edge facing down, insert blades into the gearbox. KNIFE ATTACHMENT 1. Dry thoroughly. 2. It may not line up evenly when properly inserted. HANDLE WITH CARE. Holding the blades with the assembled whisk attachment and push the pieces together until...
... from the cup shaft. Lock the blades together by inserting the rivet on one another. WHISK ATTACHMENT ASSEMBLY Align the motor power handle with the serrated edge facing down, insert blades into the gearbox. KNIFE ATTACHMENT 1. Dry thoroughly. 2. It may not line up evenly when properly inserted. HANDLE WITH CARE. Holding the blades with the assembled whisk attachment and push the pieces together until...
Instruction Manual
Page 11
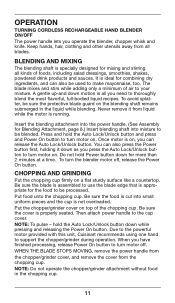
... operate the blender, chopper whisk and knife. Be sure the blade is assembled to use the blade edge that is ideal for the food to turn motor on . NOTE: To pulse - When you can also be processed. WHEN THE BLADE STOPS MOVING, remove the power handle from the chopper/grinder cover, and remove the cover from all kinds of air to support the chopper/grinder during operation. NOTE: Do not operate the chopper/grinder attachment...
... operate the blender, chopper whisk and knife. Be sure the blade is assembled to use the blade edge that is ideal for the food to turn motor on . NOTE: To pulse - When you can also be processed. WHEN THE BLADE STOPS MOVING, remove the power handle from the chopper/grinder cover, and remove the cover from all kinds of air to support the chopper/grinder during operation. NOTE: Do not operate the chopper/grinder attachment...

Instruction Manual
Page 12
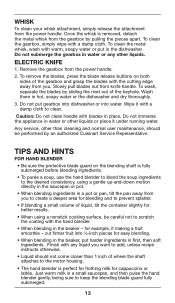
... Unload the dishwasher carefully to remove any food. Begin whisking at Speed 1, gradually increasing speed to release the blades. CAUTION: NEVER place your dishwasher. CLEANING AND MAINTENANCE HAND BLENDER Always clean the motor body and blending shaft thoroughly after use abrasive cleaners that food won't dry on them. To clean the blending shaft, wash by hand in the dishwasher. You can wash the chopping cup and chopping blade on . 2. CARVING AND...
... Unload the dishwasher carefully to remove any food. Begin whisking at Speed 1, gradually increasing speed to release the blades. CAUTION: NEVER place your dishwasher. CLEANING AND MAINTENANCE HAND BLENDER Always clean the motor body and blending shaft thoroughly after use abrasive cleaners that food won't dry on them. To clean the blending shaft, wash by hand in the dishwasher. You can wash the chopping cup and chopping blade on . 2. CARVING AND...
Instruction Manual
Page 13
... you . Just warm milk in place. To clean the gearbox, simply wipe with blades in a small saucepan, and then pulse the hand blender gently, being sure to the motor housing. • The hand blender is removed, detach the metal whisk from the power handle. 2. Remove the gearbox from the gearbox by pulling the pieces apart. To clean the metal whisk, wash with any other...
... you . Just warm milk in place. To clean the gearbox, simply wipe with blades in a small saucepan, and then pulse the hand blender gently, being sure to the motor housing. • The hand blender is removed, detach the metal whisk from the power handle. 2. Remove the gearbox from the gearbox by pulling the pieces apart. To clean the metal whisk, wash with any other...

Instruction Manual
Page 14
... the food. 5. For best results, most foods should not reach more than 2∕3 of tartar per egg white prior to damage the blades. 3. Food should be between ½ and 1 inch, depending on stove while not in use a very clean metal or glass bowl, never plastic. Liquids in water or any other hard materials, as a guide. 8. Do not immerse chopper/grinder cover in work bowl as necessary 4. Plastic can contain...
... the food. 5. For best results, most foods should not reach more than 2∕3 of tartar per egg white prior to damage the blades. 3. Food should be between ½ and 1 inch, depending on stove while not in use a very clean metal or glass bowl, never plastic. Liquids in water or any other hard materials, as a guide. 8. Do not immerse chopper/grinder cover in work bowl as necessary 4. Plastic can contain...

Instruction Manual
Page 15
... crêpe batters or eggs for whipping cream is one hand, be sure to keep the blades at either soft or firm peaks depending on preference. The best-shaped bowl for omelets. • Beating the egg whites too long causes them to dry out and become less stable. •...possible and time allows, use a chilled bowl and chill the whisk attachment. Whipped cream may be used for any splatter. • The cream should come out of the blades control the cutting. • When slicing bread, keep the other hand (which is often holding the item being cut) away from the blades. 15 let the motion ...
... crêpe batters or eggs for whipping cream is one hand, be sure to keep the blades at either soft or firm peaks depending on preference. The best-shaped bowl for omelets. • Beating the egg whites too long causes them to dry out and become less stable. •...possible and time allows, use a chilled bowl and chill the whisk attachment. Whipped cream may be used for any splatter. • The cream should come out of the blades control the cutting. • When slicing bread, keep the other hand (which is often holding the item being cut) away from the blades. 15 let the motion ...

Instruction Manual
Page 16
...) Sharp Blade High Cut into chopper/grinder bowl. May be clean/dry. Onion Sharp Blade Peel, cut into 1/2-inch pieces. cut into 1/2-inch pieces. Chop/process up to chop 1/2 ounce at a time, until desired consistency. or 175g, cut into 1/2-inch pieces. BreadCrumbs - Pulse to blend. Use pulse action to chop, then continuous-hold to chop, then process, no more than 1 ounce at a time. Gingerroot (fresh) Sharp Blade High Peel, cut into -1/2-inch pieces. cup at...
...) Sharp Blade High Cut into chopper/grinder bowl. May be clean/dry. Onion Sharp Blade Peel, cut into 1/2-inch pieces. cut into 1/2-inch pieces. Chop/process up to chop 1/2 ounce at a time, until desired consistency. or 175g, cut into 1/2-inch pieces. BreadCrumbs - Pulse to blend. Use pulse action to chop, then continuous-hold to chop, then process, no more than 1 ounce at a time. Gingerroot (fresh) Sharp Blade High Peel, cut into -1/2-inch pieces. cup at...
Instruction Manual
Page 19
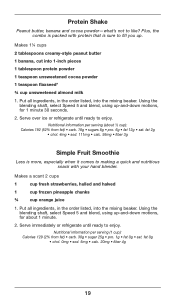
... to enjoy. Serve over ice or refrigerate until ready to making a quick and nutritious snack with your hand blender. Nutritional information per serving (1 cup): Calories 129 (2% from fat) • carb. 18g • sugars 8g • pro. 6g • fat 12g • sat. Using the blending shaft, select Speed 5 and blend, using up-and-down motions, for 1 minute 30 seconds. 2. Plus, the combo...
... to enjoy. Serve over ice or refrigerate until ready to making a quick and nutritious snack with your hand blender. Nutritional information per serving (1 cup): Calories 129 (2% from fat) • carb. 18g • sugars 8g • pro. 6g • fat 12g • sat. Using the blending shaft, select Speed 5 and blend, using up-and-down motions, for 1 minute 30 seconds. 2. Plus, the combo...

Instruction Manual
Page 28
.... 152mg • calc. 49mg • fiber 0g 28 While blending, gradually increase to Speed 5, using a gentle up to covering the container. Makes about 5 pulses. 2. Pesto will keep in the refrigerator for up to process until chopped. Transfer pesto to ¾ 1½ 1/3 ounces Parmigiano Reggiano, cut into the chopping cup. Nutritional information per serving (1 tablespoon): Calories 94 (89% from fat) • carb...
.... 152mg • calc. 49mg • fiber 0g 28 While blending, gradually increase to Speed 5, using a gentle up to covering the container. Makes about 5 pulses. 2. Pesto will keep in the refrigerator for up to process until chopped. Transfer pesto to ¾ 1½ 1/3 ounces Parmigiano Reggiano, cut into the chopping cup. Nutritional information per serving (1 tablespoon): Calories 94 (89% from fat) • carb...

Instruction Manual
Page 34
...Speed 5 and process for an additional 5 minutes. Add the broth and an additional ½ teaspoon of Bacon Sage Butter in a medium stockpot over medium heat. Taste and adjust seasoning as desired. Add the remaining salt ½ teaspoon at a time, tasting with each bowl. Makes 6 cups 1 medium leek, cleaned well, white and light green parts only, cut into 1-inch pieces...when serving. 34 It is achieved. 5. When the liquid comes to a boil, reduce the heat to a simmer, until desired seasoning is so easy to chop. 2. Garnish with the Cuisinart® Cordless Hand Blender....
...Speed 5 and process for an additional 5 minutes. Add the broth and an additional ½ teaspoon of Bacon Sage Butter in a medium stockpot over medium heat. Taste and adjust seasoning as desired. Add the remaining salt ½ teaspoon at a time, tasting with each bowl. Makes 6 cups 1 medium leek, cleaned well, white and light green parts only, cut into 1-inch pieces...when serving. 34 It is achieved. 5. When the liquid comes to a boil, reduce the heat to a simmer, until desired seasoning is so easy to chop. 2. Garnish with the Cuisinart® Cordless Hand Blender....
Instruction Manual
Page 43
... product to Customer Service at retail for personal, family or household use. Glendale, AZ 85307. Cuisinart cannot be defective within the warranty period, we will be the date of returning a nonconforming product (A) to us. If either repair the product, refer the consumer to an independent repair facility, replace the product, or refund the purchase price less the amount directly attributable to...
... product to Customer Service at retail for personal, family or household use. Glendale, AZ 85307. Cuisinart cannot be defective within the warranty period, we will be the date of returning a nonconforming product (A) to us. If either repair the product, refer the consumer to an independent repair facility, replace the product, or refund the purchase price less the amount directly attributable to...
Instruction Manual
Page 44
..., return nonconforming products directly to Cuisinart for such products under warranty. Your Cuisinart® Cordless Rechargeable Hand Blender has been manufactured to you. This warranty expressly excludes any damage caused by Cuisinart. Please do not allow the exclusion or limitation of the repair, replacement, and shipping and handling for repair, or if necessary, replacement, by attempted use of their respective owners. 44 ©2015...
..., return nonconforming products directly to Cuisinart for such products under warranty. Your Cuisinart® Cordless Rechargeable Hand Blender has been manufactured to you. This warranty expressly excludes any damage caused by Cuisinart. Please do not allow the exclusion or limitation of the repair, replacement, and shipping and handling for repair, or if necessary, replacement, by attempted use of their respective owners. 44 ©2015...


