Ricoh MP 2553 Support Question
Ricoh MP 2553 Support Question
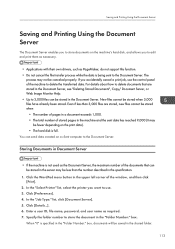
Find answers below for this question about Ricoh MP 2553.Need a Ricoh MP 2553 manual? We have 1 online manual for this item!
Question posted by mpedraza69443 on July 9th, 2014
Where To You Change The Admin Password Ricoh Web Image Monitor
Current Answers
Answer #1: Posted by waelsaidani1 on July 9th, 2014 12:04 PM

Member since:
May 12th, 2013 Points: 19,501,787

and the IP address information) follow the steps listed below:
1. Make sure the machine is not operating and then disconnect all the cables from the machine (except
power cable)
2. Press MENU.
3. Press 5 (LAN)
4. Press 0 (Factory Reset)
5. Press the 1 key to confirm you want to continue with the factory reset
6. Press the 1 key to confirm that it is ok to reboot the machine after reset
7."Please Wait" will appear for several moments and then the machine will automatically power off and
then back on. The network card has now been restored to the factory default settings.
Once you have successfully completed these steps, close this window to return to the Wireless Printing
Assistant.
Answer #2: Posted by waelsaidani1 on July 9th, 2014 11:58 AM
Member since:
May 12th, 2013 Points: 19,501,787
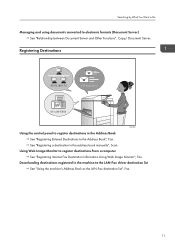
The Address Book is where fax numbers, e-mail addresses, user codes and folders are populated into the systems address book, then displayed on the operation screen of the respective feature. To access the address book, Web Image Monitor must be launched as described above.
- Select Login, located on the upper-left side of the display.
- User Name = admin (lower case). Password: leave blank
- Select Address Book, located on the left side of the display.
- Select Add, located on the top of the display. A user profile page will be displayed.
- Enter the users Name and Key Display Name.
Optional: Use q to select category in Title 1, 2 or 3 (Title 1 is the default).
Example AB / CD / EF / GH etc.
- Use arrow q on right bottom side of display to scroll to bottom of page.
- To the right of E-mail Address enter the email address in field.
This programs the email address as a Destination.
- If you want to program this email address as a Sender too: Scroll to top of page to Protection.
- To the right of Use Name as – check box to the right of Sender to select.
Email Address is now a Sender.
- To protect the senders email address:
To the right of Protect Destination – check box next to Sender to select.
- Select Change and enter a numeric code. Confirm code by entering it again.
- Click on OK located on the upper right of the screen.
- Click on OK if finished or Save and Add Another to program additional email addresses.
To edit, delete or change an existing destination, email address or user, click in the circle to the left of the name and select Change or Delete.
Note: If an error message appears in the display stating that the system is in use, all the profile information will have to re-entered and saved. Make sure the system is not in use or in User Tools during programming.
Click Log out before closing Web Image Monitor.
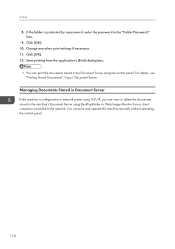
Related Ricoh MP 2553 Manual Pages


Similar Questions

Hello, I changed the password for the copier mp 2553 sp. What should I do? thank you

i can't log in administrator sesion of Web image Monitor software, i trayed with user name: adminpas...


