eMachines D620 Support Question
eMachines D620 Support Question
Find answers below for this question about eMachines D620.Need a eMachines D620 manual? We have 3 online manuals for this item!
Question posted by nylafm on May 17th, 2014
Emachine D620 Specshow Can I Remove Cmos Battery From Emachine D620 Series
The person who posted this question about this eMachines product did not include a detailed explanation. Please use the "Request More Information" button to the right if more details would help you to answer this question.
Current Answers
Related eMachines D620 Manual Pages
eMachines Notebook User Guide (All Series) - Page 12
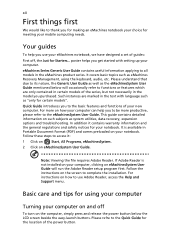
... on the screen to use your notebook. For instructions on eMachinesSystem User Guide will occasionally refer to functions or features which are marked in the eMachines product series. Basic care and tips for Starters... Please refre to the Quick Guide for meeting your mobile computing needs.
Such instances are only contained in...
eMachines Notebook User Guide (All Series) - Page 14
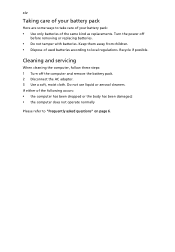
... the same kind as replacements. Cleaning and servicing
When cleaning the computer, follow these steps: 1 Turn off
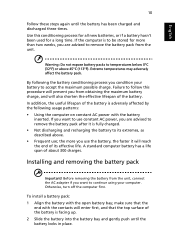
before removing or replacing batteries.
• Do not tamper with batteries. Turn the power off the computer and remove the battery pack. 2 Disconnect the AC adapter. 3 Use a soft, moist cloth. Recycle if possible. xiv
Taking care of your...
eMachines Notebook User Guide (All Series) - Page 15
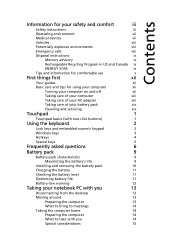
... embedded numeric keypad
2
Windows keys
3
Hotkeys
4
Special keys
5
Frequently asked questions
6
Battery pack
9
Battery pack characteristics
9
Maximizing the battery's life
9
Installing and removing the battery pack
10
Charging the battery
11
Checking the battery level
11
Optimising battery life
11
Battery-low warning
12
Taking your notebook PC with you
13
Disconnecting...
eMachines Notebook User Guide (All Series) - Page 27
... follow this conditioning process for all new batteries, or if a battery hasn't been used for more you from obtaining the maximum battery charge, and will also shorten the effective lifespan of its effective life. Installing and removing the battery pack
Important! To install a battery pack: 1 Align the battery with the battery
inserted. Use this procedure will prevent you...
eMachines Notebook User Guide (All Series) - Page 28
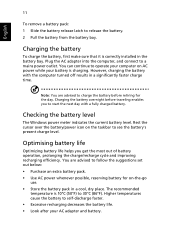
... to follow the suggestions set out below: • Purchase an extra battery pack. • Use AC power whenever possible, reserving battery for the day. English
11
To remove a battery pack: 1 Slide the battery release latch to a mains power outlet. Charging the battery
To charge the battery, first make sure that it is charging. Note: You are advised...
eMachines Notebook User Guide (All Series) - Page 37
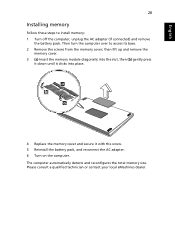
...The computer automatically detects and reconfigures the total memory size. then lift up and remove the
memory cover. 3 (a) Insert the memory module diagonally into the slot, then... it with the screw. 5 Reinstall the battery pack, and reconnect the AC adapter. 6 Turn on the computer. Please consult a qualified technician or contact your local eMachines dealer. Then turn the computer over to ...
eMachines Notebook User Guide (All Series) - Page 47
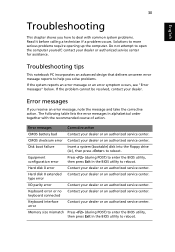
Do not attempt to reboot.
CMOS checksum error Contact your dealer or an authorized service center. Equipment ...to reboot.
keyboard connected
Keyboard interface error
Contact your dealer or an authorized service center.
Error messages
Corrective action
CMOS battery bad
Contact your dealer or an authorized service center. Disk boot failure
Insert a system (bootable) disk into ...
eMachines D620 Series Quick Guide - Page 2
...the implied warranties of merchantability or fitness for any person of Acer Incorporated. eMachines D620 Series Quick Guide Original Issue: 09/2008
This company makes no representations or ... your unit should include the serial number, model number and purchase information. eMachines D620 Series Notebook PC
Model number Serial number Date of purchase Place of merchantability or ...
eMachines D620 Series Quick Guide - Page 3
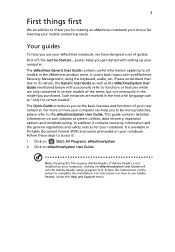
... User Guide will occasionally refer to functions or features which are marked in the eMachines product series.
The Quick Guide introduces you get started with language such as system utilities, ... eMachinesSystem User Guide. Follow the instructions on such subjects as "only for meeting your eMachines notebook, we have designed a set of your new computer. Please understand that due to...
Service Guide - Page 38
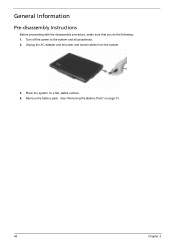
See "Removing the Battery Pack" on a flat, stable surface. 4. Remove the battery pack. Place the system on page 51.
48
Chapter 3 General Information
Pre-disassembly Instructions
Before proceeding with the disassembly procedure, make sure that you do ...
Service Guide - Page 41
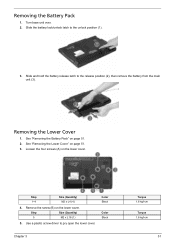
... the lower cover. Step 1~4
Size (Quantity) M2 x L4 (4)
4. Remove the screw (B) on the lower cover.
See "Removing the Lower Cover" on page 51. 2.
Removing the Lower Cover
1. See "Removing the Battery Pack" on page 51. 3. Step
Size (Quantity)
5
M2 x L18 (1)
5. Turn base unit over. 2.
Slide the battery lock/unlock latch to pry open the lower cover...
Service Guide - Page 42
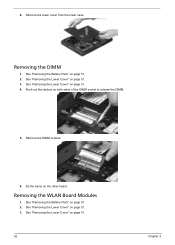
... Lower Cover" on page 51. 2. Remove the DIMM module.
6. See "Removing the Battery Pack" on page 51. 3.
Do the same on page 51. 2. See "Removing the Battery Pack" on the other board. Push out the latches on page 51. 4. Removing the WLAN Board Modules
1. 6.
See "Removing the Lower Cover" on both sides of the DIMM socket to...
Service Guide - Page 44
See "Removing the Lower Cover" on this model does not have the rubber enclosure as above images show.
54
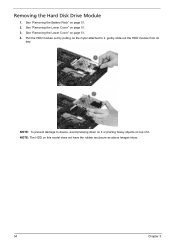
Chapter 3 NOTE: The HDD on page 51... pressing down on it or placing heavy objects on top of it , gently slide-out the HDD module from its
bay. See "Removing the Battery Pack" on page 51. 3. See "Removing the Lower Cover" on page 51. 2. Removing the Hard Disk Drive Module
1.
Service Guide - Page 46
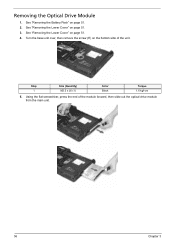
... page 51. 3. Step 1
Size (Quantity) M2.5 x L6 (1)
Color Black
Torque 1.6 kgf-cm
5. See "Removing the Lower Cover" on page 51. 4. Removing the Optical Drive Module
1. Turn the base unit over, then remove the screw (E) on page 51. 2.
See "Removing the Battery Pack" on the bottom side of the module forward, then slide out the optical...
Service Guide - Page 49
....220 86.00F87.735
5.
Chapter 3
59
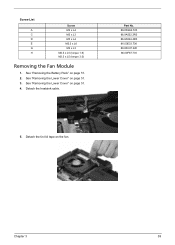
Screw List
A C D E G H
Screw M2 x L4 M2 x L3 M3 x L4 M2.5 x L6 M2 x L3 M2.5 x L5 (torque 1.6) M2.5 x L5 (torque 3.0)
Removing the Fan Module
1. See "Removing the Lower Cover" on the fan. Detach the tin foil tape on page 51. 4. Detach the heatsink cable. See...
Service Guide - Page 50
... unit. Color Black
Torque 1.6 kgf-cm
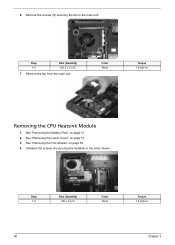
Removing the CPU Heatsink Module
1. See "Removing the Battery Pack" on page 51. 3. Step 1-5
Size (Quantity) M2 x L4 (5)
Color Silver
Torque 1.6 kgf-cm
60
Chapter 3
Unfasten the screws (A) securing the heatsink in the order shown. Step 1-2
Size (Quantity) M2.5 x L5 (2)
7. See "Removing the Lower Cover" on page 51...
Service Guide - Page 51
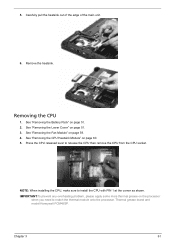
.... 2. NOTE: When installing the CPU, make sure to release the CPU then remove the CPU from the CPU socket. Chapter 3
61 Removing the CPU
1.
Thermal grease brand and model:Honeywell PCM45SP.
Remove the heatsink. 5. See "Removing the Battery Pack" on page 59. 4. See "Removing the CPU Heatsink Module" on page 51. 3. Carefully pull the heatsink out...
Service Guide - Page 52
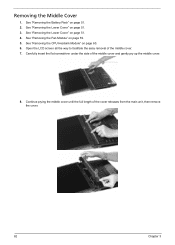
... under the side of the middle cover. 7. See "Removing the Battery Pack" on page 59. 5. See "Removing the Fan Module" on page 51. 2. Open the LCD screen all the way to facilitate the easy removal of the middle cover and gently pry up the middle cover.
8. See "Removing the Lower Cover" on page 51. 4. See...
Service Guide - Page 53
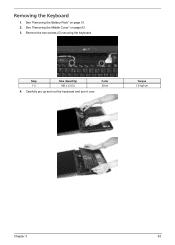
Step 1-2
Size (Quantity) M2 x L3 (2)
4. Remove the two screws (G) securing the keyboard. Removing the Keyboard
1. See "Removing the Middle Cover" on page 51. 2. Carefully pry up and out the keyboard and turn it over.
See "Removing the Battery Pack" on page 62. 3. Color Silver
Torque 1.6 kgf-cm
Chapter 3
63
Service Guide - Page 113
... and test procedures, please refer to the following lists for components, adapter cards, and peripherals which have passed these tests. Appendix B
123 Refer to the eMachines D620 series Compatibility Test Report released by Acer's internal testing department. All of its system functions are tested under Windows® Vista™ Business, Vista Home Premium...
Similar Questions


Where Is The Internal Battery Located On A Emachines E525 Series Laptop
(Posted by bmomdegra 10 years ago)

Have Emachine D620 Series And Upgraded To Windows 8 Now Can Not Connect To
projector
projector
(Posted by praone 10 years ago)

Problems With Emachines D620 Laptop Black Screen When Going To Desktop
(Posted by Annampk 10 years ago)

My Emachine D620 Didnt Tun Rn On Properly
why my laptop emachine d620 didnt turn on even when the the battery is fully chrge..
why my laptop emachine d620 didnt turn on even when the the battery is fully chrge..
(Posted by caragperry 11 years ago)