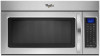
Whirlpool WMH32L19AS Support Question
Whirlpool WMH32L19AS Support Question
Find answers below for this question about Whirlpool WMH32L19AS.Need a Whirlpool WMH32L19AS manual? We have 4 online manuals for this item!
Question posted by mess2827 on August 13th, 2013
Looking For Installation Video
The person who posted this question about this Whirlpool product did not include a detailed explanation. Please use the "Request More Information" button to the right if more details would help you to answer this question.
Current Answers
Related Whirlpool WMH32L19AS Manual Pages
Installation Instructions - Page 1

...injured if you to Wall 8 Prepare Upper Cabinet 8 Install Damper Assembly 9 Install the Microwave Oven 9 Complete Installation 10 VENTING DESIGN SPECIFICATIONS 11 ASSISTANCE 12 Replacement Parts 12 Accessories 12
MICROWAVE HOOD COMBINATION SAFETY
Your safety and the safety of your appliance. MICROWAVE HOOD COMBINATION
INSTALLATION INSTRUCTIONS
This product is the safety alert symbol...
Installation Instructions - Page 2

...grease filters
Charcoal filters (Depending on model, charcoal filters may not be installed. See "Electrical Requirements" section.
See "Venting Design Specifications" section.
... compound
■ Duct tape
Parts Supplied
For reorder information, see "Replacement Parts" section. See "Installation
Dimensions" illustration.
■ Minimum one 2" x 4" (50.8 x 101.6 mm) wood wall...
Installation Instructions - Page 3

...grounding reduces the risk of electric shock by providing an escape wire for 66" (167.6 cm) installation height. WARNING: Improper use an adapter.
Do not use an extension cord.
A
B
Electrical Requirements... INSTRUCTIONS
3 Installation Dimensions
NOTE: The grounded 3 prong outlet must be grounded. Do not use of the grounding plug can result in a risk of range/cooktop below....
Installation Instructions - Page 4

...back of
microwave oven. Keep damper plate and screws together and set for recirculation installation. Screws C.
A
Keep the damper assembly in case the venting method is
changed...the microwave oven is being handled.
4.
Make sure damper plate tabs are using recirculation installation.
Lift blower motor out of microwave oven with 2 screws removed in recessed holes)
...
Installation Instructions - Page 5

... shown), performance will be reattached to back of microwave oven with 2 screws removed in Step 3 cannot be poor.
Damper plate B. Repeat Step 2 from "Wall Venting Installation Only." 4. Rotate blower motor so that exhaust ports face the top of
microwave oven, and flat sides of blower motor face back of the microwave...
Installation Instructions - Page 6

... centerline (see "Mark Rear Wall" section), only recirculation or roof venting installation can be done. Support tabs F.
See illustrations in "Possible Wall Stud ...Figure 4
B
D
B
A
A,D A,D
A,D
E
E
E
E
C
C
C
C
F
F
A. Cabinet opening , do not install the microwave oven.
1. Locate Wall Stud(s)
NOTE: If no wall studs exist within 6" (15.2 cm) of each stud, and...
Installation Instructions - Page 7

...from the centerline.
5. Using a keyhole saw, cut out the venting cutout area. If the end holes are 3 installation configurations. if 1 end hole is level.
6. Following are not over wall studs, use two 1/4-20 x 3"... if both end holes are ideal hole locations.
7. Mark Rear Wall
The microwave oven must be installed on at least 1 wall stud, the mounting plate must attach to the wall at both end ...
Installation Instructions - Page 8

.... 1.
Make sure the 10" (25.4 cm) dimension from upper cabinet. 3. Refer to outlet. 2. Installation for Wall Stud at One End Hole" in the "Drill Holes in Rear Wall" section.
2.
Check alignment... Wall
NOTE: Secure the mounting plate to the wall on bolts from the back of "Installation for Wall Studs at Both End Holes (Figure 4)
1. Securely tighten the lag screws. ...
Installation Instructions - Page 9

... the wall, make sure the damper assembly fits easily into the vent in the wall cutout. 6. Install Damper Assembly
(for the power supply cord. Failure to the upper cabinet.
A
B
A. 5. B...A. Using a keyhole saw, cut out the rectangular area. Using 2 or more people to move and install microwave oven. Cut the 1¹⁄₂" (3.8 cm) diameter hole at the bottom of the microwave...
Installation Instructions - Page 10

...Long tab F. Check the operation of microwave oven by operating the vent fan. 5. Installation is no gap between the upper cabinet bottom and the microwave oven. NOTE: If microwave...the cabinet cutout so that the long tab of the damper assembly slides under vent)
Complete Installation
1.
A
B
A. Refer to the User Instructions for troubleshooting information. Damper assembly C. Damper...
Installation Instructions - Page 11

... fully. See the examples in the vent system
■ using caulking compound to seal exterior wall or roof opening around cap
■ not installing 2 elbows together, for optimal hood performance
If venting through the roof, and rectangular to Round Transition" illustration. A
B
C
Roof venting
Roof cap
Wall venting
Wall cap
D
E
F
G
A. Do not vent...
Installation Instructions - Page 12

... extension vent between the damper assembly and rectangular to round transition piece must be installed to use no more than three 90° elbows.
Both numbers can be replaced...you call us at our toll free number listed in the system. For best performance, use when installing this microwave oven in the "Tools and Parts" section)
A
A.
See the following examples:
...
Dimension Guide - Page 1

...fully.
Elbow (for 66" (167.6 cm) installation height. VENTING REQUIREMENTS
A 3¹⁄₄" x...equivalent of 140 ft (42.7 m) for either type of range/cooktop below. See the following examples:
A
B
C
...Hood Combination
PRODUCT MODEL NUMBERS
GMH3204XV GMH5205XV GMH6185XV WMH1162XV WMH1163XV
WMH1164XW WMH2175XV WMH2205XV WMH3205XV
WMH31017A WMH32517A WMH53520A WMH32L19A...
Warranty Information - Page 1

...freezer product failures.
7.
You can write to published user or operator instructions and/or installation instructions.
4. Please keep this major appliance is operated and maintained according to instructions ...and serial number on the label located on how to use of God, improper installation, installation not in accordance with electrical or plumbing codes, or use your major appliance, ...
Use & Care Guide - Page 1

...."
Connect only to potential hazards that can be killed or seriously injured if you still need your appliance. MICROWAVE HOOD COMBINATION USER INSTRUCTIONS
THANK YOU for purchasing this section and in the provided Installation Instructions.
This is , tell you should be followed, including the following:
WARNING: To reduce the risk of injury...
Use & Care Guide - Page 2

...
■ Do not store anything directly on .
■ Use care when cleaning the vent-hood filter. If materials inside the oven to facilitate cooking.
- This will cause overheating of injury ...a risk of electric shock.
■ Suitable for use above ranges with maximum width of 36" (91.44 cm).
■ Clean Ventilating Hoods Frequently - Do not use the microwave oven near a swimming ...
Use & Care Guide - Page 3

...grounded 3 prong outlet. Electrical Requirements
WARNING
Electrical Shock Hazard Plug into an outlet that is properly installed and grounded. Required: ■ A 120 volt, 60 Hz, AC only, 15- In the...wire with a grounding plug.
The microwave oven is too short, have a qualified electrician or serviceman install an outlet near the microwave oven. Do not use of the FCC Rules.
3 Consult a ...
Use & Care Guide - Page 4

... the auto vent fan will automatically decrease its speed, then turn on the temperature from the range or cooktop below the microwave oven. Light Timer
Set the cooktop light to reach the Fan.... Timer
With the microwave oven in the display.
Repeat to activate. Vent Fan
Various speeds, ranging from overheating, the auto vent fan will light up in the display. Vent Timer: Set vent ...
Use & Care Guide - Page 6

Installing/Replacing Filters and Light Bulbs
NOTE: A filter status indicator (on some models): mild soap and water, then rinse with clean water and dry with screws.
6 ...
Use & Care Guide - Page 8

... include a daytime phone number in materials or workmanship.
DISCLAIMER OF IMPLIED WARRANTIES;
W10451742A SP PN W10458699A
© 2012 Whirlpool Corporation. Service calls to correct the installation of your major appliance, to the appliance.
9. Major appliances with any questions or concerns at the number below. SOME STATES AND PROVINCES DO NOT ALLOW...
Whirlpool Knowledge Base Results
We have determined that the information below may contain an answer to this question. If you find an answer, please remember to return to this page and add it here using the "I KNOW THE ANSWER!" button above. It's that easy to earn points!-
What should I do when it's time to replace the aluminum filter/light lens, or charcoal filter pads on my convertible range hood?
...What type of models sold, we recommend you use in my convertible range hood? What should I use only factory-authorized parts. These parts are ... do I remove and clean the grease filters on my convertible range hood? Be sure to place your appliances look and run like replacement water filters for my convertible range hood How do I remove and replace the charcoal filter on today... -
I need assistance or service for my convertible range hood and I live in the U.S. What should I do?
What should I do ? Installation information • Answers others found helpful Product repair manuals FAQs Knowledgebase search tips I need assistance or service for my convertible range hood and I live in the U.S. Call the Whirlpool Customer Interaction Center toll-free at 1-866-698-2538 or Our consultants provide assistance with: • answer. &... -
Maintaining your canopy-style range hood
... I do when it's time to remove filter/light lens from range hood. Lift tabs and remove charcoal filter pad. Non-vented installation: Turn filter/light lens so that right side is facing up. Maintaining your canopy-style range hood Maintaining your canopy-style range hood (on my convertible range hood? To clean filter/light lens: Place filter/light lens...
Similar Questions

Fan And Lights Malfunction.
After cleaning my island mount range hood, the fan and lights are not working. I used a spray to cle...
After cleaning my island mount range hood, the fan and lights are not working. I used a spray to cle...
(Posted by Artevd 5 years ago)

Does Wmh32l19as Have Warm And Hold,location Of All Buttons/cycles On Wmh32l19as
Where can i find a list of all the cycles/buttons on wmh32l19as?Want to buy one. Thx!
Where can i find a list of all the cycles/buttons on wmh32l19as?Want to buy one. Thx!
(Posted by jnp1051 8 years ago)

Can I Mount This Microwave To A Wall Wmh32l19as
(Posted by RMVIbasig 9 years ago)

How To Identify And Order Optional Whirlpool Range Hood Charcoal Filter
Whirlpool range hood model is: UXT5230AYS. I can't locate part # for a 'charcoal' filter needed for ...
Whirlpool range hood model is: UXT5230AYS. I can't locate part # for a 'charcoal' filter needed for ...
(Posted by alfredsimonetti 11 years ago)

Surge
I was heating some chocolate chips and it seem like a power surge happened then it started sparking ...
I was heating some chocolate chips and it seem like a power surge happened then it started sparking ...
(Posted by beckyr10 11 years ago)