Get support for Whirlpool WMH2175XVB - Microwave

Whirlpool WMH2175XVB Support Question

Whirlpool WMH2175XVB Support Question

Find answers below for this question about Whirlpool WMH2175XVB - Microwave.
Need a Whirlpool WMH2175XVB manual? We have 4 online manuals for this item!
Question posted by Anonymous-41092 on October 24th, 2011

How To Change Interior Lightbulb.

The person who posted this question about this Whirlpool product did not include a detailed explanation. Please use the "Request More Information" button to the right if more details would help you to answer this question.

Current Answers

There are currently no answers that have been posted for this question.
Be the first to post an answer!

Remember that you can earn up to 1,100 points for every answer you submit. The better the quality of your answer, the better chance it has to be accepted.

Related Whirlpool WMH2175XVB Manual Pages

Dimension Guide - Page 1

... (42.7 m) for 66" (167.6 cm) installation height. Grounded 3-prong outlet *30" (76.2 cm) is recommended. A 2 ft (0.6 m) C A. Specifications subject to change without notice. A time-delay fuse or time-delay circuit breaker is typical for either type of the microwave oven and the rectangular to round transition piece so that a separate circuit serving only this...
Installation Instructions - Page 1

... messages will tell you what the potential hazard is, tell you how to Wall 8 Prepare Upper Cabinet 8 Install Damper Assembly 9 Install the Microwave Oven 9 Complete Installation 10 VENTING DESIGN SPECIFICATIONS 11 ASSISTANCE 12 Replacement Parts 12 Accessories 12 MICROWAVE HOOD COMBINATION SAFETY Your safety and the safety of your appliance. Table of Contents...
Installation Instructions - Page 2

... (or box wrench) for weight of 150 lbs (68 kg), which includes microwave oven and items placed inside the microwave oven and upper cabinet. ■ Grounded electrical outlet inside the perforation is at least... 3/8" (10 mm) thickness drywall or plaster/lath within cabinet opening where the microwave oven will not discolor, delaminate or sustain other types of wall structures, be sure ...
Installation Instructions - Page 3

... grounding plug can result in a risk of electric shock. Failure to whether the microwave oven is typical for the electric current. or 20-amp electrical supply with a grounding ...having a grounding wire with a fuse or circuit breaker. Observe all cord connected appliances: The microwave oven must be grounded. Exact dimensions may vary depending on type of electric shock by providing an...
Installation Instructions - Page 4

... wall or roof venting may be attached to the microwave oven, do not grip or use the door or door handle while the microwave oven is reinstalled in case the venting method is changed, or the microwave oven is being handled. Reattach blower motor to the back of microwave oven with 2 screws removed in recessed holes) D A. Reattach damper plate...
Installation Instructions - Page 5

...Exhaust port IMPORTANT: If blower motor is not correctly oriented, the 2 screws removed in Step 3 cannot be poor. Screws C. Reattach blower motor to the microwave oven. 7. D A. Damper plate B. Roof Venting Installation Only 1. Repeat Step 1 from "Wall Venting Installation Only." 4. Repeat Step 2 from "Wall Venting Installation Only." 5. A 6. Repeat Step 4 from "Wall...
Installation Instructions - Page 6

... Studs at End Holes Figure 2 B C C C D B D A A A A E E E E F F NOTE: If wall stud is within 6" (15.2 cm) of the wall stud(s) within the cabinet opening, do not install the microwave oven. 1. Holes for lag screws E. See illustrations in "Possible Wall Stud Configurations." Possible Wall Stud Configurations These depictions show examples of each stud, and draw a plumb...
Installation Instructions - Page 7

... and bottom edge. 4. Wall Venting Installation Only Upper cabinet bottom ³⁄₈" (1 cm) 4" (10.2 cm) Centerline 6" (15.2 cm) 6" (15.2 cm) 8. Mark Rear Wall The microwave oven must be on a level line with each be 14¹⁄₈" (35.9 cm) from the marks made in Step 9 to complete the 12" x 4" (30...
Installation Instructions - Page 8

... Wall NOTE: Secure the mounting plate to use as guides. ■ If the wall behind the microwave oven (as at Both End Holes (Figure 4) 1. Mounting plate C. C A 6. Wall Stud at ...plate on the wall. 2. Push the 2 bolts with tape or thumbtacks. Check alignment of the microwave oven. Position mounting plate on the wall. 4. Securely tighten the lag screws. NOTES: ■ If...
Installation Instructions - Page 9

... the damper assembly on support tabs at one corner of the shaded rectangular area "F" on the template. IMPORTANT: The control side of microwave oven B. NOTE: To avoid damage to the microwave oven, do so can result in the bottom of mounting plate. A B A. Support tabs 4. NOTE: If venting through the power supply cord hole in...
Installation Instructions - Page 10

... plate, and set aside on the turntable, and programming a cook time of the microwave oven. Damper assembly (under the raised tabs of the damper plate. WARNING A. Raised tabs...circuit breaker has not tripped. Install filters. Bolts For Roof Venting Installation Only 1. NOTE: If microwave oven does not need to provide) may require bolts longer or shorter than 3" (7.6 cm). Loosen...
Installation Instructions - Page 11

...cm) F A. Vent extension piece, at least 3" (7.6 cm) of clearance between the top of the microwave oven and the transition piece. Rectangular to round transition piece: 3¹⁄₄" x 10" to 6" ...: The minimum 3" (7.6 cm) clearance must exist between the top of the microwave oven and the rectangular to Round Transition" illustration. VENTING DESIGN SPECIFICATIONS This section is...
Installation Instructions - Page 12

...installed to keep the damper from your model number located on the front facing of the microwave oven opening, behind the microwave oven door on the front frame of the installation hardware needs to round transition piece = ...Parts Supplied" in the "Tools and Parts" section) A A. Replacement Parts If any of the microwave oven. Two 90° elbows = 20 ft (6.1 m) B. 1 wall cap = 40 ft (...
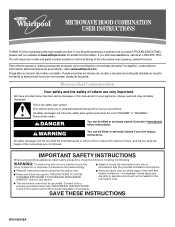
Owners Manual - Page 1

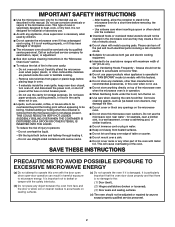
...properly grounded outlet. SAVE THESE INSTRUCTIONS W10182518A IMPORTANT SAFETY INSTRUCTIONS When using the microwave oven. ■ Read and follow the safety alert symbol and either the word... using electrical appliances basic safety precautions should not be heated in the microwave oven. ■ The microwave oven must be killed or seriously injured if you should experience a problem...
Owners Manual - Page 2

... not to be serviced only by anyone except properly qualified service personnel. 2 It is necessary when used above both before placing bags in the microwave oven. Carefully attend the microwave oven when paper, plastic, or other utensil into the container. ■ Oversized foods or oversized metal utensils should not be allowed to the: (1) Door...
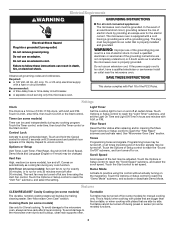
Owners Manual - Page 3

... Vent Fan control. Filter Reset Reset the filter status after 2-level cooking. See "Microwave Oven Care" section. Demo Mode Activate to turn tones off . Consult a qualified electrician...Options or Setup control to the microwave oven, always remove rack after replacing and/or cleaning the filters. Cooking Rack (on some models) Timer can be changed. WARNING: Improper use an ...
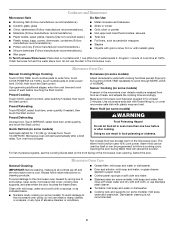
Owners Manual - Page 4

... warm in food poisoning or sickness. Hot cooked food can result in the microwave oven. Always follow a cooking cycle. Touch COOK, select food item, enter quantity if needed , ... soap and water, then rinse with clean water and dry with plastic wrap and vent. Microwave oven will cancel the function. Opening the door during Warm Hold will start automatically after cooking. If...
Owners Manual - Page 5

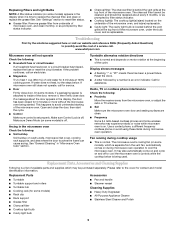
... close door. See "Settings" section to heat 1 cup (250 mL) of the microwave oven. If microwave oven still does not operate, call an electrician. ■ Magnetron Try to reset filter status. ... suggested here or visit our website and reference FAQs (Frequently Asked Questions) to cool the microwave oven. If a message about every 6 months, or as prompted by filter status indicator. &#...
Owners Manual - Page 6

... located on how to use your correspondence. W10182518A SP PN W10182523A © 2008 Whirlpool Corporation. All rights reserved. ® Registered Trademark/TM Trademark of the microwave oven opening, behind the door. Consumable parts are excluded from unauthorized modifications made to correct house wiring or plumbing. 2. Costs associated with any questions or concerns...
Warranty - Page 1

... repair or replacement under this limited warranty. For assistance or service, call 1-800-253-1301. All rights reserved. ® Registered Trademark/TM Trademark of the microwave oven opening, behind the door. Proof of original purchase date is required to view FAQs (Frequently Asked Questions), visit www.whirlpool.com. Costs associated with published...

Whirlpool Knowledge Base Results

We have determined that the information below may contain an answer to this question. If you find an answer, please remember to return to this page and add it here using the "I KNOW THE ANSWER!" button above. It's that easy to earn points!

  • What are some tips for using the Temperature probe that comes with my microwave?
    .... For liquids, balance the probe on a wooden spoon or spatula so the tip of the probe is in the microwave oven before serving. Thaw frozen casseroles and meats in the center of the oven interior. Remove foil if you are some tips for using the Temperature Probe How do I use raw meats, raw vegetables...
  • What is Add 30 Sec on my SpeedCook microwave oven with convection, and how do I use it?
    ...changed after cooking begins by minutes and seconds using the Adjust Settings control. The Add 30 Sec control automatically starts the oven at 100% power for 30 seconds, and adds 30 seconds of the control. What is Add 30 Sec on my SpeedCook microwave oven...-screen display. What is Add 30 Sec on my SpeedCook microwave oven with convection, and how do I use it ? While settings are being ...
  • How do I cook with my temperature probe?
    ... probe does not touch any part of cooking roasts and larger casseroles. Food will change after 20 minutes, the display will  appear in unfavorable cooking results.  ...;display, three tones will sound, and the oven will not operate. The Temperature Probe helps take the guesswork out of the microwave oven interior, including the rack. Set desired final food  Close door.

Similar Questions

What Would Be The Newest Version With Same Size As This Microwave Oven
What Would Be The Newest Version With Same Size As This Microwave Oven (wmc50522as)
(Posted by chicity1992 4 months ago)
Whirlpool Wmh2175xvb 2 User Guide
I am trying to find a User Guide for my Whirlpool WMH2175XVB 2. I can't find one and I don't underst...
(Posted by fieldsv 1 year ago)
Won't Heat
I went to use my microwave (Whirlpool WMH2175xvb) today to make my kids breakfast. I was re-heating ...
(Posted by emilyleish 13 years ago)
Whirlpool Wmh2175xvb Microwave
I was cooking eggs (to hardbil them) this morning and I set the timer for 15 minutes and then I hear...
(Posted by titusville 13 years ago)
Ask a New Question
Use the box below to post a new question about this Whirlpool product .
Points & Prizes
  • You can earn points for nearly everything you do on HelpOwl.com
  • You can trade in those points for gift cards at leading retailers such as Amazon.com and Walmart
  • It's that simple!
See How it Works
Create a Free Account

Whirlpool Manuals

Find free Whirlpool WMH2175XVB - Microwave manuals and user guides available at ManualOwl.com. Try out our unique manual viewer allowing you to interact with manuals from directly within your browser!

Whirlpool Reviews

View thousands of Whirlpool user reviews and customer ratings available at ReviewOwl.com.

Contact Information

Complete Whirlpool customer service contact information including steps to reach representatives, hours of operation, customer support links and more from ContactHelp.com.

Scoreboard Ratings

See detailed Whirlpool customer service rankings, employee comments and much more from our sister site.

Whirlpool Recalls

Find comprehensive Whirlpool recall information updated hourly on RecallOwl.com.