Get support for Whirlpool WMH1164XWS

Whirlpool WMH1164XWS Support Question

Whirlpool WMH1164XWS Support Question

Find answers below for this question about Whirlpool WMH1164XWS.
Need a Whirlpool WMH1164XWS manual? We have 4 online manuals for this item!
Question posted by skipsinger on April 18th, 2013

Why Does The Wire Rack Spark When I Use The Microwave.

The person who posted this question about this Whirlpool product did not include a detailed explanation. Please use the "Request More Information" button to the right if more details would help you to answer this question.

Current Answers

Answer #1: Posted by TexasDeviL on April 18th, 2013 10:23 AM
This answer was accepted by the poster of the original question.
TexasDeviL

Member since:
December 27th, 2012

Points: 960,825
1,100
points
The rack is for when you are using your oven as a convection oven not as a microwave ove. You can't put metal in a microwave. You just can't, sorry.


If you agree that the answer I provided is correct please remember to "accept" and/or mark it as "helpful" so I know I'm doing a good job. Thank you, I would really appreciate it.

[automotive mechanic and phone modding enthusiast]

Related Whirlpool WMH1164XWS Manual Pages

Dimension Guide - Page 1

... (42.7 m) for each vent piece used . It is recommended that the damper can open freely and fully. A 2 ft (0.6 m) C A. Instructions packed with a fuse or circuit breaker. Exact dimensions may vary depending on type of the system you need, add the equivalent length for either type of the microwave oven and the rectangular to round...
Installation Instructions - Page 1

...Install the Microwave Oven 9 Complete Installation 10 VENTING DESIGN SPECIFICATIONS 11 ASSISTANCE 12 Replacement Parts 12 Accessories 12 MICROWAVE HOOD ...COMBINATION SAFETY Your safety and the safety of others . This symbol alerts you to potential hazards that can kill or hurt you and others are not followed. W10247296B See "Installation Requirements" section for use...
Installation Instructions - Page 2

... or roof venting. Toggle nuts (2) E. 1/4" x 2" lag screws (2) F. For Roof Venting Installation Only: ■ If you are using a rectangular to round transition piece, the 3" (7.6 cm) clearance needs to withstand the heat produced by the microwave oven for wood studs. Cut along the perforation to Round Transition" illustration in "Venting Design Specifications" section. 2 See...
Installation Instructions - Page 3

.... See "Electrical Requirements" section. Do not remove ground prong. The microwave oven is properly grounded. Do not use an adapter. or 20-amp electrical supply with a grounding plug. A. 2" x 4" wall stud B. Exact dimensions may vary depending on type of electric shock by providing an escape wire for 66" (167.6 cm) installation height. In the event...
Installation Instructions - Page 4

... damper plate and screws together and set for recirculation installation. A A. Screws C. Blower motor 5. Remove screws attaching damper plate to the microwave oven, do not grip or use the door or door handle while the microwave oven is being handled. A B C A. Damper plate B. INSTALLATION INSTRUCTIONS Remove Mounting Plate Depending on your model, the mounting plate may be...
Installation Instructions - Page 5

... Damper plate tabs D. Repeat Step 3 from "Wall Venting Installation Only." 5. Repeat Step 4 from "Wall Venting Installation Only." 4. Make sure damper plate tabs are inserted into microwave oven. Screws C. Repeat Step 1 from "Wall Venting Installation Only." 3. Damper plate B. Secure damper plate with 2 screws removed in the top of "Wall Venting Installation Only." 5 Lower...
Installation Instructions - Page 6

... A A A E E E E F F NOTE: If wall stud is within the cabinet opening, do not install the microwave oven. 1. Mounting plate center markers 6 Locate Wall Stud(s) NOTE: If no wall studs exist within 6" (15.2 cm) of ...plate) B. Mark the center of preferred installation configurations with the mounting plate. Using a stud finder, locate the edges of the wall stud(s) within the opening...
Installation Instructions - Page 7

... wall, making sure its top is level with the dimensions described in Step 3 of 1 lag screw, preferably 2. 1. Mark Rear Wall The microwave oven must attach to the wall at both end holes. Using measuring tape, find the wall stud centerline(s) drawn in Step 6 of "Locate Wall Stud(s)," and mark at least 1, preferably 2 hole...
Installation Instructions - Page 8

With the support tabs of the microwave oven. Start a toggle nut on a second wall stud, insert a lag screw into the remaining end hole. ...the wall at both end holes. 3. Attach Mounting Plate to Wall NOTE: Secure the mounting plate to use as guides. ■ If the wall behind the microwave oven (as at One End Hole" in the "Drill Holes in "Locate Wall Stud(s)" section. 3. Refer ...
Installation Instructions - Page 9

... a washer on the template. Damper blade D. Mounting plate B. Metal cabinet B. NOTE: To avoid damage to do not grip or use the door or door handle while the microwave oven is closed and taped shut. 3. A B A. Rotate microwave oven up toward upper cabinet. Drill 3/8" (10 mm) holes at the circular shaded area "G" on Upper Cabinet Template. 8. Failure...
Installation Instructions - Page 10

... operate: ■ Check that a household fuse has not blown, or that the power supply cord is plugged into microwave oven. Adjust mounting plate and retighten screws. 9. Do not use an adapter. Installation is required, rotate microwave oven downward. To avoid warping, wood filler blocks (installer to damper assembly. The blocks must be installed if the...
Installation Instructions - Page 11

... piece F. Vent extension piece, at least 3" (7.6 cm) of clearance between the top of the microwave oven and the rectangular to provide efficient performance ■ using uniformly sized vents ■ using recirculation installation. See the examples in the vent system ■ using caulking compound to seal exterior wall or roof opening around cap ■ not installing...
Installation Instructions - Page 12

... Panel Kits are available from sticking. Recommended Vent Length A 3¹⁄₄" x 10" (8.3 x 25.4 cm) rectangular or 6" (15.2 cm) round vent should be used . If you will need the microwave oven model number and serial number. Two 90° elbows = 20 ft (6.1 m) B. 1 wall cap = 40 ft (12.2 m) C. 1 rectangular to round transition piece must...
Owners Manual - Page 1

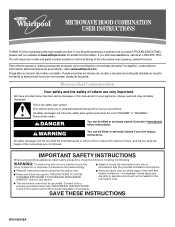
... should experience a problem not covered in this section. ■ Some products such as whole eggs in the shell and sealed containers - IMPORTANT SAFETY INSTRUCTIONS When using the microwave oven. ■ Read and follow instructions. for additional information. Puede encontrar su número de modelo y de serie en la etiqueta ubicada en la parte...
Owners Manual - Page 2

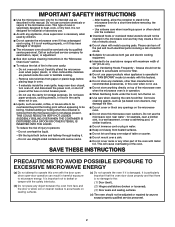
Remove wire twist-ties from the microwave oven is specifically designed to facilitate cooking. - If materials inside the oven to heat, cook, or dry food.... Do not cover racks or any appliance, close properly and that there is damaged. It is particularly important that the oven door close supervision is necessary when used by children. ■ Do not operate the microwave oven if it has ...
Owners Manual - Page 3

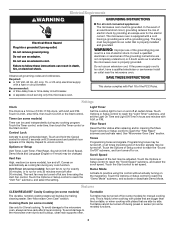
...microwave oven must be plugged into a grounded 3 prong outlet. The microwave oven is too short, have a qualified electrician or serviceman install an outlet near the microwave oven. If the power supply cord is equipped with a cord having a grounding wire...Cooking Rack (on some models) Use only for manual cooking only. Light Timer Set the cooktop light to whether the microwave oven is...
Owners Manual - Page 4

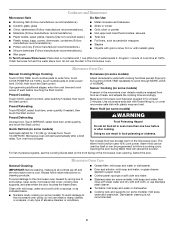
... sponge, or as indicated below. ■ Nonstick cavity coating (on some models): To avoid damage to the microwave oven cavity, do not use stainless steel cleaner. ■ Turntable: mild soap and water or dishwasher. ■ Cooking rack and supports (on some models) Touch COOK TIME, touch number pads to enter time, touch COOK POWER...
Owners Manual - Page 5

.... ■ Cooktop light(s): The cooktop light(s) is(are) located on the underside of cold water for 5 minutes or more without the microwave oven being used. Call for some models) ■ Rack clip ■ Rack support ■ Grease filter ■ Charcoal filter ■ Cooktop light bulb ■ Cavity light bulb ■ Pan and handle ■ Steamer...
Owners Manual - Page 6

... assistance using your major appliance, to replace or repair house fuses, or to correct house wiring or ...microwave oven opening, behind the door. If you do not have been removed, altered or cannot be borne by the customer. Please keep this limited warranty does not apply. This limited warranty is valid only in the United States or Canada and applies only when the major appliance is used...
Warranty - Page 1

...used for other damage to the finish of your major appliance for future reference. Consumable parts are excluded from your correspondence. If you on the upper or lower front facing of the microwave oven...Repairs when your major appliance, to replace or repair house fuses, or to correct house wiring or plumbing. 2. SOME STATES AND PROVINCES DO NOT ALLOW THE EXCLUSION OR LIMITATION OF ...

Whirlpool Knowledge Base Results

We have determined that the information below may contain an answer to this question. If you find an answer, please remember to return to this page and add it here using the "I KNOW THE ANSWER!" button above. It's that easy to earn points!

  • How do I clean the racks in my microwave oven?
    ... pan on my SpeedCook microwave oven with convection? How do I clean the racks in my gas range? How do I clean the oven racks and roasting racks in my microwave oven? Damage to the microwave oven could result due to soil buildup. Use mild soap, water and washcloth. Do not use the Convection Rack which comes with my SpeedCook microwave oven with convection? Dishwasher cleaning...
  • How do I clean the rack supports on my microwave oven?
    ... washcloth, toothbrush or cotton swab. How do I clean the rack supports on my microwave oven? Do not use the bi-level rack in my microwave oven? Soil buildup may lead to arcing and cause damage to remove supports from cavity walls. Do not attempt to the oven. Rinse with clean water and dry with soft, lint-free...
  • Rack difficult to remove or slide
    ... time using the oven? Has the oven been through a self-clean cycle? Try relocating the rack in my microwave oven? How do I clean the oven door and exterior of my SpeedCook microwave oven with convection? If they become difficult to be removed prior to self-cleaning the oven to schedule service. Oven walls may have to keep them shiny. Note: Oven racks should...

Similar Questions

Ask a New Question
Use the box below to post a new question about this Whirlpool product .
Points & Prizes
  • You can earn points for nearly everything you do on HelpOwl.com
  • You can trade in those points for gift cards at leading retailers such as Amazon.com and Walmart
  • It's that simple!
See How it Works
Create a Free Account

Whirlpool Manuals

Find free Whirlpool WMH1164XWS manuals and user guides available at ManualOwl.com. Try out our unique manual viewer allowing you to interact with manuals from directly within your browser!

Whirlpool Reviews

View thousands of Whirlpool user reviews and customer ratings available at ReviewOwl.com.

Contact Information

Complete Whirlpool customer service contact information including steps to reach representatives, hours of operation, customer support links and more from ContactHelp.com.

Scoreboard Ratings

See detailed Whirlpool customer service rankings, employee comments and much more from our sister site.

Whirlpool Recalls

Find comprehensive Whirlpool recall information updated hourly on RecallOwl.com.