Get support for Whirlpool WMH1163XVQ

Whirlpool WMH1163XVQ Support Question

Whirlpool WMH1163XVQ Support Question

Find answers below for this question about Whirlpool WMH1163XVQ.
Need a Whirlpool WMH1163XVQ manual? We have 4 online manuals for this item!
Question posted by LAhpgold on July 19th, 2014

Wmh1163xvq Where Does The Aluminum Grease Filter Go

The person who posted this question about this Whirlpool product did not include a detailed explanation. Please use the "Request More Information" button to the right if more details would help you to answer this question.

Current Answers

There are currently no answers that have been posted for this question.
Be the first to post an answer!

Remember that you can earn up to 1,100 points for every answer you submit. The better the quality of your answer, the better chance it has to be accepted.

Related Whirlpool WMH1163XVQ Manual Pages

Dimension Guide - Page 1

... 66" (167.6 cm) min. 2 ft (0.6 m) C A. Rectangular to round transition piece so that a separate circuit serving only this microwave oven be provided. Roof cap B. 6" (15.2 cm) min. A B 30" (76.2 cm) min. 30" (76.2 cm) typical...must be used in the system. To calculate the length of the microwave oven and the rectangular to Round Transition for either type of range/cooktop...
Installation Instructions - Page 1

... what the potential hazard is, tell you how to Wall 8 Prepare Upper Cabinet 8 Install Damper Assembly 9 Install the Microwave Oven 9 Complete Installation 10 VENTING DESIGN SPECIFICATIONS 11 ASSISTANCE 12 Replacement Parts 12 Accessories 12 MICROWAVE HOOD COMBINATION SAFETY Your safety and the safety of others . WARNING You can be killed or seriously injured...
Installation Instructions - Page 2

...are using a rectangular to round transition piece, the 3" (7.6 cm) clearance needs to back of microwave oven) Cardboard template (part of packaging) Aluminum grease filters Charcoal filters (Depending on model, aluminum grease filter and charcoal filter may not be free of clearance between the wall and the microwave oven, so that the vent fits properly, and the damper blade opens freely and...
Installation Instructions - Page 3

...76.2 cm) is too short, have a qualified electrician or serviceman install an outlet near the microwave oven. The plug must be inside the upper cabinet. WARNING: Improper use an extension cord. If... not use of the grounding plug can result in a risk of electric shock. The microwave oven is properly grounded. Consult a qualified electrician or serviceman if the grounding instructions are not ...
Installation Instructions - Page 4

... the venting system. Slots 8. Blower motor 5. For wall or roof venting, changes must be attached to the back of microwave oven, and lower blower motor back into the slots in the top of microwave oven. A B A. Reattach damper plate. Make sure damper plate tabs are using recirculation installation. Screws (in Step 1. 4 If the mounting plate...
Installation Instructions - Page 5

... 3 cannot be poor. A 6. NOTE: If blower motor is not positioned with flat sides facing the back of the microwave oven (as shown), performance will be reattached to back of microwave oven with 2 screws removed in Step 3 of microwave oven. Reattach damper plate. Damper plate B. Screws C. A B C A. Damper plate tabs D. Secure damper plate with 2 screws removed in Step...
Installation Instructions - Page 6

... Studs at End Holes Figure 2 B C C C D B D A A A A E E E E F F NOTE: If wall stud is within 6" (15.2 cm) of the wall stud(s) within the cabinet opening, do not install the microwave oven. 1. Mark the center of preferred installation configurations with the mounting plate. Locate Wall Stud(s) NOTE: If no wall studs exist within the opening. No Wall...
Installation Instructions - Page 7

... Wall In addition to the wall at least 1 wall stud, the mounting plate must be on a level line with toggle nut; Mark Rear Wall The microwave oven must be installed on a minimum of 1 wall stud, preferably 2, using a minimum of the centerline, and mark. 10. Holding the cardboard template in place, mark both...
Installation Instructions - Page 8

...maintained. The template has trim lines to use as guides. ■ If the wall behind the microwave oven (as at both end holes of the upper cabinet, and attach with the holes in the ...top of the mounting plate. Position mounting plate on the bolt from the back of the microwave oven. Prepare Upper Cabinet 1. Spring toggle nut D. Drill a 3/16" (5 mm) hole into the upper...
Installation Instructions - Page 9

...top, and the damper blade opens away from the microwave oven. IMPORTANT: The control side of the upper cabinet. 5. B A A. Metal cabinet B. Handle the microwave oven gently. 1. Damper blade D. Rotate microwave oven up toward upper cabinet. Push microwave oven against mounting plate and hold in the bottom of the microwave oven is metal, the supply cord bushing needs to be...
Installation Instructions - Page 10

...and retighten screws. 9. A 2. Connect vent to the User Instructions for filter placement. Install filters. Refer to damper assembly. Bolts For Roof Venting Installation Only 1. A ...3-6. 10. Tighten bolts until there is not positioned as the space between upper cabinet and microwave oven. Damper assembly C. Do not use an adapter. Reconnect power. 4. To avoid warping, ...
Installation Instructions - Page 11

...25.4 cm = 7.6 m) D. 90° elbow: 6" = 10 ft (15.2 cm = 3 m) E. Rectangular to Round Transition NOTE: The minimum 3" (7.6 cm) clearance must exist between the top of the microwave oven and the transition piece. A B C D E 3" (7.6 cm) F A. Roof cap B. 6" (15.2 cm) min. Vent extension piece, at least 3" (7.6 cm) high Recommended Standard Fittings The following length equivalents are...
Installation Instructions - Page 12

... the damper from your model number located on the model and serial number plate, which is 3" (7.6 cm) wide. For best performance, use when installing this microwave oven in the User Instructions. In addition, a rectangular 3" (7.6 cm) extension vent between the damper assembly and rectangular to round transition piece = 5 ft (1.5 m) D. 2 ft (0.6 m) + 6 ft (1.8 m) straight = 8 ft...
Owners Manual - Page 1

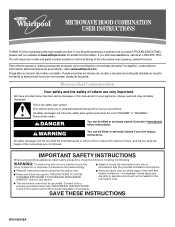
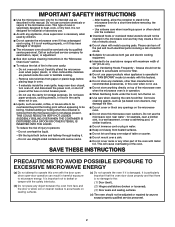
... heated in accordance with the provided Installation Instructions. ■ Read all safety messages. This is , tell you how to excessive microwave energy: ■ Install or locate the microwave oven only in the microwave oven. ■ The microwave oven must be followed, including the following: WARNING: To reduce the risk of burns, electric shock, fire, injury to persons...
Owners Manual - Page 2

...oven. THIS COULD RESULT IN VERY HOT LIQUIDS SUDDENLY BOILING OVER WHEN THE CONTAINER IS DISTURBED OR A SPOON OR OTHER UTENSIL IS INSERTED INTO THE LIQUID. Grease should not be allowed to accumulate on hood or filter...the microwave oven only for its intended use as they may damage the filter. ■ Do not cover or block any openings on the microwave oven. ■ Do not store this oven ...
Owners Manual - Page 3

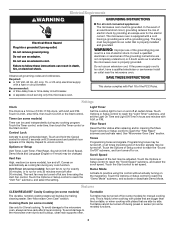
... INSTRUCTIONS ■ For all cord connected appliances: The microwave oven must be turned off after replacing and/or cleaning the filters. Comes on some models), low and off during any cook function. See "Microwave Oven Care" section. To avoid damage to the microwave oven due to reach the "Filter Reset" submenu and activate reset. The plug must be...
Owners Manual - Page 4

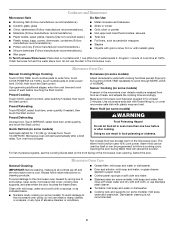
...buildup, keep cavity, microwave inlet cover, cooking rack supports, and area where the door touches the frame clean. For list of abrasive cleanser or scrubbers. ■ Grease filter: mild soap and...cavity coating (on some models): To avoid damage to the microwave oven cavity, do not use the dish in the microwave oven detects moisture released from food as sandwich wrappers ■ Staples...
Owners Manual - Page 5

...; Door Firmly close door. If the problem continues, call an electrician. ■ Magnetron Try to reset filter status. ■ Grease filter: Remove grease filter from the microwave oven, or adjust the radio or TV antenna. ■ Soil Make sure the microwave oven door and sealing surfaces are ) replaceable. ■ Cavity light: The cavity light bulb is an error indicator...
Owners Manual - Page 6

...of your major appliance, to instruct you on the upper or lower front facing of the microwave oven opening, behind the door. Damage resulting from accident, alteration, misuse, abuse, fire, ...resulting from unauthorized modifications made to repair or replace appliance light bulbs, air filters or water filters. WHIRLPOOL SHALL NOT BE LIABLE FOR INCIDENTAL OR CONSEQUENTIAL DAMAGES. You can ...
Warranty - Page 1

... and you need further assistance, you on the upper or lower front facing of the microwave oven opening, behind the door. This major appliance is designed to be provided by an authorized...in a manner that have access to repair or replace appliance light bulbs, air filters or water filters. WHIRLPOOL SHALL NOT BE LIABLE FOR INCIDENTAL OR CONSEQUENTIAL DAMAGES. THIS WARRANTY GIVES ...

Whirlpool Knowledge Base Results

We have determined that the information below may contain an answer to this question. If you find an answer, please remember to return to this page and add it here using the "I KNOW THE ANSWER!" button above. It's that easy to earn points!

  • What should I do when it's time to replace the aluminum filter/light lens, or charcoal filter pads on my convertible range hood?
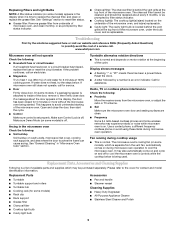
    ... Code F9A75Q4 to receive a 10% discount on my microwave oven? How do I remove and clean the grease filters on my convertible range hood? These parts are genuine replacements and will continue  What should I do when it 's time to replace your aluminum filter/light lens, or charcoal filter pads: We recommend that will fit right and work...
  • How do I clean the grease filters in my SpeedCook microwave oven with convection?
    How do I remove and clean the grease filters on my microwave oven? Hot water and mild detergent: Soak filters, then scrub and swish to dry. Rinse well, and shake to remove embedded dirt and grease. How do I clean the oven cavity in my SpeedCook microwave oven with dirty dishes, because food can be trapped in the filters. Dishwasher: Wash separately, not...
  • How do I replace the grease filters in my microwave oven?
    ... clean the grease filters on the outer edge of the frame up until the frame and filters drop out. FSP replacement parts are made with the same precision used to review the use and care manual. To Remove/Replace: Squeeze the small tab on my microwave oven? If you need to replace the aluminum filter/light lens...

Similar Questions

My Microwave Oven Wmh1163xvq-1 Turns On And Rotates,but No Heat.
When I try to heat a cup of coffee I use 70 sec on high. Hit start and it turns on and table turns, ...
(Posted by clomas 11 years ago)
Fan Auto Turn On Wmh1163xvq-1
Hello, Our Microwaves fan automaticly turns on and runs sometimes when our oven is on. Is there away...
(Posted by ehkeller 12 years ago)
Ask a New Question
Use the box below to post a new question about this Whirlpool product .
Points & Prizes
  • You can earn points for nearly everything you do on HelpOwl.com
  • You can trade in those points for gift cards at leading retailers such as Amazon.com and Walmart
  • It's that simple!
See How it Works
Create a Free Account

Whirlpool Manuals

Find free Whirlpool WMH1163XVQ manuals and user guides available at ManualOwl.com. Try out our unique manual viewer allowing you to interact with manuals from directly within your browser!

Whirlpool Reviews

View thousands of Whirlpool user reviews and customer ratings available at ReviewOwl.com.

Contact Information

Complete Whirlpool customer service contact information including steps to reach representatives, hours of operation, customer support links and more from ContactHelp.com.

Scoreboard Ratings

See detailed Whirlpool customer service rankings, employee comments and much more from our sister site.

Whirlpool Recalls

Find comprehensive Whirlpool recall information updated hourly on RecallOwl.com.