Get support for Whirlpool RF263LXTQ

Whirlpool RF263LXTQ Support Question

Whirlpool RF263LXTQ Support Question

Find answers below for this question about Whirlpool RF263LXTQ.
Need a Whirlpool RF263LXTQ manual? We have 4 online manuals for this item!
Question posted by kejo18 on February 12th, 2014

8' Element Over Heats I Believe The Surface Element Switch Is Bad ????

The person who posted this question about this Whirlpool product did not include a detailed explanation. Please use the "Request More Information" button to the right if more details would help you to answer this question.

Current Answers

There are currently no answers that have been posted for this question.
Be the first to post an answer!

Remember that you can earn up to 1,100 points for every answer you submit. The better the quality of your answer, the better chance it has to be accepted.

Related Whirlpool RF263LXTQ Manual Pages

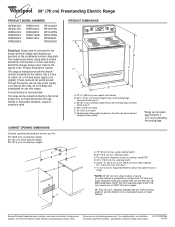
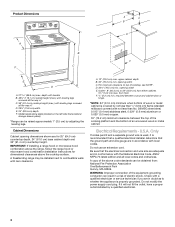
Dimension Guide - Page 1

... improve our products, we reserve the right to change without notice. The model/serial number rating plate is protected by adjusting the leveling legs. The range can be raised approximately 1" (2.5 cm) by not less than 1/4" (6.4 mm) flame retardant millboard covered with the neutral terminal connected to the cabinet. For minimum clearance...
Installation Instructions - Page 1

...Connection - U.S.A. INSTALLATION INSTRUCTIONS 30" (76 CM) FREESTANDING ELECTRIC RANGES Table of Contents RANGE SAFETY 2 INSTALLATION REQUIREMENTS 3 Tools and Parts 3 Location Requirements 3 Electrical Requirements - Only 7 Verify Anti-Tip Bracket Location 12 Level Range 12 Storage Drawer 12 Complete Installation 13 Moving the Range 14 ANTI-TIP BRACKET TEMPLATE 15 IMPORTANT: Save for...
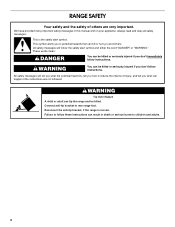
Installation Instructions - Page 2

...." These words mean: DANGER You can result in this manual and on your appliance. Failure to rear range foot. RANGE SAFETY Your safety and the safety of injury, and tell you what can tip the range and be killed or seriously injured if you and others are not followed. Always read and obey...
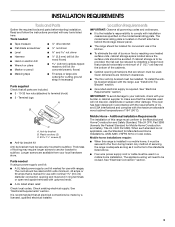
Installation Instructions - Page 3

... the kitchen. ■ To eliminate the risk of burns or fire by reaching over heated surface units, cabinet storage space located above . ■ Four-wire power supply cord or ... with installation clearances specified on the left side frame behind the storage drawer panel. ■ The range should be avoided. Parts needed ■ Tape measure ■ ¼" drive ratchet ■ ...
Installation Instructions - Page 4

... connection and wire size are for dimensional clearances above the cooktop surface. A freestanding range may be obtained from floor F 2.2 cm) min. For ... 69.9 cm) max. required between the top of the cooking platform and the bottom of the above the range, follow the range hood or microwave hood combination installation instructions for 25" (64.0 cm) countertop depth, 24" (61.0 cm...
Installation Instructions - Page 5

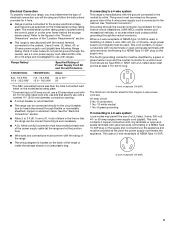
... (34.9 mm) diameter connection opening. ■ A circuit breaker is recommended. ■ The range can be moved if servicing is ever necessary. ■ A UL listed conduit connector must be ... terminating in the "Product Dimensions" section of the "Location Requirements" section. ■ This range is located behind the storage drawer panel. When a 4-wire receptacle of NEMA Type 14-50R...
Installation Instructions - Page 6

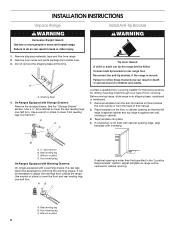
...result in cabinet opening . Wrench or pliers D. Wrench or pliers 6 INSTALLATION INSTRUCTIONS Unpack Range WARNING Excessive Weight Hazard Use two or more people to children and adults. Do not ...tip bracket to do so can result in death or serious burns to move and install range. A. Rear leveling leg B. Contact a qualified floor covering installer for the best procedure...
Installation Instructions - Page 7

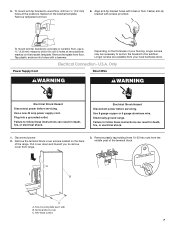
...concrete or ceramic floor, use a 4.8 mm) masonry drill bit to remove cover from range. 3. Longer screws are available from floor. Electrical Connection - Failure to the subfloor. ... Shock Hazard Disconnect power before servicing. Terminal block cover C. Depending on the back of the range. Remove plastic tag holding three 10-32 hex nuts from floor. 6. Align anti-tip bracket...
Installation Instructions - Page 8

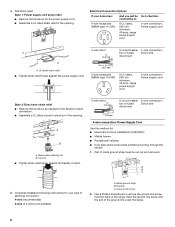
... B. Discard C. 4. Removable retaining nut B. Save the ground-link screw and the end of the range. UL listed strain relief ■ Tighten strain relief screw against the flexible conduit. 3-wire direct ...3-wire receptacle (NEMA type 10-50R) A UL listed, 250-volt minimum, 40-amp, range power supply cord 3-wire connection: Power supply cord Style 2: Direct wire strain relief ■...
Installation Instructions - Page 9

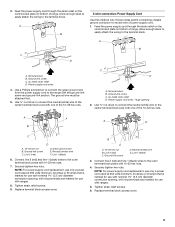
...supply cord wires 4. UL listed strain relief D. large opening , with ring terminals and marked for use with ranges. 5. Green ground wire E. Neutral (center) wire F. D B C A. 10-32 hex nut B....;⁄₈" (3.5 cm) diameter connection opening, with ring terminals and marked for use with ranges. 8. 3. Ground-link screw C. Line 2 (red) D D. Tighten strain relief screws....
Installation Instructions - Page 10

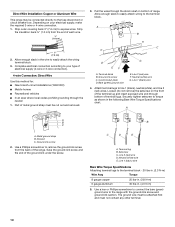
... connection. 1. Metal ground strap B. Discard C. Save the ground-link screw and the end of the range. Line 2 (red) wire D. Line 1 (black) wire Bare Wire Torque Specifications Attaching terminal lugs ... bottom of each wire. ³⁄₈" (1.0 cm) 3. Allow enough slack in the wire to the range with the ground-link screw and ground-link section. C G D EF A. A A B B C A....
Installation Instructions - Page 13

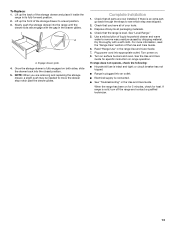
...Range." 5. See the Use and Care Guide for heat. Complete Installation 1. Dispose of your tools. 3. Read "Range Use" in the drawer glides. Turn on . 8. When the range...range until the drawer side rails engage with a soft cloth. If range... read the "Range Care" section of...place it inside the range in the Use ...9632; Range is plugged into appropriate outlet. Check that the range is connected...
Owners Manual - Page 3

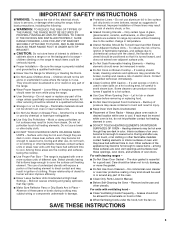
... become hot enough to accumulate on hood or filter. ■ When flambeing foods under the hood, turn the fan on the Range - Grease should be referred to cover the surface unit heating element. SAVE THESE INSTRUCTIONS 3 Improper installation of these pans or bowls during cooking may ignite. ■ Make Sure Reflector Pans or Drip...
Owners Manual - Page 5

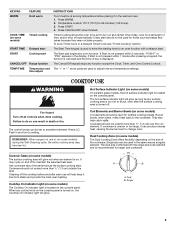
... The hot surface indicator light will glow red when an element is turned off. The control knobs can result in use will glow. REMEMBER: When range is located ...Elements and Burner Bowls (on some models) Coil elements should not extend more than ½" (1.3 cm) over the coil element. Burner bowls, when clean, reflect heat back to maintain the selected heat level. When any surface...
Owners Manual - Page 6

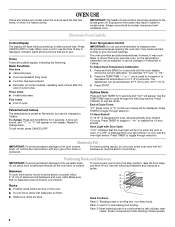
...raise the front edge, and then lift out. however, it out to the fumes may cause element cycling to clear. Broiling chicken pieces. 6 Rack 3: Most baked goods on the oven. Use...TIME keys to the porcelain finish, do not cover entire oven rack with the oven light switch. Positioning Racks and Bakeware IMPORTANT: To avoid permanent damage to cycle through selection. Make ...
Owners Manual - Page 7

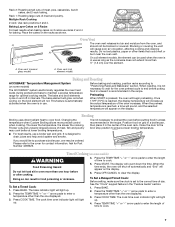
...keypad feature in use . The bake and broil elements cycle on some models) The ACCUBAKE® system electronically regulates the oven heat levels during preheat and bake to the correct ... refer to clear the display. Press BAKE. Do not set to maintain a precise temperature range for optimal cooking results. Oven vent (ceramic glass model) A. Blocking or covering the vent...
Owners Manual - Page 8

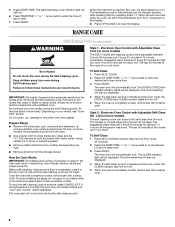
... must be changed anytime after pressing Start by repeating steps 1-7. How the Cycle Works IMPORTANT: The heating and cooling of the cycle is extremely sensitive to start. 7. To stop the self-cleaning cycle .... Do not clean, rub, damage or move birds to HI (4 hours 30 minutes). 2. Prepare Range ■ Remove the broiler pan, grid, cookware and bakeware, all items from oven during the Self...
Owners Manual - Page 9

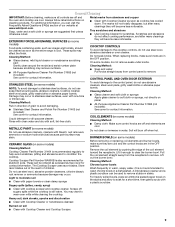
... scrubber can be cleaned as soon as the entire range is not recommended to wear oven mitts while cleaning the...not included): See cover for contact information. Remove the coil element by pushing the edge of children. General Cleaning IMPORTANT: Before...rust removers, ammonia or sodium hydroxide (lye) because paint surface may stain. Scratches and abrasions do not affect cooking performance...
Owners Manual - Page 10

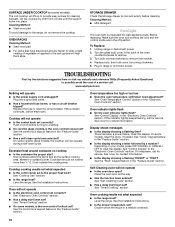
...See "Self-Cleaning Cycle" section. ■ Has a delay start been set correctly? Level the range. SURFACE UNDER COOKTOP (on some models) The coil cooktop will lift up to provide easy access for service...the proper heat level? www.whirlpool.com Nothing will not operate ■ Is the oven door open? Use cookware about the same size as the surface cooking area, element or surface burner....
Owners Manual - Page 11

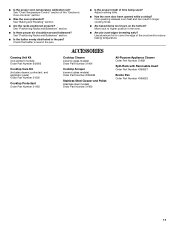
..." section. ■ Is there proper air circulation around bakeware? Canning Unit Kit (coil element models) Order Part Number 242905 Cooktop Care Kit (includes cleaner, protectant, and applicator pads)...Temperature Control" section of the crust and/or reduce baking temperature. Oven peeking releases oven heat and can result in the oven. ■ Are pie crust edges browning early? See "...

Whirlpool Knowledge Base Results

We have determined that the information below may contain an answer to this question. If you find an answer, please remember to return to this page and add it here using the "I KNOW THE ANSWER!" button above. It's that easy to earn points!

  • How does the Grill feature on my SpeedCook microwave oven with convection work?
    ...the grill element is off How does the grill rack accessory work ? To Use: Touch "Cook Method" on Main Menu, then touch "Grill," and then follow screen prompts to a heat-safe surface. Oven cavity...oil to grill rack. Use oven mitts to catch drippings. Do not place the Sizzle Pan on heat-sensitive surfaces. Then position food directly on rack. The Grill menu has 9 main food categories, plus a...
  • What is the Convection-Roast menu on my SpeedCook microwave oven with convection, and how do I use it?
    ... turns on and stays on my SpeedCook microwave oven with the type of cooking you to a heat-safe surface. Simmer cycle. What is the Convection-Roast menu on the Main Menu, touch "More Choices...SpeedCook microwave oven with a loose-fitting lid. What is the Convection-Roast menu on heat-sensitive surfaces as damage may occur. The oven cavity and door will be very hot. Follow ...
  • What is the Convection Bake menu on my SpeedCook microwave oven with convection, and how do I use it?
    ... microwave oven with convection, and how do I use it ? What is recommended.  You will become hot during any cookware or bakeware will need to a heat-safe surface.

Similar Questions

Heating Elements
How do you replace the surface heating elements?
(Posted by bluebdr1 9 years ago)
Trouble Isolating Element Or Terminal Block Receptacle
One of the two electrodes burned off the 8" element of my Whirlpool Model stove. To trouble isolate...
(Posted by donwill2 9 years ago)
Pre-heating
This stove will pre-heat and then once it reaches the timed countdown it shuts off and won't keep th...
(Posted by gbreuer 11 years ago)
Ask a New Question
Use the box below to post a new question about this Whirlpool product .
Points & Prizes
  • You can earn points for nearly everything you do on HelpOwl.com
  • You can trade in those points for gift cards at leading retailers such as Amazon.com and Walmart
  • It's that simple!
See How it Works
Create a Free Account

Whirlpool Manuals

Find free Whirlpool RF263LXTQ manuals and user guides available at ManualOwl.com. Try out our unique manual viewer allowing you to interact with manuals from directly within your browser!

Whirlpool Reviews

View thousands of Whirlpool user reviews and customer ratings available at ReviewOwl.com.

Contact Information

Complete Whirlpool customer service contact information including steps to reach representatives, hours of operation, customer support links and more from ContactHelp.com.

Scoreboard Ratings

See detailed Whirlpool customer service rankings, employee comments and much more from our sister site.

Whirlpool Recalls

Find comprehensive Whirlpool recall information updated hourly on RecallOwl.com.