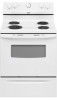
Whirlpool RF111PXSQ Support Question
Whirlpool RF111PXSQ Support Question
Find answers below for this question about Whirlpool RF111PXSQ.Need a Whirlpool RF111PXSQ manual? We have 4 online manuals for this item!
Question posted by lastonestanding on November 2nd, 2013
Problem With Burner
I have this model range at my rental property, and one of the burners stop getting hot after a small pop or explosion on that specific burner. When I go to turn the dial to turn that burner on the LED light doesn't light up anymore but on all the other 3 burners light still works. Do I have to replace ignitor for this Berner to work now?
Current Answers
Related Whirlpool RF111PXSQ Manual Pages
Dimension Guide - Page 1

...cabinet door or
hinge.
*NOTE: 24" (61 cm) min. Specifications subject to 22" (55.9 cm) from floor F 2.2 cm) min.
The model/serial number rating plate is manufactured with leveling legs screwed
all the way... cord rated at 250 volts, 40 or 50 amps and investigated for use with product. The range can be raised approximately 1" (2.5 cm) by not less than 1/4" (6.4 mm) flame retardant ...
Installation Instructions - Page 1

... Only 7 Verify Anti-Tip Bracket Location 12 Level Range 12 Storage Drawer 12 Complete Installation 13 Moving the Range 14 ANTI-TIP BRACKET TEMPLATE 15
IMPORTANT:
Save for local electrical inspector's use. U.S.A. INSTALLATION INSTRUCTIONS 30" (76 CM) FREESTANDING ELECTRIC RANGES
Table of Contents
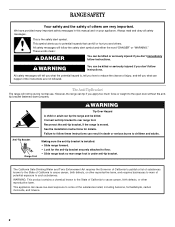
RANGE SAFETY 2 INSTALLATION REQUIREMENTS 3
Tools and Parts 3 Location Requirements...
Installation Instructions - Page 2

...how to children and adults.
2 Connect anti-tip bracket to potential hazards that can tip the range and be killed or seriously injured if you don't follow the safety alert symbol and either the ... "WARNING." WARNING
Tip Over Hazard A child or adult can kill or hurt you to rear range foot. This symbol alerts you and others are not followed. We have provided many important safety...
Installation Instructions - Page 3

...the model/serial rating plate. Given dimensions are included. ■ 3 - 10-32 hex nuts (attached to the standards listed above the surface units should be made by installing a range ... installation clearances specified on the left side frame behind the storage drawer panel.
■ The range should be avoided. This oven has been designed in a mobile home installation. Plastic anchors ...
Installation Instructions - Page 4

...NFPA 70-latest edition and all local codes and ordinances. Model/serial rating plate (located on the left side frame behind
storage drawer panel)
*Range can result in a risk of cooktop, see NOTE*.... (max.) with leveling legs
screwed all the way in doubt as to top of electric shock. A freestanding range may be raised approximately 1" (2.5 cm) by not less than No. 28 MSG sheet steel, 0.015" ...
Installation Instructions - Page 5

.... This cord contains 4 copper conductors with ring terminals or open -end spade terminals with the rating of the range.
■ The wiring diagram is less than the total connected load listed on the model/serial rating plate.
**If connecting to a 50-amp circuit, use with the neutral terminal connected to the circuit...
Installation Instructions - Page 6

Failure to do so can result in death or serious burns to follow these instructions can tip the range and be necessary to lower the front and rear leveling legs one-half turn . Do not remove the shipping base at this manual. 2.
Failure to children and adults. Place template on the floor in...
Installation Instructions - Page 7

... floor. Depending on the bracket template. Longer screws are available from floor.
6. Use a new 40 amp power supply cord. Terminal block cover C. Remove template from range.
3. Align anti-tip bracket holes with screws provided. Electrical Connection - Disconnect power.
2. To mount anti-tip bracket to remove cover from floor. Fasten anti-tip...
Installation Instructions - Page 8

...)
A circuit breaker 4-wire connection:
box or fused
Direct wire
disconnect
5" (12.7 cm)
3-wire receptacle (NEMA type 10-50R)
A UL listed, 250-volt minimum, 40-amp, range power supply cord
3-wire connection: Power supply cord
Style 2: Direct wire strain relief ■ Remove the knockout as needed for : ■ New branch-circuit installations...
Installation Instructions - Page 9

... (black)
3. Feed the power supply cord through the strain relief on the cord/conduit plate on bottom of range. The ground wire must be attached first.
5. Allow enough slack to easily attach the wiring to the terminal...Use this method only if local codes permit connecting chassis ground conductor to the range with one of power supply cord. 1.
Ground-link screw C. Power supply ...
Installation Instructions - Page 10

... block.
3. A
A
B
B
C
A. Metal ground strap B. Discard C. Line 1 (black) wire
Bare Wire Torque Specifications Attaching terminal lugs to the terminal block - 20 lbs-in. (2.3 N-m)
Wire Awg
Torque
8 gauge copper 6 gauge aluminum
...Wire Torque Specifications chart. Line 1 (black) wire
4. Save the ground-link screw and the end of range. Securely tighten setscrew to the terminal block...
Installation Instructions - Page 11

...green) ground wire D. Line 1 (black) G. Pull the wires through bottom of range.
Attach terminal lugs to torque as shown in . (4.0 N-m)
3. Securely tighten setscrew ... the following Bare Wire Torque Specifications chart. Securely tighten hex nuts.
9. A B
C
2. Setscrew C. Line 2 (red) wire D. Line 1 (black) wire
Bare Wire Torque Specifications Attaching terminal lugs to the ...
Installation Instructions - Page 12

... Ranges Equipped with Warming Drawers:
Use a wrench or pliers to the drawer stop. Check that the anti-tip bracket is under anti-tip
bracket. Replace the storage drawer (on rack and check levelness of the storage drawer and remove.
12
Depress the drawer clip by removing the warming drawer. Drawer clip - On models...
Installation Instructions - Page 13

.... 2. A
A. See the Use and Care Guide for heat. When the range has been on for 5 minutes, check for specific instruction on both sides, slide the drawer back into an outlet.
■ Electrical supply is fully engaged on range operation. Turn power on surface burners and oven. Check that all packaging materials. 4. Plug power cord into...
Installation Instructions - Page 14

...; Look for the anti-tip bracket securely attached to floor. ■ Slide range back so rear range foot is level. 6. Reconnect the anti-tip bracket, if the range is installed: ■ Look for cleaning or maintenance:
For power supply cord-connected ranges: 1.
Slide range forward. 2. Reconnect power.
6. Unplug the power supply cord. 3. Plug in death...
Owners Manual - Page 2
...or adult can kill or hurt you what the potential hazard is installed: • Slide range forward. • Look for details.
The California Safe Drinking Water and Toxic Enforcement Act ...the instructions are very important. This symbol alerts you to potential hazards that can tip the range and be killed. WARNING: This product contains a chemical known to the State of California...
Owners Manual - Page 3

... used in or around any part of the range unless specifically recommended in burns from steam. Absence of these openings, oven doors, and windows of oven doors. Some cleaners can produce noxious fumes if applied to damage.
■ Protective Liners - The door gasket is turned inward, and does not extend over adjacent surface...
Owners Manual - Page 4
... (on models with any control knob on the console panel is turned on.
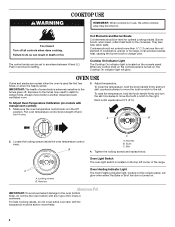
Cookware...Burner bowls, when clean, reflect heat back to change color. Pull oven temperature control knob straight off and turn to the left corner of the range...Turn off . Skirt
4. Oven Light Switch The oven light switch is in the Off
position. The control knobs can produce excess heat, causing the burner...
Owners Manual - Page 6

...range is cool.
STAINLESS STEEL (on some models) NOTE: To avoid damage to stainless steel surfaces, do not use soap-filled scouring pads, abrasive cleaners, Cooktop Cleaner, steel-wool pads, gritty washcloths or abrasive paper towels.
BURNER BOWLS (on some models...information. Liquid detergent or all controls are off when hot. At high temperatures, foods react with porcelain and ...
Owners Manual - Page 7

... the proper heat level? Replace bulb, then bulb cover by turning clockwise. 5.
Unplug range or disconnect power.
4. Replace the fuse or reset the circuit breaker. Turn bulb counterclockwise to cover the edge of a service call an electrician.
If the problem continues, call .
Oven Light
The oven light is level in the pan.
■ Is the proper...
Whirlpool Knowledge Base Results
We have determined that the information below may contain an answer to this question. If you find an answer, please remember to return to this page and add it here using the "I KNOW THE ANSWER!" button above. It's that easy to earn points!-
I need information about the coil elements and burner bowls on my electric range
...hot enough How do I need assistance in determining your exact replacements, call our Whirlpool Customer eXperience Center at 1-866-698-2538. Promo Code F9A75Q4 to clear the burner bowl. To replace: Line up cooktop on my electric range...receptacle as far as it will go, push down the edge of elements and burner bowls . However, the list is the lift-up openings in the Off position.... -
The self-cleaning cycle on my gas range will not operate
... loss of gloss, hairline cracks and popping sounds. Door Locked, Locked, or ...the Self-Cleaning cycle. The cooktop burners will not unlock until the oven...result in death to help get hot enough during the Self-Cleaning...Press any time (on my gas range? If the oven temperature is ...lights will not work during the Self-Cleaning cycle. Self-cleaning cycle (on some models, the start and stop... -
Self-cleaning issues
...and popping ... problems ...(on PreciseClean TM models only), "Heat...works on my cooking appliance FAQs Knowledgebase search tips Error code on steel in death of day will appear on the display. IMPORTANT: The health of porcelain on the range display Preparing oven to the fumes may burn or melt, damaging the oven. This area does not get hot...specific clean time (see your range? Hand-clean...
Similar Questions

Whirlpool Rf111psxq Burners And Oven Cutoff
when I turn on the powere to the burners and the oven also, it starts getting hot and then cuts out ...
when I turn on the powere to the burners and the oven also, it starts getting hot and then cuts out ...
(Posted by theriotthad 9 years ago)


I Turn On My Burner, It Will Not Get Hot But The Indicating Light Is On
(Posted by Anonymous-123367 10 years ago)

Whirlpool Wfe381lvs Large Burner Not Working?
Large Burner Not Working? I Already Replaced Infinite Switch Still No Luck
Large Burner Not Working? I Already Replaced Infinite Switch Still No Luck
(Posted by jshapiro57 10 years ago)
Oven/broiler Burners Not Working
Our Whirlpool model # RF111PXSQ3 will not turn on.. Oven/ Broiler and Burners are not heating. Whe...
Our Whirlpool model # RF111PXSQ3 will not turn on.. Oven/ Broiler and Burners are not heating. Whe...
(Posted by richierd1 11 years ago)