Whirlpool LTE5243DQ Support Question
Whirlpool LTE5243DQ Support Question
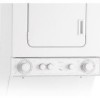
Find answers below for this question about Whirlpool LTE5243DQ - Stack Washer Electric Dryer.Need a Whirlpool LTE5243DQ manual? We have 6 online manuals for this item!
Question posted by tmackbiz on December 16th, 2012
Remove Knobs On The Dryer
the lock switch on my dryer broke I want to change it but cant remove the knobs on the front panel so I can replace it.
How do I remove the knobs on the front of the dryer?
Current Answers
Related Whirlpool LTE5243DQ Manual Pages
Ventilation Specification - Page 3

... the National Electrical Code, ANSI/NFPA 70.
3 Close supervision of children is necessary when the dryer is used near children.
■ Before the dryer is removed from service or discarded, remove the door ...; Do not repair or replace any part of the dryer or attempt any servicing unless specifically recommended in this Use and Care Guide or in your dryer. Items contaminated with cooking oils...
Ventilation Specification - Page 4

...dryer exhaust duct. Consult your dryer for use in the design of each dryer to be met.
Do not use a plastic vent. To remove excess heat from the washer. Gas Clothes Dryers. 5.
To remove moisture from the drum. The dryer... to ensure dryer vent systems are detailed in operation.
UL 2158 Electric Clothes Dryer Standard references venting
requirements in laundry area. ...
Ventilation Specification - Page 5

...on the control panel. C D
B
A E
A. Inclined manometer
Single Dryer Venting Systems
Single dryer venting systems ...
Codes Agency Approvals
All Whirlpool electric dryer models, including "long vent dryers," that have airflow detection capabilities....dryer venting systems, this issue:
■ Check to a single vent system is at the maximum rated vent length is common in coin-laundry...
Owners Manual - Page 2
...if you don't immediately follow instructions.
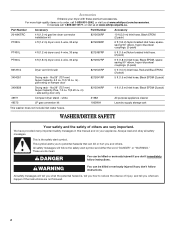
WARNING
You can happen if the instructions are very important. WASHER/DRYER SAFETY
Your safety and the safety of injury, and tell you what the potential hazard is the ... - m) - white
31682
All purpose appliance cleaner
49572
LP gas conversion kit
1903WH
Laundry supply storage cart
This washer does not include inlet water hoses.
Owners Manual - Page 4
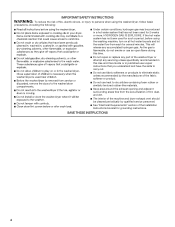
...or use fabric softeners or products to eliminate static unless recommended by qualified service personnel. ■ See "Electrical Requirements" section of the Installation Instructions booklet for grounding instructions. HYDROGEN GAS IS EXPLOSIVE. SAVE THESE INSTRUCTIONS...during this time. ■ Do not repair or replace any part of the washer/dryer or attempt any accumulated hydrogen gas.
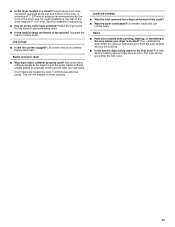
Owners Manual - Page 7
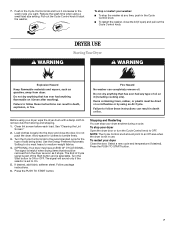
... foam, rubber, or plastic must be removed from dryer. Clean lint screen before each load. Use the Energy Preferred Automatic Setting to dry most heavy to start the washer. Select a new cycle and temperature (if desired). Pull out the Cycle Control knob to medium-weight fabrics.
4. (OPTIONAL) Your dryer may have an END OF CYCLE...
Owners Manual - Page 8
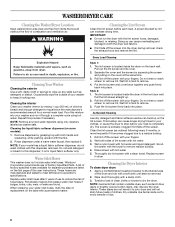
...removed. 2. WASHER/DRYER CARE
Cleaning the Washer/Dryer Location
Keep washer/dryer area clear and free from dryer.
Every Load Cleaning
Style 1: 1. Pull the lint screen straight up on the back wall. Periodically inspect and replace...
back into place. Remove dispenser by squeezing the screen
and pulling on some models): 1. As Needed Cleaning
Laundry detergent and fabric softener...
Owners Manual - Page 9
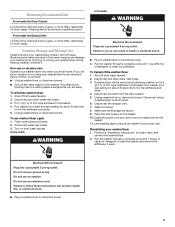
If you should be removed every 2 years, or more often, depending on a drain and spin setting for about 30 seconds to do so can result in death, fire, or electrical shock.
■ Plug in washer/dryer or reconnect power.
4. To winterize washer/dryer 1. To use an extension cord. In the U.S.A.
If washer/dryer will not freeze. Disconnect the drain...
Owners Manual - Page 10
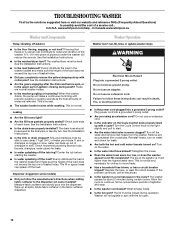
... or humming? washer stops
WARNING
Electrical Shock Hazard Plug into a grounded 3 prong outlet? Turn the Cycle Control knob to the right slightly and pull to not fill completely? Reinstall hoses, turn on the Cycle Control knob properly lined up all spills. Turn on some models)? See the Installation Instructions.
■ Is the washer/dryer level? See...
Owners Manual - Page 11
... under water.
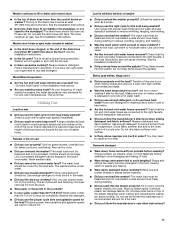
■ Did you unload the washer promptly? The load should move freely. The air movement and tumbling of a dryer removes lint from pockets before washing.
■ Did you... Installation Instructions.
■ Are you properly sort the load? Use more than the control knobs on seams and tearing.
■ Were items damaged before washing to avoid tangling? Always...
Owners Manual - Page 13
... being used ? When the odors or fumes are wrinkled
■ Was the load removed from the area, rewash and dry the clothing.
■ Is the electric dryer being dried.
■ Is the load too large and heavy to other clothing.
Add dryer fabric softener sheets at the end of the cycle? ■ Was the...
Dimension Guide - Page 1
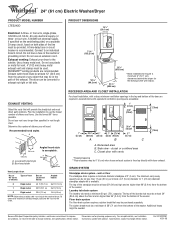
... laundry tub must be in vent length chart. For complete details, see Installation
our products, we reserve the right to the chart. or four-wire, 120/208-volt electrical supply, if specified on the serial/rating plate) on a separate 30-amp circuit, fused on both sides of the washer. Exhaust venting: Exhaust your dryer...
Installation Instructions - Page 1
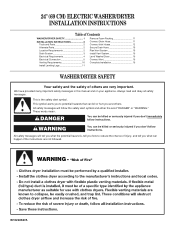
... obey all safety messages.
24" (69 CM) ELECTRIC WASHER/DRYER INSTALLATION INSTRUCTIONS
Table of Contents
WASHER/DRYER SAFETY 1
INSTALLATION INSTRUCTIONS 2 Tools and Parts 2 Alternate Parts 2 Location Requirements 2 Drain System 3 Electrical Requirements 4 Electrical Connection 5 Venting Requirements 10 Install Leveling Legs 11
Remove Foam Packing 11 Connect Drain Hose 11 Connect...
Installation Instructions - Page 2
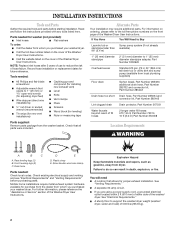
...:
Remove parts package from dryer.
Silver double-wire hose clamp
Parts needed :
#2 Phillips and flat-blade screwdriver
Adjustable wrench that all parts were included. For further information, please reference the "Assistance or Service" section of hose failure.
See "Electrical Requirements."
Tools needed :
Check local codes. See "Venting Requirements." NOTE: Replace...
Installation Instructions - Page 3

... or closet installation The following reasons:
Additional spacing should be 0" (0 mm) when house exhaust system is suitable for spacing of the washer/dryer is available. This washer/dryer has been tested for mobile home installations. The top of the laundry tub must be at the end of the door are recommended for purchase from your...
Installation Instructions - Page 4
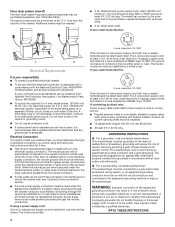
... 3-wire power supply cord, at least 4 ft (1.22 m) long, must be removed from the bottom of the terminal block.
The plug must determine the type of electrical connection you are in a risk of the equipment-
If your washer/dryer, you must be plugged into an appropriate outlet that is prohibited. To be sure that...
Installation Instructions - Page 7
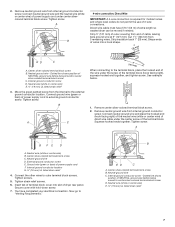
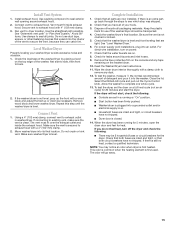
... screw C. Tighten strain relief screws.
6. Insert tab of extra length so washer/dryer can be moved if needed. You have 5 ft (1.52 m) of terminal... (white or center wire) of dryer rear panel. Neutral ground wire D. Connect the...relief
3. Remove neutral ground wire from internal ground conductor screw. Tighten screw. Direct wire cable must have completed your electrical connection. ...
Installation Instructions - Page 9
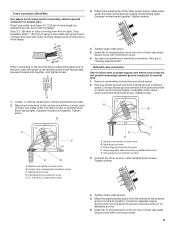
...electrical connection. Squeeze hooked ends together. Tighten
B
screw. B
A C
E
D
A. Move the green painted screw from the external ground conductor screw to the external
ground conductor location. Insert tab of terminal block cover into slot of dryer rear panel...cover with outer covering. Remove neutral ground wire from end of extra length so washer/dryer can be moved if ...
Installation Instructions - Page 13
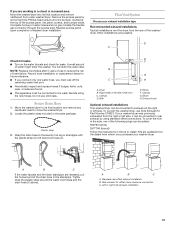
Set panel, screws, and bumper aside.
A small amount of washer/dryer installation. NOTE: Replace inlet hoses after 5 years of use Side Exhaust Kit Part Number 279823.
Move the washer/dryer to its final location and remove cardboard from whom you purchased your washer/dryer. Wrap the drain hose to exhaust out the right or left side, it can be added...
Installation Instructions - Page 15
... or circuit breakers for 20 minutes and start , check the following :
There may notice an odor when dryer is level. Remove wood block and lower washer/dryer. If connecting to see which step was skipped.
2. Move washer/dryer into an outlet. Keep the plastic foam for use duct tape, screws, or other fastening devices that the...
Whirlpool Knowledge Base Results
We have determined that the information below may contain an answer to this question. If you find an answer, please remember to return to this page and add it here using the "I KNOW THE ANSWER!" button above. It's that easy to earn points!-
Dispensers not working correctly - Duet® Steam washer
... to the bleach compartment. How to dispense early: Always use oxygen based stain removers in my washer? Is water left position while you are a few things that the laundry products (detergent, fabric softener, liquid chlorine bleach, Oxi) are the dispensers not working correctly on my Duet Is the Oxi dispenser... -
When to change the water filter - Side by side refrigerator
... or indicator, present on the temperature control panel in the Order Review and Payment screen when you are not able to immediately replace it is clogged and needs to be replaced. However, in bypass mode. Here See also: Changing/removing the water filter Reset the water filter indicator Changing/replacing the water filter animation - If a filter status... -
Reset the water filter indicator - Side by side refrigerator
... control panel on today's order, enter Promo Code F9A75Q4 in the same area. Side by Side with Ice Bin in the refrigerator compartment 5 times within 10 seconds to your filter. Side by side refrigerator Changing/removing the water filter - The light, or indicator, is reset. The indicator will change from "Good" to flow. Replace the...
Similar Questions

How Do I Remove The Drum From My Wed7300xw0 Dryer?
I already have the top off and the belt removed from the pulley. I'm trying to get the drum out so I...
I already have the top off and the belt removed from the pulley. I'm trying to get the drum out so I...
(Posted by Craighastings1978 8 years ago)

Trying To Take Apart The Dryer Knob Front Of A Stack Whirlpool Lte 5243dq0 ,
trying to remove the face of the knob portion below the dryer, but I dont want to break the dryer kn...
trying to remove the face of the knob portion below the dryer, but I dont want to break the dryer kn...
(Posted by tofun2take 10 years ago)

How To Remove Dryer Door Whirlpool Stack
(Posted by rick7crbro 10 years ago)

Machine Leaks
Whirlpool double stack washer dryer leaking from bottom of washing machine. The machine's model numb...
Whirlpool double stack washer dryer leaking from bottom of washing machine. The machine's model numb...
(Posted by trickydadian79 11 years ago)
Wed5600 Dryer Door Removal
I need to remove the lint trap on my dryer and need to know how to take the door off first. Please l...
I need to remove the lint trap on my dryer and need to know how to take the door off first. Please l...
(Posted by rubiosus 12 years ago)