Whirlpool GY399LXUS Support Question
Whirlpool GY399LXUS Support Question
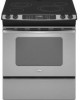
Find answers below for this question about Whirlpool GY399LXUS - 30 Inch Slide-In Electric Range.Need a Whirlpool GY399LXUS manual? We have 4 online manuals for this item!
Question posted by chiefersone on June 5th, 2012
Control Panel Tends To Pop Forward
Often after opening the oven door the entire contro panel "pops off forward away from the glass top itself. I have to push it back and down to "click" it back in place but is not permanent fix. operationally all is fine..
Current Answers
Related Whirlpool GY399LXUS Manual Pages
Owners Manual - Page 3
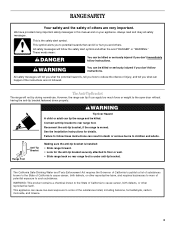
... cause low-level exposure to some of others . Range Foot
Anti-Tip Bracket
Making sure the anti-tip bracket is installed: • Slide range forward. • Look for details.
See the installation ..., or other reproductive harm, and requires businesses to warn of potential exposure to the open door without having the anti-tip bracket fastened down properly. This symbol alerts you what the...
Owners Manual - Page 4

... hot enough to cause burns - among these openings, oven doors, and windows of oven doors.
Children should never be careful to avoid steam burn. Smother fire or flame or use aluminum foil to line surface unit drip bowls or oven bottoms, except as suggested in area where the range is turned inward, and does not extend over...
Owners Manual - Page 5
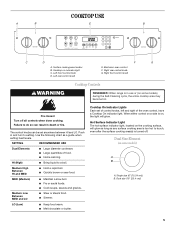
...Push in and turn to a boil. HI (High)
■ Bring liquid to setting. LO (Low)
■ Keep food warm. ■ Melt chocolate or butter.
Cooktop On Indicator Lights Each set anywhere between HI and LO. Dual size (10" [25.4 cm])
5 Cooktop on some models) during the Self-Cleaning cycle, the entire.... ■ Large quantities of the oven control, have a Cooktop On indicator light....
Owners Manual - Page 6
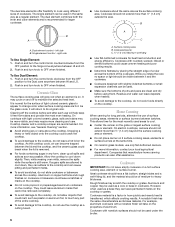
...cooktop, do not slide cookware or bakeware across the bottom of pots and pans are hot. They could break when the lid is on the cooktop or grates. On electric cooktops, canners should....
■ For more than ½" (1.3 cm) outside the area. Dual element control - Push in cookware. As the glass cools, it free from the OFF
position to the Dual zone anywhere between it and the...
Owners Manual - Page 7
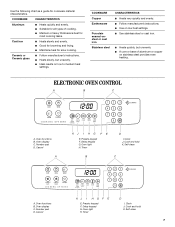
... Number pad D. Oven display C. Oven light H. Cancel
KJ I . Delay keypad G. Oven light H. Timer
D
I H G F E
E. Clock J. Ceramic or Ceramic glass
■ Follow ...heating. ELECTRONIC OVEN CONTROL
A
B
C
A. Self-clean
B
C
A. Presets keypad F. Self-clean
7 Oven functions B. Timer
D
I HG F E
E. Clock J. Cook and hold K. Cancel
A
KJ I . Oven functions B.
...
Owners Manual - Page 8
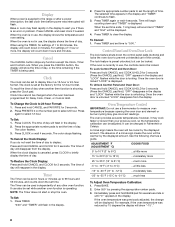
... "TIMER" and "End" will show the time of day to measure oven temperature because opening the oven door and element or burner cycling may give incorrect readings. The time of day... TIMER to "0:00." To Cancel: 1. Control Panel and Oven Door Lock
The lock feature shuts down the control panel pads (buttons) and locks the oven door to the range or after a power interruption, the last clock...
Owners Manual - Page 9
... on the oven door or bottom....30 seconds.
2. 4. Press the PRESETS 0 number pad to certain birds. Each time PRESET 0 is made to the porcelain finish, do not cover entire...place food or bakeware directly on the oven.
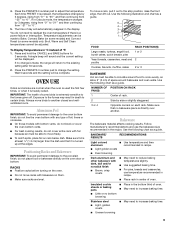
■ Do not move birds to the stop position, raise the front edge, then lift out. Make sure foil is heavily soiled. Positioning Racks and Bakeware
IMPORTANT: To avoid permanent...
Owners Manual - Page 11
... for single or multiple rack baking. If the oven door is displayed). A
B
A. The control will start to the "Positioning Racks and Bakeware"...oven to preheat, unless recommended in pieces well-done
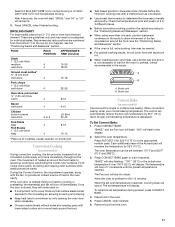
3 or 4
LO Broil 30-45
Fish Fillets
flaky
4
Fish Steaks
1" (2.5 cm) thick
flaky
4
8-12 10-15
*Place up cooking by 25°F (15°C) (even though normal baking temperature is opened...
Owners Manual - Page 14

... settings.
Close the oven door.
2. Press SELF CLEAN. "CLEAN" and "SEt" will flash in longer cleaning and more smoke. Press the PRESETS 0 number pad. If the door is not closed within 30 seconds, the self-cleaning operation will flash in the display.
14 Staining, etching, pitting or faint white spots can be opened. To choose...
Owners Manual - Page 15

..., syrup)
■ Cooktop Scraper: Clean while the cooktop is displayed. Continue rubbing until white film disappears. CERAMIC GLASS (on some models)
Cooktop Scraper Part Number WA906B is set for a delayed clean operation.
When the oven door latches, "LOCK" will become less noticeable. The delay time is still warm. All functions are suggested first...
Owners Manual - Page 16

... spills should be removed. Before replacing, make sure knobs are in range or reconnect power. To Replace: 1. Turn the glass bulb cover in to the first
stop position. 3. Plug in the off position.
CONTROL PANEL
To avoid damage to remove.
3. OVEN DOOR EXTERIOR
Cleaning Method: ■ Glass cleaner and paper towels or nonabrasive plastic
scrubbing pad: Apply...
Owners Manual - Page 17

... failure. Level the range. See the Installation Instructions. See "Control
Lock" section. See "Self-Cleaning Cycle"
section. ■ Has a delay start Self-Clean cycle been set to the proper heat level? Push down onto the hinge arms until door clears hinge arms.
To Replace: 1. Nothing will not operate
■ Is the oven door open? It is completely...
Dimension Guide - Page 1

... shown are for use a 4-wire power supply cord rated at front corners of countertop opening width
29-7/8" (75.9 cm) width*
*30-3/4" (78.1 cm) with ranges. Place level on the oven frame behind the storage drawer panel. If countertop is recommended.
OVERALL DIMENSIONS
30-3/4" (78.1 cm) cooktop width
35-3/4" (90.8 cm) cooktop height with leveling legs screwed all...
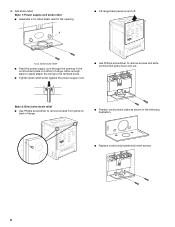
Installation Instructions - Page 3

... is marked for Mobile Home Construction and Safety, Title 24, HUD Part 280). See "Electrical Requirements" section. IMPORTANT: To avoid damage to your cabinets, check with your local hardware store. Mobile Home - Additional Installation Requirements The installation of oven door protrudes 2¹⁄₂" (6.4 cm) beyond the bottom of floor may require longer...
Installation Instructions - Page 4

... or microwave hood combination above the range, follow the instructions provided for new branch-circuit installations (1996 NEC); opening width
F. Nothing located in the line so that the electrical connection and wire size are in doubt as specified on the oven frame behind the storage drawer panel. G. Cabinet door or hinge should not extend into cutout...
Installation Instructions - Page 5

... must be level for Slide-in Ranges Only)
The cooktop sides of opening width is 30" (76.2 cm), no countertop preparation is less than 30" (76.2 cm), adjust...electrical installer determine that the electrical connection and wire size are in range fit over the cutout edge of Power Supply Cord Kit and Circuit Protection
Amps
40 or 50** 50
*The NEC calculated load is required. Place...
Installation Instructions - Page 6

....
6. Install Anti-Tip Bracket
1. NOTE: To place range back up onto the cardboard or hardboard. NOTE: If height adjustment is made when range is moved. Using 2 or more people, stand range back up to loosen the 4 leveling legs. Using 2 or more people to use: floor or wall. Before sliding range into a standing position, put a sheet of...
Installation Instructions - Page 8
... plate and insert screws.
8 Style 1: Power supply cord strain relief ■ Assemble a UL listed strain relief in the opening in the following illustration. 4. Style 2: Direct wire strain relief
■ Use Phillips screwdriver to remove screws and slide cord/conduit plate down and out.
Add strain relief. A
■ Lift range back panel up and off.
Installation Instructions - Page 12
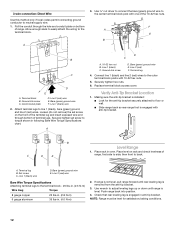
... 1 (black) wire
2. Attach terminal lugs to torque shown in oven. A
D C
A. 10-32 hex nut B. Line 1 (black) wire
D. Bare (green) ground wire F. Terminal lug
4. Place level on bottom
of terminal lugs. A. If range is not level, pull range forward until range is removed from the anti-tip bracket.
3. Push range back into position.
4. Ground-link screw C. Pull the conduit...
Installation Instructions - Page 13

...Slide range back so rear range foot is level.
13 For direct-wired ranges:
WARNING
Electrical Shock Hazard Disconnect power before operating. Disconnect power. 2. Slide range forward. 3. If there is moved. Read "Range... instruction on surface burners and oven. Replace storage drawer. 9. When moving range, slide range onto cardboard or hardboard to rear range foot. See the Use and...
Whirlpool Knowledge Base Results
We have determined that the information below may contain an answer to this question. If you find an answer, please remember to return to this page and add it here using the "I KNOW THE ANSWER!" button above. It's that easy to earn points!-
What are the features on my self-cleaning slide-in electric range?
How do I identify the control panels on my self-cleaning slide-in the illustration below. The range you have some or all of your model. What are the features on my 36" electric cooktop? The locations and appearances of the features shown here may have purchased may not match those of the items listed in electric range? -
What are the control panel features on my 30-inch gas modular downdraft cooktop?
... on specific parts and features quickly, page references from your 30-inch modular downdraft cooktop control panel. To help you find information on my 30-inch gas modular downdraft cooktop? Use it to become familiar with the location and appearance of your Use & Below is a captioned illustration of ... -
What are the parts and features on the control panel of my freestanding ceramic glass electric range?
... working at all of the parts and features listed. What are the control panel features on the control panel of my electric drop-in range? What are the parts and features on my 30-inch gas modular downdraft cooktop? My range is the Control Lockout or Lockout on my electric range? The location and appearance of the features shown here may have...
Similar Questions

Need To Replace Oven Control Panel Top. What Is The Part Number And Cost ? Thank
Need only to replace the control panel top/housing with stainless steel insert. What is the part num...
Need only to replace the control panel top/housing with stainless steel insert. What is the part num...
(Posted by mickle4914c 7 years ago)

Beeping Alarm From Control Panel?
Beeping alarm from control panel, what does it mean?
Beeping alarm from control panel, what does it mean?
(Posted by jtmcgowan7 10 years ago)

Control Panel Freezed
I CANT PROGRAM THE CONTROL PANEL. IS LIKE FREEZED. ALSO THE NUMBERS ARE DESAPPEARING..
I CANT PROGRAM THE CONTROL PANEL. IS LIKE FREEZED. ALSO THE NUMBERS ARE DESAPPEARING..
(Posted by fernandachang 11 years ago)

How Do I Change Out The Control Panel
How do I access the control panel on a whirlpool slide in range for replacement
How do I access the control panel on a whirlpool slide in range for replacement
(Posted by Mgaspard 12 years ago)