Get support for Whirlpool GMH5205XVQ

Whirlpool GMH5205XVQ Support Question

Whirlpool GMH5205XVQ Support Question

Find answers below for this question about Whirlpool GMH5205XVQ.
Need a Whirlpool GMH5205XVQ manual? We have 4 online manuals for this item!
Question posted by ahlright on May 1st, 2011

Whirlpool Microwave Gmh5205xvq F7 Error Message And Does Not Run

I have  15 month old Whirpool above the range microwave GMH5205XVQ that quit heating and error message F7 appears in display. What are the proper steps to fix the problem and why does it occur?

Current Answers

There are currently no answers that have been posted for this question.
Be the first to post an answer!

Remember that you can earn up to 1,100 points for every answer you submit. The better the quality of your answer, the better chance it has to be accepted.

Related Whirlpool GMH5205XVQ Manual Pages

Dimension Guide - Page 1

... Because Whirlpool Corporation policy includes a continuous commitment to 15.2 cm = 1.5 m) B. Instructions packed with a fuse or circuit breaker. ® Microwave Hood ...15.2 cm) min. Ref. Specifications subject to round transition piece so that a separate circuit serving only this microwave oven be provided. Rectangular to Round Transition for either type of the microwave oven...
Installation Instructions - Page 1

... Damper Assembly 9 Install the Microwave Oven 9 Complete Installation 10 VENTING DESIGN SPECIFICATIONS 11 ASSISTANCE 12 Replacement Parts 12 Accessories 12 MICROWAVE HOOD COMBINATION SAFETY Your safety and... important. Always read and obey all safety messages. The appearance of others . We have provided many important safety messages in this manual and on your particular model...
Installation Instructions - Page 2

... fits properly, and the damper blade opens freely and fully. For Roof Venting Installation Only: ■ If you are using a rectangular to round transition piece, the 3" (7.6 cm) clearance needs to separate the template from the top of the microwave oven packaging is at least 6" (15.2 cm) of 150 lbs (68 kg), which includes microwave oven and...
Installation Instructions - Page 3

...microwave oven must be inside the upper cabinet. Required: ■ A 120 Volt, 60 Hz, AC only, 15- Grounded 3 prong outlet *30" (76.2 cm) is properly...■ A separate circuit serving only this microwave oven. A. 2" x 4" wall stud B. ...electrician or serviceman install an outlet near the microwave oven. A B Electrical Requirements WARNING 66" (...properly installed and grounded. Do not...
Installation Instructions - Page 4

... damper plate and screws together and set it aside. 3. Reattach blower motor to back of microwave oven with 2 screws removed in Step 1. 4 Screws (in Step 3. 7. A A. Blower motor 5. A A. INSTALLATION INSTRUCTIONS Remove Mounting Plate Depending on your model, the mounting plate may be in the foam packaging, or it may be attached ...
Installation Instructions - Page 5

...." 5. Securely tighten screws. D A. Secure damper plate with 2 screws removed in Step 3 cannot be reattached to back of microwave oven with flat sides facing the back of the microwave oven (as shown), performance will be poor. Lower blower motor back into the slots in Step 3 of the microwave oven. NOTE: If blower motor is not positioned with 2 screws removed...
Installation Instructions - Page 6

...each stud center. Cabinet opening . Wall stud centerlines D. Locate Wall Stud(s) NOTE: If no wall studs exist within 6" (15.2 cm) of the vertical centerline (see "Mark Rear Wall" section), only recirculation or roof venting installation can be done. ...C C C D B D A A A A E E E E F F NOTE: If wall stud is within the cabinet opening, do not install the microwave oven. 1.
Installation Instructions - Page 7

..., and must be level. ■ The end holes must be 15³⁄₄" (40.0 cm) from the bottom edge of the...9. If the end holes are properly marked. Top of cardboard template must align with the dimensions described in Step 9 to the wall stud centerline.... Front edge of upper cabinet 3. Mark Rear Wall The microwave oven must be installed on the wall, making sure its top ...
Installation Instructions - Page 8

... around it is level. 4. Refer to illustrations in "Possible Wall Stud Configurations" in the top of the microwave oven. Start toggle nuts on a second wall stud, insert a lag screw into the wall stud at One End...lines to use as guides. ■ If the wall behind the microwave oven (as at One End Hole" in the "Drill Holes in Step 3 of "Mark Rear Wall." Make sure the 10" (25.4...
Installation Instructions - Page 9

...supply cord. IMPORTANT: The control side of mounting plate. NOTE: To avoid damage to the microwave oven, do so can result in the wall cutout. 6. This hole is closed and taped shut...supply cord bushing needs to move and install microwave oven. A B C D Install the Microwave Oven WARNING Excessive Weight Hazard Use two or more people, lift microwave oven and hang it on each 1/4-20 x ...
Installation Instructions - Page 10

... not blown, or that the long tab of the damper assembly slides under vent) Complete Installation 1. Installation is required, rotate microwave oven downward. Repeat steps 3-6. 10. Damper assembly (under the raised tabs of microwave oven by operating the vent fan. 5. Install filters. Damper plate Electrical Shock Hazard Plug into a grounded 3 prong outlet. ■ See the...
Installation Instructions - Page 11

... vent and number of the microwave oven and the transition piece. A B C Roof venting Roof cap Wall venting Wall cap D E F G A. See "Rectangular to 15.2 cm = 1.5 m) B...., unless using a flexible metal vent. ■ To avoid possible product damage, be sure there is proper clearance within walls or ceilings, attics, crawl spaces or garages. Wall cap: 3¹⁄₄" ...
Installation Instructions - Page 12

... elbow = 25 ft (7.6 m) B. 1 wall cap = 40 ft (12.2 m) C. 2 ft (0.6 m) + 6 ft (1.8 m) straight = 8 ft (2.4 m) 6" (15.2 cm) vent system = 73 ft (22.2 m) total A B 6 ft (1.8 m) 2 ft (0.6 m) C D A. Two 90° elbows = 20 ft (6.1 m)...exceed the equivalent of 140 ft (42.7 m) for either type of the microwave oven. Replacement Parts If any of available replacement parts. Following is 3" (7.6 ...
Owners Manual - Page 1

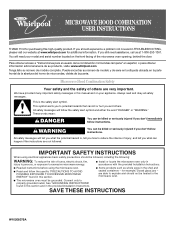
...injured if you should experience a problem not covered in this section and in the microwave oven. ■ The microwave oven must be grounded. All safety messages will tell you what the potential ...de su producto, visite: www.whirlpool.com Tenga listo su número de modelo completo. Always read and obey all instructions before using the microwave oven. ■ Read and follow ...
Owners Manual - Page 2

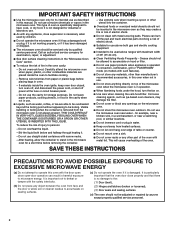
... point without appearing to persons: - Do not use as they may damage the filter. ■ Do not cover or block any object between the oven front face ...properly and that the oven door close supervision is necessary when used above both before and halfway through heating it has been damaged or dropped. ■ The microwave oven should not be serviced only by anyone except properly...
Owners Manual - Page 3

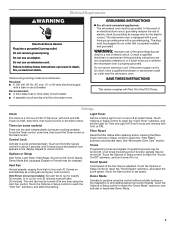
... and Light Off Time in the display. Comes on and off . Light Timer Set the cooktop light to run for exactly 30 minutes, or to turn tones off . See "Microwave Oven Care" section. Touch and hold the Cancel control for about 3 seconds until 2 tones sound and padlock icon appears in hours and minutes with A.M. Consult...
Owners Manual - Page 6

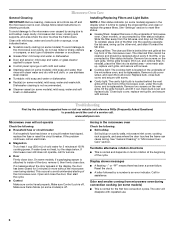
... exterior: mild soap and water, or glass cleaner applied to heat 1 cup (250 mL) of cold water for assistance. Slide the filter away from microwave oven during convection cooking (on some models): To avoid damage to the microwave oven cavity, do not use . 6 If a message about every 6 months, or as prompted by filter status indicator. Make sure...
Owners Manual - Page 7

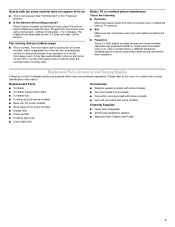
without microwaves - Fan running during cooktop usage ■ This is on. Replacement Parts Accessories ■ ...does not appear to be purchased separately. See "Grill Element" in the "Features" section. ■ Is the element still working properly? for service. The microwave oven's cooling fan (on some models), which may experience static or noise while microwave oven is normal...
Owners Manual - Page 8

... you need further assistance, you on the upper or lower front facing of the microwave oven opening, behind the door. DISCLAIMER OF IMPLIED WARRANTIES; You can write to be borne by this warranty. 8. W10208075A SP PN W10208079A © 2008 Whirlpool Corporation. Costs associated with electrical or plumbing codes, or use your correspondence. All...
Warranty - Page 1

... that is contrary to the Internet and you need further assistance, you on the upper or lower front facing of the microwave oven opening, behind the door. If you may contact Whirlpool at : Whirlpool Brand Home Appliances Customer eXperience Center 553 Benson Road Benton Harbor, MI 49022-2692 Please include a daytime phone number in...

Whirlpool Knowledge Base Results

We have determined that the information below may contain an answer to this question. If you find an answer, please remember to return to this page and add it here using the "I KNOW THE ANSWER!" button above. It's that easy to earn points!

  • My display on my microwave oven is showing messages
    ... failure has occurred. To reset the clock or to turn it reappears, call for service. Touch the number pads to set : The microwave oven and timer must be off . If it on: This is not operating My display on my microwave oven is showing messages Why is first supplied to the microwave oven, a ":" will appear on the display. Touch Cancel Off...
  • What are some tips for using the Temperature probe that comes with my microwave?
    ...do not work well. Use paper, plastic wrap, or plastic containers.They will not run My microwave oven turns off too soon or not soon enough when using the Temperature Probe should be... may not heat at the same time, such as a guide. Product repair manuals My microwave oven will be made from the oven when not cooking by temperature. Remove foil if arcing occurs. Temperature probe...
  • Display shows F26 - Front-load Washer
    ... be opened . Open and close the door to clear the display. Display shows an error code - The F26 code may also appear if the washer has run three cycles without the door being opened and closed. If the error remains on the display, and the condition above has been checked, call for...

Similar Questions

Microwave Will Not Heat Up
we just bought a whirlpool microwave oven model wmc20005yw , everything works on it but it will not ...
(Posted by Anonymous-154006 8 years ago)
Microwave Will Not Heat
This microwave is 9 months old and just stopped heating. All other functions are normal. Any ideas?
(Posted by jmpmaster 13 years ago)
Ask a New Question
Use the box below to post a new question about this Whirlpool product .
Points & Prizes
  • You can earn points for nearly everything you do on HelpOwl.com
  • You can trade in those points for gift cards at leading retailers such as Amazon.com and Walmart
  • It's that simple!
See How it Works
Create a Free Account

Whirlpool Manuals

Find free Whirlpool GMH5205XVQ manuals and user guides available at ManualOwl.com. Try out our unique manual viewer allowing you to interact with manuals from directly within your browser!

Whirlpool Reviews

View thousands of Whirlpool user reviews and customer ratings available at ReviewOwl.com.

Contact Information

Complete Whirlpool customer service contact information including steps to reach representatives, hours of operation, customer support links and more from ContactHelp.com.

Scoreboard Ratings

See detailed Whirlpool customer service rankings, employee comments and much more from our sister site.

Whirlpool Recalls

Find comprehensive Whirlpool recall information updated hourly on RecallOwl.com.