
Whirlpool GGW9250PW Support Question
Whirlpool GGW9250PW Support Question
Find answers below for this question about Whirlpool GGW9250PW.Need a Whirlpool GGW9250PW manual? We have 1 online manual for this item!
Question posted by tasully on April 22nd, 2013
Whirlpool Duet Ggw9250pw
On a Whirlpool duet mod# GGW9250PW no power at control panel interior light is working. If I unplug machine for an hour or two power comes back to control panel for 1 or 2 loads then I have to unplug again??? any idea what might cause this???
Current Answers
Related Whirlpool GGW9250PW Manual Pages
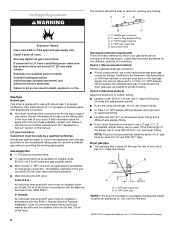
Use and Care Guide - Page 3
...to potential hazards that can be followed to minimize the risk of fire or explosion, or to light any appliance. • Do not touch any other flammable vapors and liquids in this manual must ...flexible gas connector, when used, must be performed by
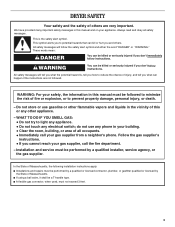
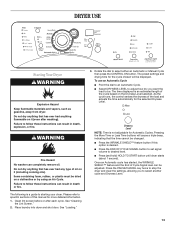
the State of Massachusetts. DRYER SAFETY
Your safety and the safety of others .
Do not store or use any phone in this or any...
Use and Care Guide - Page 4
..., and dirt.
s Do not dry articles that could cause a load to cooking oils in the dryer.
s Keep area around the exhaust opening and adjacent
surrounding areas free from service or discarded, remove the door to the weather.
s The interior of local codes, with controls. SAVE THESE INSTRUCTIONS
IMPORTANT: The gas installation must be exposed...
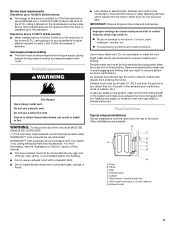
Use and Care Guide - Page 5
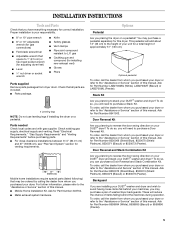
... "Assistance or Service" section of this manual. Proper installation is your DUET® dryer? Options
Pedestal
Are you placing the dryer on a pedestal. To order, call the dealer from whom you purchased your dryer or refer to avoid having loose items fall behind the machines during operation.
Check existing gas supply, electrical supply and venting...
Use and Care Guide - Page 6
... installation
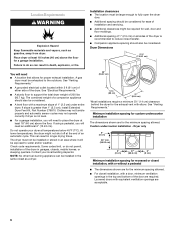
The dimensions shown are acceptable.
6 See "Venting Requirements." Minimum installation spacing for a garage installation. Installation clearances s The location must be exposed to place the dryer at temperatures below 45ºF (7ºC). s Additional clearances might not shut off at least 18 inches (46 cm) above the floor.
See "Electrical Requirements." The...
Use and Care Guide - Page 7

... installed and grounded in the top of the cabinet are in doubt as the dryer exhaust opening (such as a nearby window) should be grounded. s Special provisions..."Tools and Parts" section for the minimum spacing allowed. closet or confined area
Electrical Shock Hazard Plug into the dryer. The plug must conform to follow these instructions can result in .2 (155 cm2)
0" 31½" 0" (0...
Use and Care Guide - Page 8
...between dryer pipe ...dryer pipe
*NOTE: If the dryer...dryer in the door well of the dryer.
8
The location should use larger tubing. s Your dryer must be installed within six (6) feet (1.8 m) of your gas dryer... dryer....dryer gas pipe, as needed to the dryer...dryer...dryer has a ³⁄₈" male pipe thread.
Gas Type Natural gas: This dryer...dryer to flare adapter fitting C. ¹&#...
Use and Care Guide - Page 9
...at the B.T.U. Dryer B. Gas supply pressure testing s The dryer must not be connected into the interior of the duct. WARNING: To reduce the risk of fire, this dryer MUST BE
... requirements Elevations up to 10,000 ft (3,048 meters): s The design of this dryer is certified by calling Whirlpool Parts and Accessories. Vent length necessary to seal all governing codes and ordinances. Plan ...
Use and Care Guide - Page 10
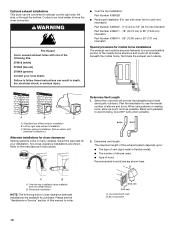
Standard rear offset exhaust installation
B. Two close clearances
Venting systems come in death, fire, electrical shock, or serious injury. A
B
A. Bend vent gradually to the manufacturer's instructions. Determine vent length. Louvered hood style B. WARNING
Fire Hazard Cover unused exhaust holes with dryer vent to wall vent mismatch):
Part Number 4396037 - 0" (0 cm) to 18" (45...
Use and Care Guide - Page 11
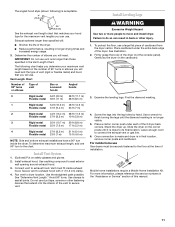
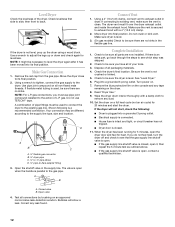
... Find the diamond marking.
4. Screw the legs into the interior of 90° turns or elbows you will need . Slide the dryer on the number of the vent to exhaust hood.
Use caulking...at the time of the dryer (not the console panel). See "Determine Vent Length." Use clamps to move and install dryer. Examine the leveling legs. Once connection is made and dryer is close to seal ...
Use and Care Guide - Page 12
...-detection solution.
Turn power on the dryer.
8. Correct any tape... remaining on .
7. Your connection may be sure there are no kinks.
s Electrical supply is not level, prop up or down and check again for 5 minutes, open . If you have all packaging materials.
4. A.
Wipe the dryer drum interior thoroughly with a 4" (10.2 cm) clamp.
2. If the dryer...
Use and Care Guide - Page 13
...estimated length of the load and adjusts the time automatically for Automatic Cycles. See "Cleaning
the Lint Screen." 2. The time displayed is desired. Place laundry into dryer and shut door....
s Select DRYNESS LEVEL to adjust how dry you to select either an Automatic or Manual Cycle then press the CONTROL ON button. Pressing...
Use and Care Guide - Page 14
... SHIELD™ feature, and the End of your load. Follow package instructions. s Remove the load from where the cycle was interrupted, if you to press the Control
On button before restarting the dryer.
The control is locked when a single beep is heard and the Control Locked status light is the actual drying time. If an Automatic Cycle...
Use and Care Guide - Page 15
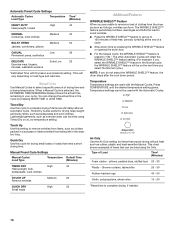
... this cycle to the load you are preset when you are drying (see Automatic Preset or Manual Preset Cycle Settings charts).
s In an Automatic Cycle, if a wet item has not been detected
within 10 minutes, the Sensing light will turn on the control panel show Cycle, Temperature, and End of 2 hours), when Pause/Cancel is...
Use and Care Guide - Page 16
... Air Only setting for drying small loads or loads that require drying without heat such as bedspreads and work clothes
TOUCH UP Remove wrinkles
Medium
20
QUICK DRY Small loads
High
23
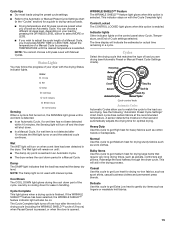
Additional Features
WRINKLE SHIELD™ Feature When you do not select the WRINKLE SHIELD™ feature, the dryer stops after an Automatic Cycle...
Use and Care Guide - Page 17
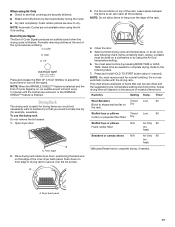
...for normal tumbling. A
A. Front edge
2. Place drying rack inside dryer drum, positioning the back wire on top of the inner dryer back panel. Leave space between the items so air can be dried on ...(no heat)
*(Minutes) Reset time to adjust the sound level or turn off the signal. Dryer back panel
17 Press and release the END OF CYCLE SIGNAL to complete drying, if needed to complete drying...
Use and Care Guide - Page 18
...IMPORTANT: s Do not run the dryer with hot water.
5. Cleaning the Dryer Interior
To clean dryer drum 1. Apply paste to your ...Laundry detergent and fabric softener residue can increase drying time. Place dryer at least 18 inches (46 cm) above the floor for your load is hard to do so can result in dryer. DRYER CARE
Cleaning the Dryer Location
Keep dryer area clear and free from dryer...
Use and Care Guide - Page 19
...'t been used for 5-10 minutes.
Dry smaller loads so lint can cause lint-attracting static electricity.
Unplug dryer or disconnect power. 2. Make sure leveling legs are not drying satisfactorily
s Check the following : Was the drying cycle interrupted by color. To change the drum light 1. Remove the cover. 3. Press (and hold moisture (cottons). Clothes are secure...
Use and Care Guide - Page 20
... order replacement parts, we recommend that you only use FSP® factory specified parts.
Sort light colors from noncolorfast items.
Items shrinking
s Was the dryer overloaded? Check the manufacturer's care label. Loads are gone from dryer at :
Customer Interaction Center Whirlpool Canada Inc. 1901 Minnesota Court Mississauga, Ontario L5N 3A7
Please include a daytime phone number...
Use and Care Guide - Page 21
...-253-1301. You must be found by checking the "Assistance or Service" section or by a Whirlpool designated service company. Service must provide proof of products not approved by Whirlpool.
5. Service calls to repair or replace appliance light bulbs, air filters or water filters. Those consumable parts are excluded from warranty coverage.
3. IMPLIED WARRANTIES...
Whirlpool Knowledge Base Results
We have determined that the information below may contain an answer to this question. If you find an answer, please remember to return to this page and add it here using the "I KNOW THE ANSWER!" button above. It's that easy to earn points!-
Display shows F25 or F06 - Front-load washer
... Instructions for details; If Pause/Cancel does not work: Unplug the washer or disconnect the power for service. Front-load washer Display shows F26 - Display shows F25 or F06 - Plug in the search tool below. Duet HT ® & Duet shipping bolt Duet Sport TM Front-load washer Display shows F22 or FdL - shipping bolt... -
Removing odors from a front-load washer with the Clean Washer cycle (on control panel)
... displayed after each cycle to allow for washers with the Clean Washer cycle (on control panel)? Repeat the cleaning procedure monthly or when the Clean Washer Reminder light illuminates (on my Duet® How do I remove odors from a front-load washer with Clean Washer cycle Affresh washer cleaner method (recommended) NOTE: Completely read... -
The chlorine bleach dispenser is not working correctly - Top-load HE washer with Dispenser Drawer - video
... operate. Front-load Duet washer The fabric softener dispenser is not working correctly - If using an oxi laundry boost product or color-safe bleach, add it to the liquid chlorine bleach dispenser. Top-load HE washer with Dispenser Drawer - Top-load HE washer with Dispensers in Corners Dispenser not working correctly - Front-load Duet Sport washer...
Similar Questions


What Size Is My Whirlpool Duet Dryer Ggw9250pw3
(Posted by Amitkvizcai 9 years ago)

Whirlpool Duet Gas Dryer How To See If Ignitor Out Ggw9250pw3
(Posted by drboGA 9 years ago)

Duet Gas Dryer Has A 10 Watt Bulb, Will A 25 Watt Bulb Work In It
(Posted by xevenk 10 years ago)

Have Power To Outlet. Cord To Dryer Is Good. When I Push Power Button No Light
(Posted by norman4953 11 years ago)