
Thermador T36IT800NP Support Question
Thermador T36IT800NP Support Question
Find answers below for this question about Thermador T36IT800NP.Need a Thermador T36IT800NP manual? We have 2 online manuals for this item!
Question posted by stevehelms99 on April 5th, 2017
Custom Wood Door Panel Sizes
what is the size of the wood door panels need to be on T36IT800NP?
Current Answers


Related Thermador T36IT800NP Manual Pages
Use and Care Manual - Page 3

... 6 Getting to know your appliance 7 2 door model 7 3 door model 8 Controls 9 Switching the appliance on 10 Operating tips 10 Set the language 10 Setting the temperature unit 10 Setting the temperature 10 Refrigerator compartment 10 Freezer compartment 10 Special functions 11 ...Eliminating minor faults yourself 19 Appliance 19 Ice maker 20 Customer service 21 Warranty 21
3
Use and Care Manual - Page 4
... of explosion!
■ Never use and maintain the appliance. Otherwise, parts and door seal will become porous.
■ Never cover or block the ventilation openings for the...satisfy the safety requirements. Repairs may be replaced by the manufacturer, customer service or a similarly qualified person only. Leaking refrigerant may explode!
■ Never put the user at considerable risk...
Use and Care Manual - Page 10
...off .
, CAUTION:
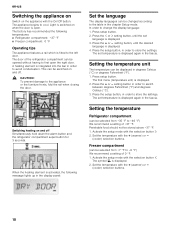
To prevent damage to +46 °F) We recommend a setting of +37 °F. The door of 0 °F. 1. The set temperature is displayed. 3.
Set the temperature with the @ (warmer) or ...We recommend a setting of the refrigerator compartment can be switched on the appliance with the On/Off button. In order to the table in the display panel:
Set the language
The display ...
Use and Care Manual - Page 12

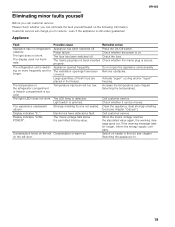
... in order to store the setting. Remedial action Press the alarm button and close the door. The refrigerator compartment is the ideal storage location for ready meals, cakes and pastries, preserved food, ... at the factory in the fascia. Food which the function was switched on.
The display panel indicates the symbol SUPER¾ and the compartment for approx. 6 hours.
The display goes...
Use and Care Manual - Page 19
...
ing on more frequently and for advice even if the appliance is on the left door. Remove obstacles.
The temperature in the freezer.
The LED lamp is not sealed. ... plug is switch-
Call customer service.
Seal strongly smelling food (see chapter Switching the appliance on the rail Condensation of fresh food are placed in the refrigerator compartment or freezer compartment is...
Use and Care Manual - Page 20
...off tap fully.
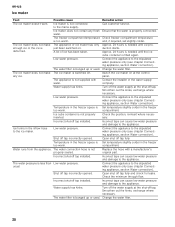
Turn off the water supply at the control panel. en-us Ice maker
Fault
Possible cause
Remedial action
The ice... hours is bunged up or used . The water filter is needed until ice production starts. Change the water filter.
Water supply ...container is too warm.
Water runs from the appliance. Call customer service.
any fresh Ensure that the water is less than...
Installation Manual - Page 4

... 27
Preparing to connect the water 27
Connecting the water to the door panel (freezer compartment 22
11. Aligning the base panel 18
3. Attaching the adjusting rail to the door panel (refrigerator compartment 20
9. Loading the appliance door 19
6. Attaching the fixation strips to the door panel (freezer compartment 21
10. Pushing the appliance into the installation enclosure 15...
Installation Manual - Page 5

... are intended for local inspector's use by a qualified service technician. Due to the weight and size of a local code: In the U.S.A., in accordance with the Canadian Electric Code C22... to improper installation is the responsibility of personal injury or damage to Consumer - Keep doors closed until the appliance is required. TWO PEOPLE ARE REQUIRED FOR PROPER INSTALLATION. Be...
Installation Manual - Page 6

...
Minimum thickness of the side panel are many different installation options. The side panel must be connected firmly to prevent damage if the doors are limited only by -Side Installation if...the design of the appliance is square and the proper size. During installation ensure that the installation enclosure is visible, a side panel must be used. These are opened at the end of...
Installation Manual - Page 7

...area must be flat and level. If the installation enclosure is strongly recommended the top panel of the niche be attached securely to the floor or the wall by suitable means... properly, the floor must be levelled properly. It is important to tilt forwards when the appliance door is always a firm connection between the installation enclosure and back wall! Installation
, WARNING:
Do ...
Installation Manual - Page 10

... Operating instructions Installation kit
Optional accessories
Heater Kit for standard height door panels without further preliminary work. Tools
Cordless screwdriver Torx bit T20 and T30 + magnetic holder Torx screwdriver T20 5/16" (8 mm) hex nut driver Wood drills in different sizes Thin (max. 1/16" (1.5 mm)), suitable material to protect the floor from...
Installation Manual - Page 12

...horizontally. Special installation
This symbol indicates that additional steps need to the appliance".
Door limitation pin, see "Adjusting the door opening angle".
1.
Note: Always use the appliance ... damage to the appliance! Note:
Do not raise up the appliance via the side panels.
Risk of transportation (trolley, lifting truck or hand).
2.
Transport the appliance to...
Installation Manual - Page 16

... been designed for the following total thickness of door panels: 3/4" (19 mm) 11/2" (38 mm) Always take the weight off by....
The mark (a) attached at the back.
Unscrew the feet at a height of the panel fronts which are to comply with the mark on the door.
When adjusting the heightadjustable feet, proceed gradually: Always alternate between left and right, etc....
Installation Manual - Page 19

...Removing the positioning aid
Unscrew the positioning aid from customer service as possible. Loading the appliance door
When attaching the door panels, it is always shorter than the thickness of the door panel.
To prevent damage, protect surfaces of one large door. 3. Open the appliance door. 2. Preparing the door panels
Important note:
When performing any work step can be...
Installation Manual - Page 20

... pre-assembled for the many different design options of the door panel. 5. Attaching the fixation strips to the door panel (refrigerator compartment)
1. Determine and mark the centerline of door panels. Transfer the middle drill holes along the marks. Hang the door panel on the adjusting rail tightly.
3. Align the door panel with at
least 6 screws. Screw on the double threaded...
Installation Manual - Page 21

... the 2 nuts and remove the adjusting rail. 3. Mark this amount A on the rear of the door panel. 5. 4. Apply the fixation strip and mark out the holes. 8. Pre-drill the holes. 9. Determine and mark the centerline of the door panel. 4. Put on the adjusting rail tightly.
10. Mark the drill holes. 6. Screw on the adjusting...
Installation Manual - Page 22

.... Transfer the middle drill holes along the outer edge of the gap continuously. Attaching the fixation strips to the vertical marks.
7. Hang the door panel on the fixation strips.
3. Attaching the door panel (refrigerator compartment)"). 1. Align the door panel with the double threaded bolts
(Torx screwdriver). Always screw into the best load-bearing material of the...
Installation Manual - Page 23

Attaching the door panel (refrigerator compartment)
Note: Now attach the furniture handles which are screwed from the appliance
door. Lower door panel and push the fixing brackets down over the double threaded bolts (1.).
5. Re-examine the dimensions of the open door panel with your hand.
3. Tighten the bracket screws to fix the depth alignment.
9. Hang the door panel with the adjacent...
Installation Manual - Page 24

... the adjacent fronts. Insert removed fixing brackets (a) into the adjusting rails (b) on the door panel.
6. If required, correct.
8. Correct by gently tapping the edge of the door.
3. Close the door and check the side alignment.
Close the door and check that the depth of the gap continuously.
7. Remove the fixing brackets (a) from behind! 1. Tighten the...
Installation Manual - Page 25

... lower brackets (Installation kit). Predrill holes in the wooden screw. 5. Screw in the door panel! 1. Tighten the screw.
14. Attach the cover strips (a) & (b) on the width and the design of the door. The cover can be screwed to the door.
25 Push the bracket over the screw. 3. This will fix the side alignment of...
Similar Questions

Wood Panels
Customer wants to put wood panels on the T36It800NP what size should they be?
Customer wants to put wood panels on the T36It800NP what size should they be?
(Posted by jbneubauer 1 year ago)

Freezer Door Does Not Close Tight
freezer door does not close tight - there is a plastic gadget inside that prevents door closing - it...
freezer door does not close tight - there is a plastic gadget inside that prevents door closing - it...
(Posted by susanclark999 3 years ago)
I Need The Part Numbers For The Refrigerator Doors Please
(Posted by aerikson 8 years ago)

Bottom Freezer Panel
I have 2 pieces for the bottom freezer panel ready. Is there still a connect strip available to put ...
I have 2 pieces for the bottom freezer panel ready. Is there still a connect strip available to put ...
(Posted by Hiline2 10 years ago)

How To Install Finger Guard On Refrigerator Door
how to install finger guard on refrigerator door
how to install finger guard on refrigerator door
(Posted by nbrubenstein 12 years ago)