Get support for Singer 9960 Quantum Stylist

Singer 9960 Quantum Stylist Support Question

Singer 9960 Quantum Stylist Support Question

Find answers below for this question about Singer 9960 Quantum Stylist.
Need a Singer 9960 Quantum Stylist manual? We have 2 online manuals for this item!
Question posted by kelsydan1 on May 15th, 2023

Why Is My Singer Quantum Stylist 9960 Stuck In Reverse Sewing

The person who posted this question about this Singer product did not include a detailed explanation. Please use the "Request More Information" button to the right if more details would help you to answer this question.

Current Answers

Answer #1: Posted by SonuKumar on May 15th, 2023 10:04 PM
This answer was accepted by the poster of the original question.
SonuKumar

Member since:
May 9th, 2021

Points: 16,621,300
1,100
points
There are a few reasons why your Singer Quantum Stylist 9960 might be stuck in reverse sewing. Here are some possible causes and solutions:

The reverse lever is stuck. This is the most common cause of a sewing machine getting stuck in reverse. To fix this, try gently wiggling the reverse lever back and forth. If it doesn't move, you may need to disassemble the machine and clean or lubricate the reverse lever mechanism.

The feed dogs are raised. The feed dogs are the small teeth that move the fabric through the machine. When they're raised, the machine can't sew in either direction. To lower the feed dogs, look for a lever or button on the front of the machine. Once the feed dogs are lowered, you should be able to sew in both directions again.

The bobbin case is not inserted correctly. The bobbin case is the small metal part that holds the bobbin thread. If it's not inserted correctly, the machine can't sew in either direction. To insert the bobbin case, follow the instructions in your sewing machine manual.

The bobbin thread is tangled. If the bobbin thread is tangled, it can prevent the machine from sewing in either direction. To fix this, remove the bobbin case and carefully untangle the thread. Then, reinsert the bobbin case and try sewing again.

The machine is not threaded correctly. If the machine is not threaded correctly, it can't sew in either direction. To thread the machine, follow the instructions in your sewing machine manual.

The machine is dirty or damaged. If the machine is dirty or damaged, it can cause problems with sewing. To clean the machine, follow the instructions in your sewing machine manual. If the machine is damaged, you may need to take it to a sewing machine repair technician.

If you've tried all of these things and your machine is still stuck in reverse, you may need to take it to a sewing machine repair technician.


Please respond to my effort to provide you with the best possible solution by using the "Acceptable Solution" and/or the "Helpful" buttons when the answer has proven to be helpful.

Regards,
Sonu
Your search handyman for all e-support needs!!

Answer #2: Posted by HelpHero on May 16th, 2023 1:45 AM
HelpHero

Member since:
September 3rd, 2022

Points: 523,380
100
points
If your sewing machine is stuck in reverse, it could be due to a few reasons. Here are some things that you can check:

1. Check to make sure that the Reverse Stitch button is not stuck or pressed in while you are sewing forward. If it is, press it again to release it and try sewing forward.

2. Check the stitch length settings - if the stitch length is set to 0, your machine will sew in reverse. Try increasing the stitch length to see if this releases the reverse setting.

3. Check the foot pedal - sometimes, the foot pedal can get stuck in reverse or cause the machine to sew in reverse. Try unplugging the foot pedal, then plug it back in and see if the problem resolves.

4. Check the machine's mechanical parts - sometimes, there may be a mechanical issue with the machine's gears or levers that causes it to sew in reverse. If this is the case, it may require a professional repair.

If these solutions do not resolve the issue, I would recommend taking your Singer Quantum Stylist 9960 to a certified Singer repair center to have them take a closer look and identify the problem. I hope this helps!


I hope this is helpful? PLEASE "ACCEPT" and mark it "HELPFUL" to complement my little effort. Hope to bring you more detailed answers.

Helphero
Answer #3: Posted by Aslam1111 on May 16th, 2023 6:49 AM
Aslam1111

Member since:
May 4th, 2023

Points: 1,300
100
points
If your Singer Quantum Stylist 9960 sewing machine is stuck in reverse sewing mode, it could be due to a few different reasons:


1. Stitch length selector set to "0": If the stitch length selector is set to "0", the machine will sew in reverse. Try adjusting the stitch length selector to a higher number to see if this resolves the issue.


2. Faulty reverse button: If the reverse button is stuck or faulty, it may cause the machine to sew in reverse continuously. Try pressing the reverse button a few times to see if it becomes unstuck. If the button is faulty, you may need to replace it.


3. Mechanical issue: A mechanical issue with the machine may also cause it to get stuck in reverse sewing mode. In this case, you may need to take the machine to a professional for repair.


4. Software or firmware issue: It's possible that there could be a software or firmware issue with the machine. Try resetting the machine to its default settings by referring to the instruction manual.


If none of these solutions work, it's best to take the machine to a Singer authorized dealer or a professional sewing machine repair shop for further diagnosis and repair.

Related Singer 9960 Quantum Stylist Manual Pages

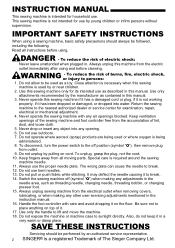
Instruction Manual - Page 2

.... 2. SAVE THESE INSTRUCTIONS Servicing should always be used by the manufacturer as described in the needle area, such as a toy. INSTRUCTION MANUAL This sewing machine is a registered Trademark of The Singer Company Ltd. Read all moving parts. Keep ventilation openings of lint, dust, and loose cloth. 5. Keep fingers away from the accumulation of...
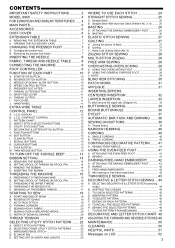
Instruction Manual - Page 3

... H. PREPARING TO THREAD MACHINE 16 B. SEWING HEAVY FABRIC 20 F. Thread Shank 39 NARROW HEMMING 40 CORDING 40 A. FREE-HAND EMBROIDERY 42 D. CONTENTS IMPORTANT SAFETY INSTRUCTIONS 2 MODEL 9960 4 FOR EUROPEAN AND...AUDIBLE BEEP 13 BOBBIN SETTING 14 A. WINDING THE BOBBIN 14 D. MIRROR/REVERSE STITCH 22 D. Quilting 27 C. NOTE 29 BLIND HEM STITCHING 30 PATCH ...
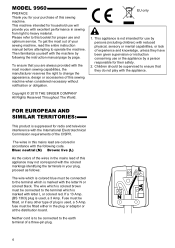
Instruction Manual - Page 4

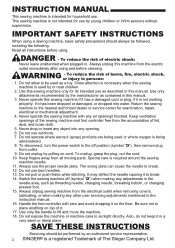
...SINGER COMPANY All Rights Reserved Throughout The World. The wire which is colored brown must be connected to operate the machine. Children should be fitted either in accordance with the colored markings identifying the terminals in sewing from light to this booklet for your sewing machine... the earth terminal of this sewing machine. MODEL 9960 PREFACE Thank you for proper use...
Instruction Manual - Page 8

...clamp screw. 3. FABRIC, THREAD AND NEEDLE TABLE Select size of the right type and size for better sewing results. 8 Turn the hand wheel toward you until the needle is at its highest point. 2. Place ...Sweatshirt, Swimwear, Double Knit, Polyester Sweater Knit 2001 green shank Leather 2032 Leather Use a Singer brand needle for the fabric to be sewn. Do not use the bent or blunt needle....
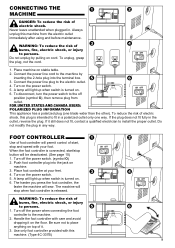
Instruction Manual - Page 9

... in any way. Turn off the power switch. (symbol O) 2. Never leave unattended when plugged in the outlet, reverse the plug. If it . 3. A lamp will sew. The harder you press the foot controller, the faster the machine will light up when switch is turned on cord. FOR UNITED STATES AND CANADA USERS: POLARIZED PLUG...
Instruction Manual - Page 10

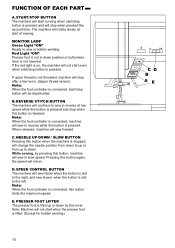
... the red light is on, the machine will sew faster when the button is slid to the right, and sew slower when the button is pressed. When released, machine will return. Pressing this button is pressed and stop button is slid to sew or bobbin winding. The machine will sew in reverse at start /stop when this button...
Instruction Manual - Page 13

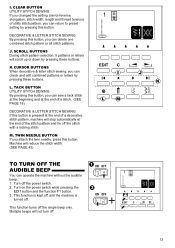
... attach the twin needle, press this button. CLEAR BUTTON UTILITY STITCH SEWING If you changed the setting (mirror/reverse, elongation, stitch width, length and thread tension) of the stitch pattern and tie off until the machine is pressed at the end of utility stitch pattern, you can check and edit combined patterns or...
Instruction Manual - Page 19

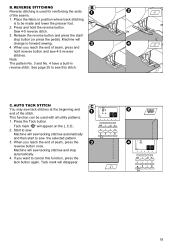
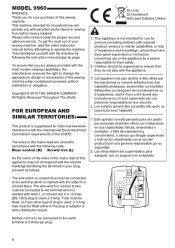
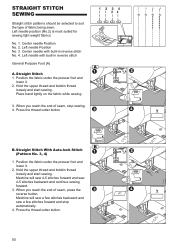
... stitches and stop button (or press the pedal). Place the fabric in reverse stitch. When you reach the end of seam, press the reverse button once. Machine will disappear. 19 Press and hold reverse button and sew 4-5 reverse stitches. AUTO TACK STITCH You may sew tack stitches at the beginning and end of the seams. 1. Start to...
Instruction Manual - Page 25

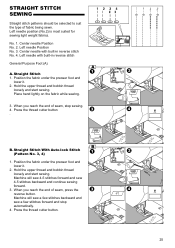
... presser foot and lower it . 2. Machine will sew a few stitches backward and sew a few stitches forward and stop sewing. 4. Press the thread cutter button. 25 Left needle position (No.2) is most suited for sewing light weight fabrics. Straight Stitch 1. Machine will sew 4-5 stitches forward and sew 4-5 stitches backward and continue sewing forward. 3. Hold the upper thread...
Instruction Manual - Page 26

...into the presser bar. 5. No. 5 Basting Stitch Darning/Embroidery Foot A. BASTING When this as many times as you need to sew. Slide the plastic attaching head from shifting, insert dress pins crosswise to right so that it . 2. BASTING You can baste a ... left to the basting position. B. Note: To prevent the fabric layers from your left . 2. Machine will be reduced automatically. 1.
Instruction Manual - Page 39

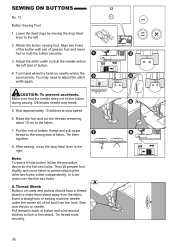
... stand away from the front. Adjust the stitch width so that the needle does not hit the button during sewing. Sew over the first two holes. You may break. 5. A. Insert a straight pin or sewing machine needle under the center slit of bobbin thread and pull upper thread to adjust the stitch width again. Tie...
Instruction Manual - Page 48

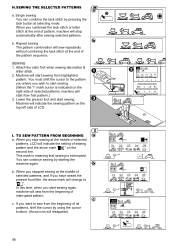
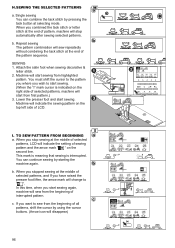
... tack stitch by pressing the tack button at the end of all patterns, shift the cursor by starting the machine again. Machine will disappear) 48 Repeat sewing The pattern combination will start sewing from the beginning of selected patterns, machine will sew repeatedly without combining the tack stitch at selecting mode. This mark is meaning that...
Instruction Manual 2 - Page 2

... adjustments mentioned in . Do not use outdoors. 7. Do not unplug by an authorized service representative. 2 SINGER is a registered Trademark of the sewing machine and foot controller free from all instructions before cleaning. Switch the sewing machine off position (symbol "O"), then remove plug from outlet. 9. Close attention is necessary when this manual. 3. Keep...
Instruction Manual 2 - Page 3

...9960 8 FOR EUROPEAN AND SIMILAR TERRITORIES: ...... 8 MAIN PARTS 10 ACCESSORIES 12 DUST COVER 12 EXTENSION TABLE 14 a. Removing the presser foot holder 14 INSERTING THE NEEDLE 16 FABRIC, THREAD AND NEEDLE TABLE ........ 16 CONNECTING THE MACHINE... SPOOL OF THREAD ON SPOOL PIN 28 C. REVERSE STITCHING 38 C. AUTO TACK STITCH 38 D. SEWING HEAVY FABRIC 40 F. ELONGATION 46 E. ATTACHING THE...
Instruction Manual 2 - Page 8

...-pin plug. 8 fuse must be connected to the earth terminal of your sewing machine, read the entire instruction manual before attempting to the terminal which is colored blue...Copyright © 2010 THE SINGER COMPANY All Rights Reserved Throughout The World. This appliance is used , a 5 Amp. Fuse must be supervised to this sewing machine. MODEL 9960 PREFACE Thank you for your...
Instruction Manual 2 - Page 38

... end of the stitch. Tack mark " " will disappear. 38 B. Machine will sew tacking stitches automatically and then start / stop automatically. 4. REVERSE STITCHING Reverse stitching is to sew this function, press the tack button again. If you want to forward sewing. 4. Machine will change to cancel this stitch. Machine will sew tacking stitches and stop button (or press the...
Instruction Manual 2 - Page 50

... (Pattern No. 3, 4) 1. Hold the upper thread and bobbin thread loosely and start sewing. Center needle with built-in reverse stitch No. 4. Position the fabric under the presser foot and lower it . 2. Machine will sew 4-5 stitches forward and sew 4-5 stitches backward and continue sewing forward. 3. Press the thread cutter button. 50 Center needle Position No. 2. Hold the...
Instruction Manual 2 - Page 52

... is selected, thread tension will make one stitch. 4. Pull the fabric required amount to sew. Machine will be reduced automatically. 1. Raise the fabric feed dogs for next regular sewing. Be sure the needle does not hit the dress pin, while sewing. 52 BASTING You can baste a garment before trying it . 2. No. 5 Basting Stitch Darning...
Instruction Manual 2 - Page 78

... two holes of the button with slot of the foot from the fabric. A. SEWING ON BUTTONS No. 13 Button Sewing Foot 1. Adjust the stitch width so that the needle does not hit the button during sewing. Insert a straight pin or sewing machine needle under the center slit of presser foot and lower foot to form...
Instruction Manual 2 - Page 96

... at the end of pattern, machine will stop sewing at the end of sewing pattern and the arrow mark " " on the second line. b. SEWING 1. If you stop automatically after sewing selected patterns. TO SEW PATTERN FROM BEGINNING a. b. Single sewing You can continue sewing by using the cursor buttons. (Arrow icon will start sewing. Machine will sew repeatedly without combining the tack...

Similar Questions

I Get E7 Error Message On My Singer Model 7258 Sewing Machine. There Is No Refe
Error message E7 is up on my Singer Stylist model 7258 sewing machine. It is not working at all. I t...
(Posted by ebellamybellamy9 5 years ago)
Bobbin Case On Singer 9960 Quantum Stylist Noisey
when I sew I hear a clicking sound and some rattling of the bobbin occurs. more so when I sew on the...
(Posted by sdshowen 8 years ago)
Beeping From Singer Sewing Machine Stylist Ii 5625
My sewing machine will beep and stop sewing after three inches of sewing. I have taken it to be repa...
(Posted by arusheria 9 years ago)
Ask a New Question
Use the box below to post a new question about this Singer product .
Points & Prizes
  • You can earn points for nearly everything you do on HelpOwl.com
  • You can trade in those points for gift cards at leading retailers such as Amazon.com and Walmart
  • It's that simple!
See How it Works
Create a Free Account

Singer Manuals

Find free Singer 9960 Quantum Stylist manuals and user guides available at ManualOwl.com. Try out our unique manual viewer allowing you to interact with manuals from directly within your browser!

Singer Reviews

View thousands of Singer user reviews and customer ratings available at ReviewOwl.com.

Contact Information

Complete Singer customer service contact information including steps to reach representatives, hours of operation, customer support links and more from ContactHelp.com.

Scoreboard Ratings

See detailed Singer customer service rankings, employee comments and much more from our sister site.