
Ryobi RY13015 Support Question
Ryobi RY13015 Support Question
Find answers below for this question about Ryobi RY13015.Need a Ryobi RY13015 manual? We have 3 online manuals for this item!
Question posted by sandiostudio on June 13th, 2014
What Are The Step By Step Instructions For Assembling Ry13015?
I am having difficulty with inserting the trimmer head into the shaft. The knob is open completely, but is too small for the head shaft to go into it. I was looking for pictures or a video showing me how to do this as the instructions are vague.
Current Answers
Related Ryobi RY13015 Manual Pages
Operator's Manual - Page 7
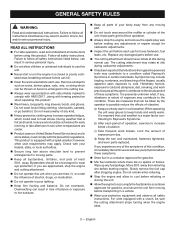
...parts before starting engine. Slowly remove the fuel cap after stopping engine. read all instructions
For safe operation, read and understand all thought to contribute to increase...exposure may contribute to cold. GENERAL SAFETY RULES
WARNING:
Read and understand all safety instructions. Check with a clutch, be encouraged to a condition called Raynaud's Syndrome in electric...
Operator's Manual - Page 8

... of operation can cause circulatory problems in the user's hands due to this wheeled trimmer can cause serious injury.
Make sure all guards, straps, deflectors, and...This product is properly installed and securely fastened. English Check for fuel leaks.
Replace string head if cracked, chipped, or damaged in place and secure. Failure to do so can result in serious...
Operator's Manual - Page 10

...remove the product and any parts are attempting. FEATURES
PRODUCT SPECIFICATIONS Weight - (Without Fuel 22.6 lbs. ASSEMBLY
UNPACKING
This product requires assembly.
packing list
Trimmer Power Head/Wheel Assembly Pro Cut II™ String Head/Shaft Assembly Handle Assembly Grass Deflector Line Carrier .105 in . Use of 4-Cycle Lubricant Operator's Manual
WARNING:
If any accessories...
Operator's Manual - Page 11

... top cap, insert line into place. Tighten the knob securely. The Pro Cut II™ string head/shaft assembly connects to avoid contact can result in . Align the button with the blade. WARNING:
Be certain all knobs are not locked into the slots located on the string head shaft. Failure to the trimmer power head/wheel assembly by pulling it...
Operator's Manual - Page 12
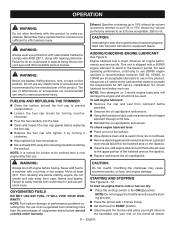
...or rope on this product to be used.
Failure to start position. Stand beside the trimmer and place your right hand on the frame as E15) are acceptable.
NOTE: Do not engage ...from a new engine after first use . NOTE: Fuel system damage or performance problems resulting from open flames and sparks. Check lubricant level before each use . To add engine lubricant: ...
Operator's Manual - Page 13
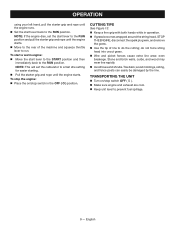
...rope until the engine starts. Move to the rear of line to do not force string head into uncut grass. Wire and picket fences cause extra line wear, even breakage. cutting tips
...: Place the on /stop switch in operation. If grass becomes wrapped around the string head, STOP
THE ENGINE, disconnect the spark plug wire, and remove the grass. Use the tip of...
Operator's Manual - Page 14
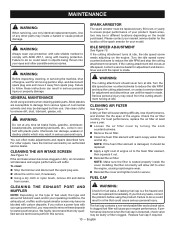
..., grease, etc.
For other repairs, have the trimmer serviced by turning the knob
counterclockwise. Remove the air filter. ... replaced every 50 hours or yearly to remove these instructions can result in serious personal injury. NOTE: Make sure...result from screen. A clogged fuel filter will cause starting difficulty, loss of performance, and shorten the life span of engine...
Operator's Manual - Page 15
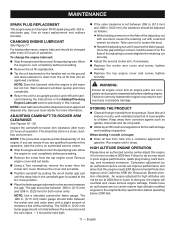
...the adjusting nut with one hand, loosen the retaining nut with a second wrench as garden chemicals and de-icing salts.
Abide by all engine parts are qualified to...cover and all ISO and local regulations for more completely.
Return the unit to an upright position and refill with lubricant following the instructions in the Adding/Checking Engine Lubricant section previously in ...
Operator's Manual - Page 16
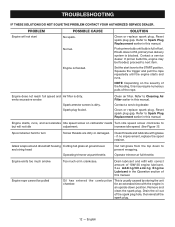
...speed.
Grass wraps around driveshaft housing Cutting tall grass at full throttle. Operate trimmer at ground level.
Oil has entered the combustion This is dirty.
SOLUTION
Clean ...reinstall the
spark plug.
12 -
PROBLEM
Engine will not idle
adjustment. and string head
Operating trimmer at part throttle.
Refer to Cleaning Air Filter earlier in this manual. Contact ...
Operator's Manual - Page 17

... the ryobi® brand outdoor product or adversely affect its operation, performance, or durability. Bump Knobs, Outer Spools, Cutting Lines, Inner Reels, Starter Pulleys, Starter Ropes, Drive Belts, Tines, ...replacement will be paid by the dealer to substantiate any way contrary to the operating instructions as commercial or rental. This warranty does not cover any product that has been ...
Operator's Manual - Page 18
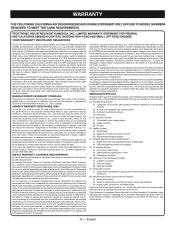
...small offroad engine. DEFECT WARRANTY COVERAGE REQUIREMENTS:
(a) The warranty period begins on your non-road or small off -road engines must be completed... and switches.
(iii) Hoses, belts, connectors, and assemblies. Techtronic Industries North America, Inc., will furnish with all...the ultimate purchaser and each new engine written instructions for two years. Your emission control system ...
User Manual 4 - Page 3

... x 28 mm, Hex Hd 2 34
310262004 Knob w/Nut Assembly 4
10
638740002 Center Handle 1 35
661527001 Carriage Bolt 4
11
519846001 Left Screen Cap 1 36
309020002 Frame Assembly 1
12
519847001 Right Screen Cap 1 37
638010003 Split Boom Clamp 1
13
309021001 Lower Boom Assembly 1 38
678460002 Lock Nut (M6 5
14
519864001 Shaft Spacer 2 39
519831001 Mow Ball 1
15...
User Manual 6 - Page 1

... grip and rope until the engine starts.
3
NOTE: If engine does not start, return to step 5 and repeat.
9
Squeeze throttle trigger to operate.
8
Warm Engine:
START
10 RUN
To Stop...until engine runs.
8
NOTE: If the engine dies, set the carburetor to START position.
2
Stand beside the trimmer and place your right hand on the
6
handlebar and your foot on /stop switch in the ON ( I ...
Similar Questions

How Does Part #678818001 Sit Inside The Trigger Assembly?
I'm trying to rebuild the trigger assembly on my Ryobi ry34441 and I have a spring that doesn't seem...
I'm trying to rebuild the trigger assembly on my Ryobi ry34441 and I have a spring that doesn't seem...
(Posted by daniel26181 9 years ago)

Ry28000 Throttle Assembly Replacement
I need a correct RY28000 throttle body diagram. Item #4 in RY28000 parts explosion diegram is not pr...
I need a correct RY28000 throttle body diagram. Item #4 in RY28000 parts explosion diegram is not pr...
(Posted by wescox1 11 years ago)

I Need Detailed Steps On How To Replace The Starte Rope On My Ryobi Model Ry1305
I need deailed steps on how to eplace the starter ropeon my Ryobi Model RY13050 edger
I need deailed steps on how to eplace the starter ropeon my Ryobi Model RY13050 edger
(Posted by alexmacc 12 years ago)

Pull String Instructions
I am in need of instructions on how t replace a ryobi RY29550 pullstring for the starter, and instru...
I am in need of instructions on how t replace a ryobi RY29550 pullstring for the starter, and instru...
(Posted by sandman5033 12 years ago)

Control Handle Assembly
How to replace a control handle assembly on the Ryobi RY28000
How to replace a control handle assembly on the Ryobi RY28000
(Posted by jlanepenny 12 years ago)