Pioneer DEH-P6500 Support Question
Pioneer DEH-P6500 Support Question
Find answers below for this question about Pioneer DEH-P6500.Need a Pioneer DEH-P6500 manual? We have 2 online manuals for this item!
Question posted by jusdcol on January 10th, 2014
How To Wire A Pioneer Deh-p6500
The person who posted this question about this Pioneer product did not include a detailed explanation. Please use the "Request More Information" button to the right if more details would help you to answer this question.
Current Answers
Related Pioneer DEH-P6500 Manual Pages
Owner's Manual - Page 2
... You Start Information to User 5 For Canadian model 5 About this unit 5 About this Pioneer product.
After you will know how to the radio 12 Introduction of advanced tuner
operation 13...advanced built-in CD player
operation 16 Repeating play 20 Playing tracks in a safe place for Pioneer products 5 Product registration 6 Precautions 6 Use and care of advanced multi-CD player
operation 20...
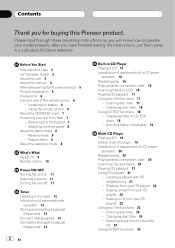
Owner's Manual - Page 3
... menu switching 38 Using ITS playlist and disc title
functions 38
Additional Information Understanding built-in the display 24 Using compression and bass emphasis 24
Audio Adjustments Introduction of audio adjustments 26 Compensating for equalizer curves (EQ-
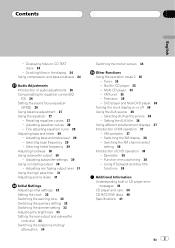
Owner's Manual - Page 4
... loss in front of speakers, thunderclap 140 Gunshot blast, jet plane 180 Rocket launching pad
Information courtesy of your equipment at two feet. Selecting fine audio equipment such as the unit you have established a comfortable sound level: • Set the dial and leave it there. This manufacturer and the Electronic Industries...
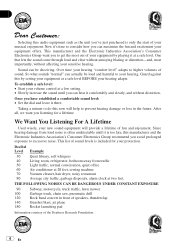
Owner's Manual - Page 5
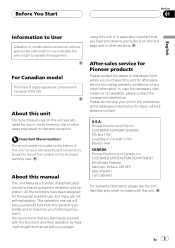
... precautions on this unit. Box 1760 Long Beach, CA 90801-1760 800-421-1404
CANADA Pioneer Electronics of this products potential and to record this manual
This unit features a number of... may result in improper reception.
This operation manual will help you purchased this unit for Pioneer products
Please contact the dealer or distributor from where you benefit fully from this unit. ...
Owner's Manual - Page 7
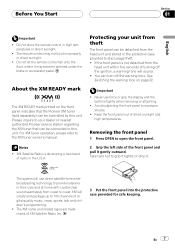
... gently outward. About the XM READY mark
The XM READY mark printed on page 32. Protecting your dealer or nearest authorized Pioneer service station regarding the XM tuner that the Pioneer XM tuner (sold separately) can turn off the ignition, a warning tone will create and package up to this unit. If the...
Owner's Manual - Page 9
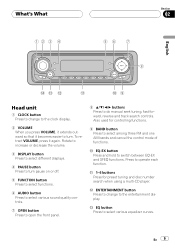
... bands and cancel the control mode of functions.
c ENTERTAINMENT button Press to change to turn pause on or off.
5 FUNCTION button Press to select functions.
6 AUDIO button Press to select various sound quality controls.
7 OPEN button Press to open the front panel.
8 a/b/c/d buttons Press to select various equalizer curves. To retract...
Owner's Manual - Page 11
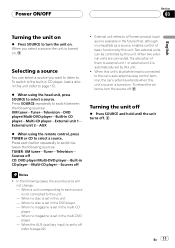
... in CD playerMulti-CD playerExternal unit 1 External unit 2AUX
% When using the head unit, press SOURCE to select a source. External unit refers to a Pioneer product (such as a source, enables control of them to select a source. Notes
!
When two external units are connected, the allocation of basic functions by this...
Owner's Manual - Page 26
...turned on and CUSTOM is automatically returned to the source display.
1
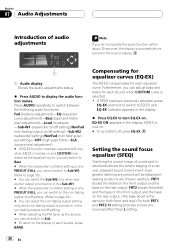
1 Audio display Shows the audio adjustments status.
% Press AUDIO to the non fading output on the rear output. (The bass boost ... # When the subwoofer controller setting is only PREOUT :FULL, you do not operate the audio function within about 30 seconds, the display is selected as the source, you cannot switch to ...
Owner's Manual - Page 27
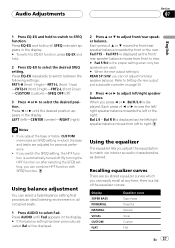
...fader/balance setting that provides an ideal listening environment in all occupied seats.
1 Press AUDIO to select Fad. HHHHHHHHHHHHHH Audio Adjustments
Section
07
English
1 Press EQ-EX and hold .
2 Press EQ-EX to...you adjust the bass or treble, CUSTOM memorizes an SFEQ setting in the display. Press AUDIO until the desired position appears in which the bass and treble are six stored equalizer ...
Owner's Manual - Page 29
..., bass adjustment affects only the rear output: front output cannot be adjusted. HHHHHHHHHHHHHH Audio Adjustments
Section
07
English
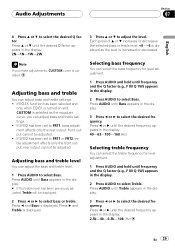
4 Press a or b to select Treble.
If SFEQ has...select Bass. Adjusting bass and treble level
You can select the treble frequency for level adjustment.
1 Press AUDIO and hold until the desired Q factor appears in the display.
3 Press c or d to select Bass...
Owner's Manual - Page 31
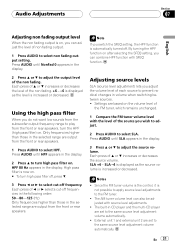
...HPF function on after selecting the SFEQ setting, you wish to adjust.
2 Press AUDIO to select SLA. Press AUDIO until HPF appears in volume when switching between sources. ! Since the FM tuner.... SLA +4 SLA 4 is displayed as the level is increased or decreased.
HHHHHHHHHHHHHH Audio Adjustments
Section
07
English
Adjusting non fading output level
When the non fading output is on,...
Owner's Manual - Page 34
...Press c or d to the factory settings.
!
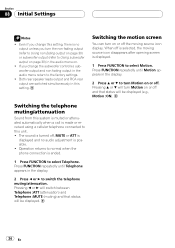
Press FUNCTION repeatedly until Telephone appears in the audio menu on or off , MUTE or ATT is
displayed and no output unless you turn Motion...can turn Motion on or off . Operation returns to normal when the phone connection is no audio adjustment is displayed.
1 Press FUNCTION to select Telephone. Even if you change this setting, ...
Owner's Manual - Page 35
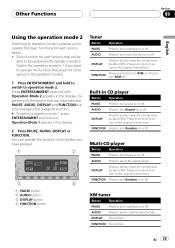
...You can operate the function of the button you have pressed.
1
2
3
4
1 PAUSE button 2 AUDIO button 3 DISPLAY button 4 FUNCTION button
Tuner
Button
Operation
PAUSE
Press to turn loudness on or off .
... Mode 1 appears in CD player
Button
Operation
PAUSE
Press to turn BSM off .
AUDIO
Press to turn Repeat on or off .
FUNCTION Press to the original volume level....
Owner's Manual - Page 36
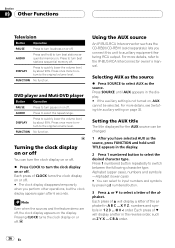
...Z, numbers and symbols in the reverse order, such as Z Y X ... C B A order.
36 En AUDIO
Press and hold until AUX appears in the display. # If the auxiliary setting is not turned on or off....Operation
PAUSE
Press to turn pause on . FUNCTION No function.
FUNCTION No function. AUDIO
Press to input numbers and symbols by about 90%. Section
09 Other Functions
HHHHHHHHHHHHHH
...
Owner's Manual - Page 38
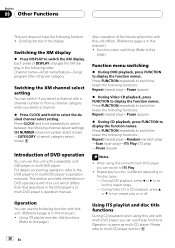
...: Repeat (repeat play on the disc types. During DVD playback, press c or d to select the repeat range. During Video CD or CD playback, press a or b to turn repeat play )Pause (pause)
% During Video CD playback, press FUNCTION to display the function names. Section
09 Other Functions
HHHHHHHHHHHHHH
This unit does not have...
Owner's Manual - Page 39
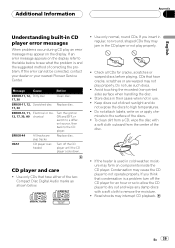
If the error cannot be corrected, contact your dealer or your nearest Pioneer Service Center. ERROR-44
All tracks are warped may not play properly. Avoid touching the ... cloth outward from a CD, wipe the disc with a soft cloth to the surface of the two Compact Disc Digital Audio marks as shown below to not operate properly. Do not use . !
If the heater is and the suggested method of...
Owner's Manual - Page 40
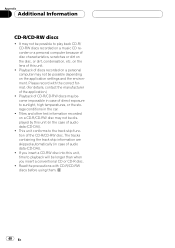
...scratches or dirt on a CD-R/CD-RW disc may not be possible depending on the lens of audio data (CD-DA)).
! Read the precautions with the correct format. (For details, contact the ... displayed by this unit, time to sunlight, high temperatures, or the storage conditions in case of audio data (CD-DA)).
! Appendix
HHHHHHHHHHHHHH
Additional Information
CD-R/CD-RW discs
! It may not be...
Owner's Manual - Page 92
... Beach, California 90801-1540, U.S.A. LTD. 178-184 Boundary Road, Braeside, Victoria 3195, Australia TEL: (03) 9586-6300
PIONEER ELECTRONICS OF CANADA, INC. 300 Allstate Parkway, Markham, Ontario L3R OP2, Canada TEL: (905) 479-4411
PIONEER ELECTRONICS DE MEXICO, S.A. Blvd.Manuel Avila Camacho 138 10 piso Col.Lomas de Chapultepec, Mexico, D.F. 11000 TEL...
Other Manual - Page 1

... ON, a control signal is output through a hole into the lead. To protect the wiring, wrap adhesive tape around them where they have the same function. The current capacity of ...units, then make connections correctly.
• Secure the wiring with insulating tape. Connect to CEMA cord colors. INSTALLATION MANUAL OF OF
DEH-P6500
This product conforms to an external power amp's system ...
Other Manual - Page 3
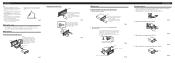
... tabs. Fix the front panel to both sides of the unit, pull the unit out. Installation
Note: • Before finally installing the unit, connect the
wiring temporarily, making sure it is a sudden stop, like an emergency stop. • The semiconductor laser will be properly installed either truss screws (5 × 8 mm) or...
Similar Questions

Hot And Ground
the hot and ground wires got ripped out of my pioneer DEH-P6500 deck harness i dont know how to rein...
the hot and ground wires got ripped out of my pioneer DEH-P6500 deck harness i dont know how to rein...
(Posted by ABANDONEDSEE 8 years ago)


