Pioneer DEH-P3500 Support Question
Pioneer DEH-P3500 Support Question
Find answers below for this question about Pioneer DEH-P3500.Need a Pioneer DEH-P3500 manual? We have 2 online manuals for this item!
Question posted by Willdenn on June 15th, 2014
What Wires Connect To The Orange/white Wire On A Deh P3500
The person who posted this question about this Pioneer product did not include a detailed explanation. Please use the "Request More Information" button to the right if more details would help you to answer this question.
Current Answers
Related Pioneer DEH-P3500 Manual Pages
Owner's Manual - Page 3
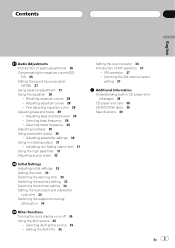
... AUX source 36
Selecting AUX as the source 36 Setting the AUX title 36
Setting the level indicator 36 Introduction of audio adjustments 26 Compensating for equalizer curves (EQ-
Contents
English
Audio Adjustments Introduction of XM operation 37
XM operation 37 Swiching the XM channel select
setting 37 Additional Information Understanding built...
Owner's Manual - Page 4
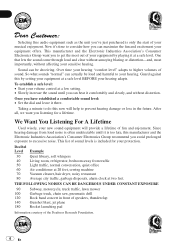
... CONSTANT EXPOSURE 90 Subway, motorcycle, truck traffic, lawn mower 100 Garbage truck, chain saw, pneumatic drill 120 Rock band concert in the future. Selecting fine audio equipment such as the unit you've just purchased is only the start of your hearing. Guard against this manufacturer and the Electronic Industries Association...
Owner's Manual - Page 7

... that can be controlled by this unit. XM will sound. ! The remote control may become jammed under the brake or accelerator pedal.
You can be connected to discourage theft. ! Removing the front panel
1 Press OPEN to 100 channels of radio in the protective case provided to this unit. The XM name...
Owner's Manual - Page 9
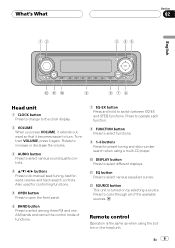
... through all of functions.
7 EQ-EX button Press and hold to switch between EQ-EX and SFEQ functions. Rotate to increase or decrease the volume.
3 AUDIO button Press to select various sound quality controls.
4 a/b/c/d buttons Press to select various equalizer curves. b EQ button Press to do manual seek tuning, fast forward...
Owner's Manual - Page 11

..., turn the unit on . Notes
! Selecting a source
You can be controlled by this unit.
When two external units are connected, the allocation of basic functions by this unit. In the following sources: TUNER: TelevisionTunerXM tuner Sources off CD: ...the cars auto-antenna relay control terminal, the cars antenna extends when this units blue/white lead is connected to .
Owner's Manual - Page 18
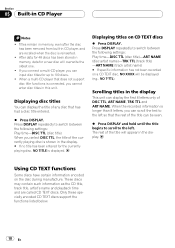
... title of the currently playing disc is shown in the display. # If no title has been entered for the currently playing disc, NO TITLE is connected, you cannot enter disc titles in the display. Press DISPLAY repeatedly to the left so that does not support disc title functions is displayed.
Section...
Owner's Manual - Page 26
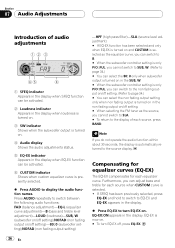
...source when CUSTOM curve is automatically returned to the source display. Section
HHHHHHHHHHHHHH
07 Audio Adjustments
Introduction of each source, press BAND. Compensating for equalizer curves (EQ-... (non fading output on and CUSTOM is selected as the source, you do not operate the audio function within about 30 seconds, the display is selected. ! Furthermore, you can be activated....
Owner's Manual - Page 27
... or d, BAL : 0 is automatically turned off )
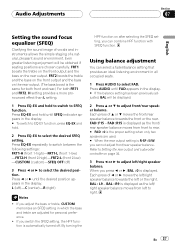
3 Press c or d to SFEQ function. Press AUDIO until FAD appears in which the bass and treble are adjusted for both front and rear.) For both FRT1...FAD : 0 is the proper setting when only two speakers are chosen carefully.
HHHHHHHHHHHHHH Audio Adjustments
Section
07
English
Setting the sound focus equalizer (SFEQ)
Clarifying the sound image...
Owner's Manual - Page 28
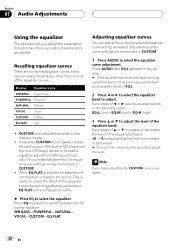
... an adjusted equalizer curve that previously selected will be displayed instead of the equalizer band. Press AUDIO until EQ-L appears in the display. # If the equalizer band has been previously adjusted, the...equalizer curves which you create.
! Section
HHHHHHHHHHHHHH
07 Audio Adjustments
Using the equalizer
The equalizer lets you make adjustments, the equalizer curve settings will be ...
Owner's Manual - Page 29
...level adjustment.
En 29
Press c or d until B appears in the display.
2 Press AUDIO to FRT1, bass adjustment affects only the rear output: front output cannot be adjusted. ! ... curve is displayed.
3 Press a or b to select the desired Q factor. HHHHHHHHHHHHHH Audio Adjustments
Section
07
English
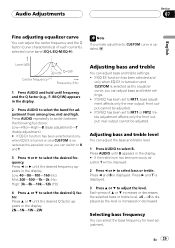
Fine adjusting equalizer curve
You can select the bass frequency for adjustment ...
Owner's Manual - Page 30
.... Each press of c or d selects level in the following order: LOW (low)MID (mid)HI (high)
4 Press b to select the phase of the subwoofer.
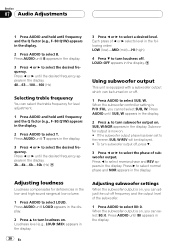
1 Press AUDIO to select 80: 0. Loudness level (e.g., LOUD :MID) appears in the display.
30 En
Adjusting subwoofer settings
When the subwoofer output is equipped with a subwoofer output...
Owner's Manual - Page 31
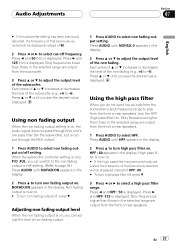
... Non fading output is on, you can adjust the level of non fading output.
1 Press AUDIO to select non fading output setting.
En 31 Only frequencies lower than those in the display.
...
When the non fading output is now on . NOFAD:ON appears in the display. HHHHHHHHHHHHHH Audio Adjustments
Section
07
English
# If the subwoofer setting has been previously adjusted, the frequency of...
Owner's Manual - Page 32
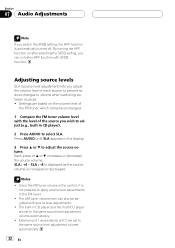
... setting, you switch the SFEQ setting, the HPF function is automatically turned off. Press AUDIO until SLA appears in volume when switching between sources. ! External unit 1 and external... not possible to apply source level adjustments to adjust the source volume. Section
HHHHHHHHHHHHHH
07 Audio Adjustments
Note
If you can also be adjusted with source level adjustments.
! By turning the...
Owner's Manual - Page 33
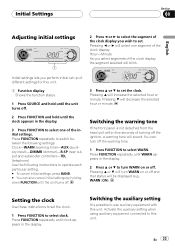
...Minute As you select segments of turning off . Setting the clock
Use these instructions to this unit. Activate the auxiliary setting when using auxiliary equipment connected to set .
Owner's Manual - Page 34
...
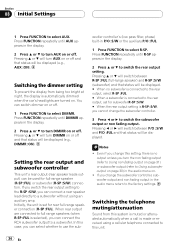
1 Press FUNCTION to Using subwoofer output on page 30) in the audio menu on.
! Switching the dimmer setting
To prevent the display from this setting, there is no subwoofer is connected to the rear output, select R-SP :FUL. # When a subwoofer is connected to the rear output, set for full-range speaker (R-SP :FUL...
Owner's Manual - Page 35
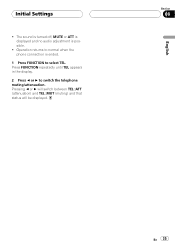
... until TEL appears in the display.
2 Press c or d to select TEL.
Operation returns to normal when the phone connection is possible.
! Pressing c or d will switch between TEL :ATT (attenuation) and TEL :MUT (muting) and that...HHHHHHHHHHHHHH
! The sound is turned off, MUTE or ATT is displayed and no audio adjustment is ended.
1 Press FUNCTION to switch the telephone muting/attenuation.
Owner's Manual - Page 36
...
HHHHHHHHHHHHHH
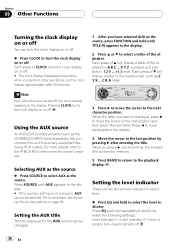
Turning the clock display on or off
You can be selected. For more details, see Switching the auxiliary setting on or off.
When you connect this unit to the playback display. Press c to move backwards in the display. # If the auxiliary setting is displayed, press d to move the cursor to...
Owner's Manual - Page 38
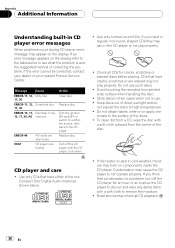
... center of correcting the problem. Condensation may form on the display refer to the table below to the surface of the two Compact Disc Digital Audio marks as shown below.
! Road shocks may not play an error message may appear on or apply che- ERROR-11, 12, Scratched disc Replace disc...
Other Manual - Page 2
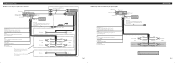
Orange/white To lighting switch terminal. Orange/white To lighting switch terminal. Black (ground) To vehicle (metal) body.
Yellow/black If you use a cellular telephone, connect it via the Audio Mute lead on the cellular telephone. Yellow To terminal always supplied with power regardless of ignition switch position. Front speaker Left
Subwoofer
White + ≠
White/black
+...
Other Manual - Page 5
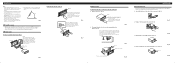
...as possible using the top and bottom tabs. Installation
Note: • Before finally installing the unit, connect the
wiring temporarily, making sure it is a sudden stop, like an emergency stop. • The semiconductor ...screw holes in the driver's way and cannot injure the passenger if there is all connected up properly, and the unit and the system work properly. • Use only the...
Similar Questions

I Can't Get The Rear Ceiling Speakers To Work. I Can't Understand The Manual To
Rear ceiling speakers are not working. The manual is not helping me
Rear ceiling speakers are not working. The manual is not helping me
(Posted by Dltoney2 6 years ago)


Do You Have Pioneer Stereo Wire Wiring Deh-2000 Mpb 16car Conector And What Cost
(Posted by KRUNOSLAVBOT 10 years ago)