
1999 Oldsmobile Bravada Support Question
1999 Oldsmobile Bravada Support Question
Find answers below for this question about 1999 Oldsmobile Bravada.Need a 1999 Oldsmobile Bravada manual? We have 1 online manual for this item!
Question posted by Anonymous-98812 on February 14th, 2013
How To Remove Rear Axle
The person who posted this question about this Oldsmobile automobile did not include a detailed explanation. Please use the "Request More Information" button to the right if more details would help you to answer this question.
Current Answers
Related Manual Pages
Owner's Manual - Page 39

...the guide upward to expose its storage clip, and then slide the guide onto the clip. To remove and store the comfort guides, squeeze the belt edges together so that the shoulder belt crosses the...guide on top.
4. Buckle, position and release the safety belt as described in "Rear Seat Outside Passenger Positions" earlier in between the seatback and the interior body, leaving only the loop ...
Owner's Manual - Page 45

Some infant seats come in the vehicle and the seat part is removable.
1-39 the base stays secured in two parts -- yellowblue
A rear-facing infant restraint (B) positions an infant to about 20 lbs. (9 kg) and about one year of the vehicle. Rear-facing infant restraints are designed for infants of up to face the...
Owner's Manual - Page 52

yellowblue To remove the child restraint, just unbuckle the vehicle's safety belt and let it go back all the way. The safety belt will move freely again and ....
Here's why: Don't use child restraints in the Right Front Seat Position
Center Seat Position
Your vehicle has a right front passenger air bag. Never put a rear-facing child restraint in this position.
Owner's Manual - Page 59

... Engine While You're Parked 22-26 2-26 2-27 2-27 2-28 2-28 2-35 2-37 2-39 2-41 2-48 2-49 2-50 2-50 2-51 2-55 2-56 2-58 Locking Rear Axle All-Wheel Drive Windows Horn Tilt Wheel Turn Signal/Multifunction Lever Exterior Lamps Interior Lamps Mirrors Storage Compartments Ashtrays and Cigarette Lighter Sun Visors Accessory...
Owner's Manual - Page 63
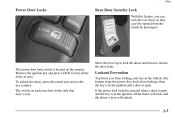
...rear door works only that door's lock. Remove the ignition key and press LOCK to lock all the doors will lock, and the driver's door will unlock.
2-5 Lockout Prevention
To protect you can lock the rear... open and the key is open.
The switch on the armrest. yellowblue
Power Door Locks
Rear Door Security Lock
With this feature, you from locking your key in the vehicle, this ...
Owner's Manual - Page 84
... shift when the all-wheel drive engages.
2-26 yellowblue
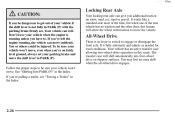
CAUTION:
It can be dangerous to get out of the rear wheels has no lever or switch to engage or disengage the front axle. Don't leave your vehicle won 't move suddenly.
Your vehicle can move , even when you're on snow, mud, ice...
Owner's Manual - Page 104

... during a collision or sudden maneuver. If you put it back, always be injured. When you remove the cover, always store it . CAUTION:
An improperly stored cargo cover could be sure that it is securely...small items, like gloves and light clothing in the upper passenger's side corner, visible from the rear of the vehicle. Attach the lower hooks to cover items in the cargo area of the liftgate ...
Owner's Manual - Page 106

... capacity when loading your vehicle. NOTICE:
Don't put it from the heating element when it . To remove the front ashtray, pull the bin upward. You can then tie it overload, damaging the lighter and... size and weight, put papers and other smoking materials could set them , push up against the rear of cargo as you can make sure the luggage carrier is locked and cargo is heating. That ...
Owner's Manual - Page 108

...exceed 20 amps. Your vehicle may be on. See "Retained Accessory Power" in use. Just remove the plug from the outlet and follow the proper installation instructions that are included with a power ...sliding sunroof. To open or close the sunroof. Press and release the rear side of the button in auxiliary electrical equipment.
Once the sunroof is also equipped with a...
Owner's Manual - Page 166
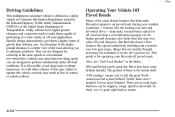
... under off-road conditions. There are no road signs. Off-road driving can be great fun. help make it does have features like the locking rear axle and all possible, avoid sharp turns or abrupt maneuvers. Specific design characteristics give them capable of performing in the Index. Operating Your Vehicle Off Paved...
Owner's Manual - Page 167

... all necessary maintenance and service work done. Before You Go Off-Roading
There are properly attached. Be sure you read all the information about your rear axle. And that's why it more enjoyable. If you don't know, you should be thrown forward during a sudden stop. CAUTION:
D Cargo on the load floor piled...
Owner's Manual - Page 193

...'s and payloads. This is found on both sides of your original tires and the inflation pressures needed to a weigh station and weigh your front and rear axles, you should spread it out. Similar appearing vehicles may have a heavy load, you need to go to obtain the gross weight capacity of the vehicle...
Owner's Manual - Page 222
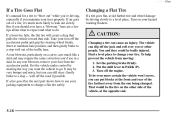
... fails, the flat tire will create a drag that pulls the vehicle toward that side. In any rear blowout, remove your jacking equipment to a level place. Get the vehicle under control by driving slowly to change your... pedal and grip the steering wheel firmly. The vehicle can put blocks at the front and rear of the vehicle, at the opposite end.
5-18 To help prevent the vehicle from moving:...
Owner's Manual - Page 223

... gloves and a plastic ground mat to assist in the changing of the vehicle when restowing.
Removing the Spare Tire and Tools
The jacking equipment you how to a stowage position under the vehicle... is stored along the driver's side inner rear quarter panel. NOTICE:
Never remove or restow a tire from/to use the jack and change a tire. yellowblue To remove the jack cover, pull up on the latch...
Owner's Manual - Page 224

...until the spare tire can be using include the jack (A), and the wheel wrench (B).
5-20 yellowblue To remove the spare, insert the chisel end of the cable and pull it through the wheel opening. Be sure... the chisel end of the wheel wrench connects into the hole in the rear bumper. Pull the tire out from under the vehicle. NOTICE:
To help avoid vehicle damage, do ...
Owner's Manual - Page 235
... Countries Filling Your Tank Filling a Portable Fuel Container Checking Things Under the Hood Engine Oil Engine Air Cleaner/Filter Automatic Transmission Fluid All-Wheel Drive Rear Axle Radiator Pressure Cap Thermostat Engine Coolant Power Steering Fluid Windshield Washer Fluid 6-27 6-31 6-32 6-35 6-37 6-45 6-45 6-47 6-49 6-52 6-53 6-53 6-53...
Owner's Manual - Page 255

... lubricant to change it. See "Recommended Fluids and Lubricants" in the Index. See "Recommended Fluids and Lubricants" in the Index.
6-21 How to Check Lubricant
Rear Axle
When to Check and Change Lubricant
Refer to the Maintenance Schedule to determine how often to check the lubricant and when to use . If the...
Owner's Manual - Page 344

... USAGE Chassis Lubrication FLUID/LUBRICANT Chassis Lubricant (GM Part No. 12377985 or equivalent) or lubricant meeting requirements of NLGI # 2, Category LB or GC-LB. Front Axle Rear Axle (Locking Differential) Automatic Transfer Case Hood Latch Assembly, Secondary Latch, Pivots, Spring Anchor and Release Pawl
Fuel Filler Door Multi-purpose lubricant, and Endgate SuperlubeR...
Owner's Manual - Page 364
......4-41 Loading Your Vehicle for Off-Road Driving ...4-15 Locking Rear Axle ...2-26 Lockout Prevention ...2-5 Lockout Switch ...2-27 Locks Door ...2-4 Ignition Transmission Check ...7-42 Key Lock ...Cylinder Service ...7-40 Power Door ...2-5 Rear Door Security ...2-5 Loss of Control ...4-13 Low Fuel Light ...2-68 Lubricants and Fluids ...6-...
Owner's Manual - Page 365
... Radiator Pressure Cap ...6-22 Radio Reception ...3-21 Radios Cassette Tape and Compact Disc Player ...3-8 Cassette Tape Player Care ...3-22, 7-39 Rain, Driving ...4-29 RAP ...2-15 Rear Axle ...6-21 Door Security Locks ...2-5 Safety Belt Comfort Guides ...1-31 Seat Passengers ...1-28 Seats ...1-7 Window Defogger ...3-6 Window Washer/Wiper ...2-32 Rearview Mirror ...2-39 Reclining Front Seatbacks...
Similar Questions

Rear Wiper Motor
I have a 1998 olds bravda rear wiper not working checked the fuse is fine, replaced it with a used o...
I have a 1998 olds bravda rear wiper not working checked the fuse is fine, replaced it with a used o...
(Posted by websle70 9 years ago)

How To Take A Rear Axle Out Of A 1996 Oldsmobile Bravada
(Posted by bitbphill 9 years ago)

How To Remove Rear Axles In A 2002 Bravada
(Posted by scapitnjaym 10 years ago)

How To Remove Rear Axle On 1999 Oldsmobile Bravada
(Posted by jarabwwwz 10 years ago)
