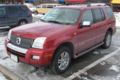
2006 Mercury Mountaineer Support Question
2006 Mercury Mountaineer Support Question
Find answers below for this question about 2006 Mercury Mountaineer.Need a 2006 Mercury Mountaineer manual? We have 9 online manuals for this item!
Question posted by hxhieLavag on March 22nd, 2014
How To Remove Hub Assembly On Mercury Mountaineer
The person who posted this question about this Mercury automobile did not include a detailed explanation. Please use the "Request More Information" button to the right if more details would help you to answer this question.
Current Answers
Related Manual Pages
Driving Your SUV or Truck 1st Printing - Page 8
... and transmission are disconnected from the rest of the anti-lock brake system. Always set the parking brake fully and turn off the ignition and remove the key. Do not "pump" the brakes.
Driving Your SUV or Truck 1st Printing - Page 12
...) position, the engine and transmission are disconnected from the rest of the driveline. Always set the parking brake fully and turn off the ignition and remove the key. When the transfer case is engaged in P (Park) with an automatic transmission or either 1 (First) or R (Reverse) with the transfer case in gear...
Driving Your SUV or Truck 1st Printing - Page 13

... tire and check the tire pressure with a tire gauge (including spare). Inspecting your tires Periodically inspect the tire treads for uneven or excessive wear and remove stones, nails, glass or other damage. Always inflate your tires are more likely to the Ford recommended inflation pressure even if it needs to the...
Tire Warranty 1st Printing - Page 38
...to store tires in damage to your retailer check the wheels before demounting. Single or dual assemblies must be mounted on the highway. Be sure that are mounted, have safety humps or ledges...must only be done by professionally trained persons using proper tools and procedures as specified by removing the tires from ozone and weather checking. The inside of the tires and sudden tire...
Owner Guide 1st Printing - Page 33

... from a station, the weaker the signal and the weaker the reception. • Terrain: Hills, mountains, tall buildings, power lines, electric fences, traffic lights and thunderstorms can affect radio reception: •... loose tapes by inserting a finger or pencil into the hole and turning the hub. • Remove loose labels before inserting tapes. • Allow tapes which have been subjected to...
Owner Guide 1st Printing - Page 48

Lights
Replacing headlamp bulbs Do not touch the glass of the lamp assembly.
48 Remove the bulb retaining ring.
5. Turn off the headlamps and open the hood. 2. Remove protective cap and disconnect the electrical connector.
4. Remove the two retainer pins, then pull headlamp forward.
3. Carefully pull the old bulb out of a halogen bulb. 1.
Owner Guide 1st Printing - Page 49

...Carefully pull the old bulb out of children's reach. Reverse steps to reinstall bulb(s).
49 Remove the bulb socket from your hand could cause the bulb to break the next time the headlamps... are operated. Lights
Handle a halogen headlamp bulb carefully and keep out of the lamp assembly. Remove the two headlamp retainer pins, then pull the headlamp forward.
3. Grasp the bulb only by...
Owner Guide 1st Printing - Page 50

... to reinstall bulb(s). Rotate the bulb socket counterclockwise to off . 2. Turn the headlamp switch to remove it . 3. Remove the lamp assembly.
50 Pull the bulb straight out. Replacing tail/brake/turn signal bulbs 1. Remove the two bolts from the lamp assembly. 3. Reverse steps to OFF and open the liftgate. 2. Turn the headlamp switch to reinstall...
Owner Guide 1st Printing - Page 51

... bulb socket from the electrical connector and replace the LED assembly. Reverse steps to reinstall bulb(s). Remove the lamp assembly by turning it from the lamp assembly. 5. Reverse steps to reinstall bulb(s).
51 Disconnect the electrical connector. Rotate the bulb socket counterclockwise and remove it counterclockwise. 3. Pull the bulb straight out of the socket. Replacing...
Owner Guide 1st Printing - Page 52

Remove the two screws and lamp assembly away from the lamp assembly by depressing the snaps.
3. Pull the bulb straight out of the socket and push in the new bulb. Lights
Replacing high-mount brakelamp bulb 1.
Remove the bulb holder from the vehicle.
2. Reverse steps to reinstall bulb(s).
52
Owner Guide 1st Printing - Page 97

... Center in the Roadside Emergencies chapter. Never place your hand in cooler temperatures. To remove the floor mat, reverse the installation procedure. A moving before working under the vehicle.... Driver Controls
Note: The running boards may operate more slowly in the hinge assemblies. Turn off the running boards before attempting to step on again, refer to the OFF ...
Owner Guide 1st Printing - Page 136

... Failure to other safety belt function is now in addition to replace the belt and retractor assembly could increase the risk of injury in deployment of a crash. The driver and front passenger... the "automatic locking retractor" feature for proper function. The safety belt pretensioner removes some slack from the safety belt system at all safety belts should be replaced if the...
Owner Guide 1st Printing - Page 219
... console access hole. Using a screwdriver (or equivalent), remove the access panel and depress the shifter lever on the shift mechanism.
4. Apply the brake and shift into N (Neutral). 5. Refer to move the gearshift lever out of P (Park) with a higher center of the floor shifter assembly. 3. If it is necessary to use the above...
Owner Guide 1st Printing - Page 255

... the plastic grommet on the lug nut wrench and into the square hole on the other side.
255 Assemble the jack handle extension on the lug nut wrench by half a turn, but do not remove them until the wheel is raised off the ground. 3. Turn off the road to moving running boards...
Owner Guide 1st Printing - Page 256

....
• Never use the running boards, front and rear hinge assemblies, running board motors, or the running board underbody mounts to the ... lug nuts, cone side in, until the wheel is facing outward. Remove the lug nuts with the jack. Do not start the engine when ... making sure the valve stem is snug against the hub. To lessen the risk of personal injury, do not put any part of...
Owner Guide 1st Printing - Page 258

... to come off while the vehicle is installed, always remove any corrosion, dirt or foreign materials present on that area.
258 Re-install the wheel ornament onto the wheel once the tire is corrosion on the area where the wheel contacts the hub, apply a thin film of grease or anti-seize compound...
Owner Guide 1st Printing - Page 278

... and color, use the following products or products of equivalent quality: Motorcraft Bug and Tar Remover (ZC-42) Motorcraft Car Care Kit (ZC-26) Motorcraft Car Wash (Canada only)...Coat Polish (ZC-8-A) Motorcraft Custom Vinyl Protectant (U.S. FORD AND LINCOLN MERCURY CAR CARE PRODUCTS Your Ford or Lincoln Mercury authorized dealer has many quality products available to avoid permanent staining. For...
Quick Reference Guide 2nd Printing - Page 1
..., press and release the appropriate HomeLink® button. INSTRUMENT PANEL
The newly-designed 2006 Mercury Mountaineer was engineered to enhance the way you live and help you have reached your desired speed... rear window wiper. For more of your tires is not recommended to activate your new Mercury Mountaineer by the door. 3. Before folding down the 2nd row seats, ensure that no objects...
Quick Reference Guide 2nd Printing - Page 2
... to the 1 (OFF/LOCK) or 2 (ACC) position. remove the cover to stop the electric fuel pump when your Mountaineer's 3-year/36,000 mile limited warranty period, the assurance and ...press AUTO. 7 Windshield Defroster Outside air is distributed through the windshield defroster vents.
20 MERCURY MOUNTAINEER QUICK REFERENCE GUIDE 06
1
8 Rear Window Defroster The rear defroster control is located ...
Warranty Guide 5th Printing - Page 25
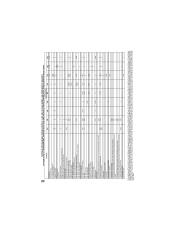
...DEFECTS WARRANTY (Coverage for Up to 7 Years/70,000 Miles, Whichever Occurs First) Ford and Mercury Vehicles Excluding Focus, Escape Hybrid and Mariner Hybrid
Part Name 2.3L X X(1) X X X ... assembly) Powertrain Control Module Wiring Harness Solenoid Body Assembly...Only; (11) Explorer, Mountaineer Only; (12) Explorer, Mustang Only; (13) F-150 Only; (14) Explorer, F-150, Mountaineer Only; (15) Grand ...
Similar Questions

How To Remove A Hub On A 2006mercury Mountaineer
(Posted by mohaferd 10 years ago)

Remove Fuse Box On 2002 Mercury Mountaineer
How do I remove the passenger compartment fuse box to replace delay assesary relay.
How do I remove the passenger compartment fuse box to replace delay assesary relay.
(Posted by dvannuys 10 years ago)
How To Change A Hub Gear Assembly On 06 Mountaineer
(Posted by bosCAMPIO 10 years ago)

How To Remove Front Hub Assembly 2006 Mercury Mountaineer
(Posted by catuJOHNCH 10 years ago)

How To Remove The Real Hub Assembly
how to you remove the rear wheel bearing hub assembly from a 2006 mercury mountaineer
how to you remove the rear wheel bearing hub assembly from a 2006 mercury mountaineer
(Posted by davies0319 12 years ago)