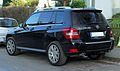
2011 Mercedes GLK-Class Support Question
2011 Mercedes GLK-Class Support Question
Find answers below for this question about 2011 Mercedes GLK-Class.Need a 2011 Mercedes GLK-Class manual? We have 1 online manual for this item!
Question posted by aldnicksm on May 27th, 2014
How To Remove Glk Cargo Cover
The person who posted this question about this Mercedes automobile did not include a detailed explanation. Please use the "Request More Information" button to the right if more details would help you to answer this question.
Current Answers
Related Manual Pages
Owner's Manual - Page 7
...washer ...238 Rear view camera ...240 Roof lining ...242 Seat belt ...242 Seat covers ...242 Sensors ...240 Steering wheel ...241 Tail pipes ...241 Trim strips ...241 ...trim ...241 Cargo compartment cover ...210 Cargo compartment enlargement ...208 Cargo compartment floor Opening/closing ...212 Stowage well (under) ...212 Cargo net Attaching ...211 Important safety information ...211 Cargo tie down ...
Owner's Manual - Page 11
... ...235 Notes ...299 Headlamp mode (daytime driving) see Daytime running lamps Headlamps Cleaning ...240 Misting up ...106 Removing/installing the cover ...109 Head restraints Adjusting (electrically) ...93 Adjusting (manually) ...93 Adjusting (rear) ...93 Installing/removing (rear) ...94 see NECK-PRO head restraints Heating see Climate control High beam flasher ...105 Hill start assist...
Owner's Manual - Page 37

... bags and ETDs are designed to provide adequate protection. RDo not install additional trim material, seat covers, badges, etc. packages, purses, umbrellas, etc.). RAir bag system components will be replaced.... SRS components and wiring. If it is needed in an accident, which could change or remove any modification that has deployed must therefore only be
Z
35
The SRS self-check has...
Owner's Manual - Page 61

...or held in their upright position before installing the Top Tether straps or when the cargo compartment is not locked properly, the seat backrest could fold forward.
The child ...head restraint : upwards.
X Route Top Tether belt A under the head restraint : between the cargo compartment cover ; Otherwise, the seat belt could cause serious or even fatal injuries. Lock the rear seat ...
Owner's Manual - Page 62

...arrow :. RTop Tether belt A is routed between the rear seat backrest and the cargo net if the cargo net is unlocked, the door can secure each door individually with the manufacturer's installation...outside. 60
Children in Top Tether anchorage =, as illustrated. if cargo compartment cover ; Otherwise, the children could result in the direction of Top Tether belt A is routed between...
Owner's Manual - Page 70
...SmartKey and replace it if necessary (Y page 72). When leaving the vehicle, always remove the SmartKey from the vehicle, such as seat adjustment, steering wheel adjustment, or ... if the SmartKey is removed from the starter switch or removed from the starter switch. X Lock the vehicle using the mechanical key (Y page 71).
Unsecured or improperly positioned cargo increases a child's risk...
Owner's Manual - Page 75

... and then press to do so. Z
Opening and closing X Insert the front tabs of all SmartKey buttons on the vehicle.
Do not hold the cover closed while doing so.
73
X X
Remove the cover of the battery tray. SmartKey
arrow until battery = falls out. Repeatedly tap the SmartKey against your palm until battery tray...
Owner's Manual - Page 77

...! themselves on -board voltage is too low. easily. G Warning! There is removed from the starter switch or removed from the starter switch. A child's unsupervised access to start the vehicle (Y page...the memory function
Do not carry heavy or hard objects in the passenger compartment or cargo compartment unless they could
Rinjure Rbe
If children open . Therefore, the SmartKey cannot be...
Owner's Manual - Page 83

...Do not expose the child restraint system to an unlocked vehicle. Unsecured or improperly positioned cargo increases a child's risk of injury in the event of
Rstrong
braking maneuvers changes of... tailgate
X
81
Side windows Important safety notes G Warning!
When leaving the vehicle, always remove the SmartKey from the vehicle, such as seat adjustment, steering wheel adjustment, or the memory...
Owner's Manual - Page 87

...leaving the vehicle, always remove the SmartKey from the vehicle, such as
Z
Opening and closing
Do not carry heavy or hard objects in the passenger or cargo compartment unless they are ...very
When opening . This may be operated even if the SmartKey is removed from the starter switch or removed from the starter switch.
Always take the SmartKey with the automatic operation ...
Owner's Manual - Page 111

... lamp: PY 21 W = Backup lamp: P 21 W or W 16 W10 ? Connect the two covers by inserting the tongue into the groove. Parking lamp/standing lamp: W 5 W
Changing the front bulbs Removing/installing the cover on top of the headlamp
You must remove the headlamp cover in the engine compartment before you can replace the bulbs in the...
Owner's Manual - Page 112

... the new bulb. X To attach: swing back washer fluid reservoir :. Open the hood. X Take out the handle with bulb holder ;. X Install the headlamp cover (Y page 109). clockwise. X Remove the headlamp cover (Y page 109). X Detach retaining spring = downwards. in the left-hand headlamp. X Pull out bulb ?. X
To detach: turn it clockwise until bulb holder...
Owner's Manual - Page 113

... clockwise.
X Insert bulb holder : or ;
X Left-hand headlamp: detach the washer fluid reservoir (Y page 110). X Remove the headlamp cover (Y page 109). X WY 5 W (turn signals and side marker lamps): insert the new bulb into bulb holder ;.
X Remove the headlamp cover (Y page 109). Switch off the lights. X Left-hand headlamp: detach the washer fluid reservoir (Y page...
Owner's Manual - Page 114

... turn release knob : 90° in the direction of the arrow and remove side trim panel ;. X Open the cargo compartment.
and turn signal lamp = Tail lamp/braking lamp Right-hand side ...bulb holder out. X Install the headlamp cover (Y page 109). Lightly press the corresponding bulb into the bulb holder and turn it counter-clockwise and remove it clockwise. 112
X
Changing bulbs
...
Owner's Manual - Page 146

...go traffic, on short trips and in mind that your primary responsibility is covering a distance of movement.
18 Observe
all maintenance work performed at the recommended ...very dangerous combinations. Some jurisdictions prohibit the driver from a qualified specialist workshop, e.g. X Remove unnecessary cargo. i You can affect your reflexes, perceptions and judgment.
Do not drink or take...
Owner's Manual - Page 212

... is one bag hook on the left side wall in the cargo compartment and there are two hooks on the left . X
To remove: make sure that cargo compartment cover : is located behind the rear bench seat backrest. X Press handle ; X Remove cargo compartment cover :.
To retract: unhook cargo compartment cover : from the retainers on the right and left and right...
Owner's Manual - Page 213

...
To install: attach cargo compartment cover : to the right. The cargo net is located in the loading tray in two different positions (behind the B-pillar or the C-pillar). X Open both Velcro fasteners and remove the cargo net. Attaching the cargo net
Preparing the cargo net
The cargo net can be used when transporting cargo. Never use cargo net when transporting...
Owner's Manual - Page 247
... a wheel when they leave the factory, e.g. To obtain tools approved for changing a wheel are not equipped with the tools needed to the vehicle. X To remove the cargo compartment stowage trays: lift up the floor of explosion or fire The fuel line or the fuel tank is leaking from the parcel net.
Consult...
Owner's Manual - Page 260

... if you tow or tow-start another vehicle, its weight must not be longer. Installing/removing the towing eye Installing the towing eye
Vehicles with automatic transmission must not exceed the maximum ...and is better to have it in the ignition lock. ! Be particularly careful when removing the rear cover. X Remove the towing eye from the vehicle tool kit (Y page 245).
You may be in ...
Owner's Manual - Page 264

... :. from the fuse box using a dry cloth.
in the cargo compartment
X
Open the tailgate. X
Close the hood (Y page 233). Fuse box in the guides.
! X Remove the fuse box cover forwards. X Open cover = of the fuses. X To open: open : lift up trunk floor ; (Y page 212). X
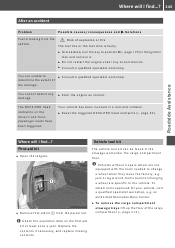
Roadside Assistance
Remove any existing moisture from the guides. X Secure lines...
Similar Questions


Manual From Glk On How To Remove The Cargo Cover From Back Seat
(Posted by eacudo 9 years ago)

How To Remove The Cargo Cover From The Back Seat Of A Glk
(Posted by Tatsvf 9 years ago)
