Get support for Memorex NDC6005-SB - Npower Flash Micro SpongeBob Digital Camera

Memorex NDC6005-SB Support Question

Memorex NDC6005-SB Support Question

Find answers below for this question about Memorex NDC6005-SB - Npower Flash Micro SpongeBob Digital Camera.
Need a Memorex NDC6005-SB manual? We have 1 online manual for this item!
Question posted by Anonymous-43084 on November 18th, 2011

Ndc6005 Sb Driver

were to get them

Current Answers

There are currently no answers that have been posted for this question.
Be the first to post an answer!

Remember that you can earn up to 1,100 points for every answer you submit. The better the quality of your answer, the better chance it has to be accepted.

Related Memorex NDC6005-SB Manual Pages

User Guide - Page 2

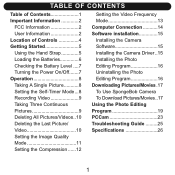
... the Video Frequency Mode 13 Computer Connection ...........14 Software installation 15 Installing the Camera Software 15 Installing the Camera Driver ..15 Installing the Photo Editing Program 16 Uninstalling the Photo Editing Program 16 Downloading Pictures/Movies .17 To Use SpongeBob Camera To Download Pictures/Movies..17 Using the Photo Editing Program 19 PCCam 23 Troubleshooting...
User Guide - Page 3

...user is connected. • Consult the dealer or an experienced radio/TV technician for a class B digital device, pursuant to Part 15 of the following two conditions: 1) This device may not cause harmful ... used in accordance with the limits for a class B digital device, pursuant to radio communications. IMPORTANT INFORMATION FCC INFORMATION FCC WARNING: This equipment meets the limits...
User Guide - Page 4

... snowing. • Should foreign matter or water get wet. This Class B digital apparatus complies with electrostatic discharge, the user may fall. • Do not touch or press on the display or lens. do not use when it get into the camera, immediately turn the power off and contact your own repairs. Be...
User Guide - Page 8

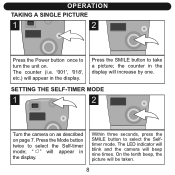
...after 30 seconds of inactivity, but the pictures will remain in the display. You can also turn the camera off, press the Power button 1 until a beep is low, the display will appear in memory. ...• For self portraits, use the mirror on the front of the camera. • The power will automatically turn off when the USB cable is connected to confirm. To turn...
User Guide - Page 9

... as described on . Press the Mode button twice to take a picture; " " will increase by one. The LED indicator will blink and the camera will be taken. 8 On the tenth beep, the picture will beep nine times. Press the SMILE button to select the Self-timer mode; Within three ...
User Guide - Page 10

... 3 pictures automatically then revert to Lo (Low) image quality mode. 9 If you using this function while in the display. TAKING THREE CONTINUOUS PICTURES 1 2 Turn the camera on as described on page 7. NOTE: The Three Continuous Pictures function is only available for HI (High) image quality mode. OPERATION (CONTINUED) RECORDING VIDEO 1 2 Turn...
User Guide - Page 11

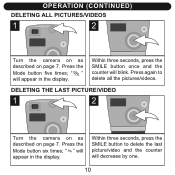
... last picture/video and the counter will blink. " " will appear in the display. " " will appear in the display. DELETING THE LAST PICTURE/VIDEO 1 2 Turn the camera on as described on page 7. Within three seconds, press the SMILE button once and the counter will decrease by one. 10 OPERATION (CONTINUED) DELETING ALL...
User Guide - Page 12

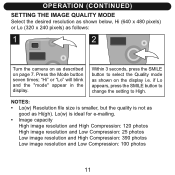
...) SETTING THE IMAGE QUALITY MODE Select the desired resolution as shown below, Hi (640 x 480 pixels) or Lo (320 x 240 pixels) as follows: 1 2 Turn the camera on as described on the display i.e. Press the Mode button seven times;
User Guide - Page 13

... compression): this option will slightly compress the pictures. 2a 2b TO SET TO Hd (High Compression) If "Ld" appears in the camera. OPERATION (CONTINUED) SETTING THE COMPRESSION 1 Turn the camera on as described on page 7. Press the Mode button eight times and the display will show one of the following: Hd (Hd...
User Guide - Page 14

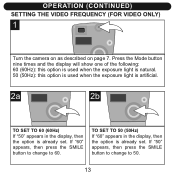
OPERATION (CONTINUED) SETTING THE VIDEO FREQUENCY (FOR VIDEO ONLY) 1 Turn the camera on as described on page 7. If "50" appears, then press the SMILE button to change to 50. 13 TO SET TO 50 (50Hz) If "60" ...
User Guide - Page 15

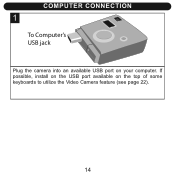
COMPUTER CONNECTION 1 To Computer's USB jack Plug the camera into an available USB port on the top of some keyboards to utilize the Video Camera feature (see page 22). 14 If possible, install on the USB port available on your computer.
User Guide - Page 16

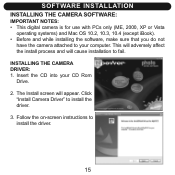
...: IMPORTANT NOTES: • This digital camera is for use with PCs only (ME, 2000, XP or Vista operating systems) and Mac OS 10.2, 10.3, 10.4 (except iBook). • Before and while installing the software, make sure that you do not have the camera attached to install the driver. 15 The Install screen will cause...
User Guide - Page 18

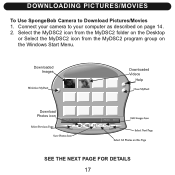
... Photos icon SEE THE NEXT PAGE FOR DETAILS 17 Connect your computer as described on the Windows Start Menu. DOWNLOADING PICTURES/MOVIES To Use SpongeBob Camera to your camera to Download Pictures/Movies 1. Select the MyDSC2 icon from the MyDSC2 folder on the Desktop or Select the MyDSC2 icon from the MyDSC2 program...
User Guide - Page 19

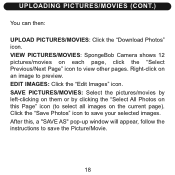
... Photos" icon to save your selected images. UPLOADING PICTURES/MOVIES (CONT.) You can then: UPLOAD PICTURES/MOVIES: Click the "Download Photos" icon. VIEW PICTURES/MOVIES: SpongeBob Camera shows 12 pictures/movies on an image to select all images on the current page). SAVE PICTURES/MOVIES: Select the pictures/movies by left-clicking...
User Guide - Page 20

Select one of the characters, SpongeBob, Dora the Explorer or Diego. Select an icon as shown on your desktop to open the Photo Editing Program. 2. Note: Selecting different characters will appear. Double-click "Shortcut to Flash PhotoTools" icon on the next page to the right will create different Frames, Stamps and Backgrounds for...
User Guide - Page 24

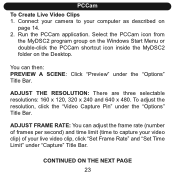
... of your computer as described on the Desktop. ADJUST FRAME RATE: You can then: PREVIEW A SCENE: Click "Preview" under the "Options" Title Bar. Connect your camera to capture your video clip) of frames per second) and time limit (time to your live video clip, click "Set Frame Rate" and "Set Time...
User Guide - Page 25

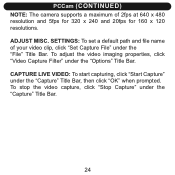
PCCam (CONTINUED) NOTE: The camera supports a maximum of your video clip, click "Set Capture File" under the "File" Title Bar. To adjust the video imaging properties, click "Video Capture Filter" ...
User Guide - Page 26

... is weak or dead. Battery is full. Video is off. Possible Cause Power is grainy. Lens is taken. Securely connect to the computer as Hold camera steady until picture picture was taken. Replace battery. Poor lighting. Pictures are poor quality. is dirty. Set Image Quality to Lo(w). Select the correct frequency...
User Guide - Page 27

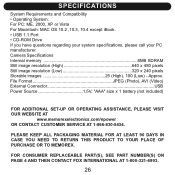
...included) FOR ADDITIONAL SET-UP OR OPERATING ASSISTANCE, PLEASE VISIT OUR WEBSITE AT www.memorexelectronics.com/npower OR CONTACT CUSTOMER SERVICE AT 1-866-830-5434. FOR CONSUMER REPLACEABLE PART(S), SEE PART NUMBER... YOU NEED TO RETURN THIS PRODUCT TO YOUR PLACE OF PURCHASE OR TO MEMOREX. Camera Specifications Internal memory 8MB SDRAM Still image resolution (High 640 x 480 pixels Still...

Similar Questions

Ask a New Question
Use the box below to post a new question about this Memorex product .
Points & Prizes
  • You can earn points for nearly everything you do on HelpOwl.com
  • You can trade in those points for gift cards at leading retailers such as Amazon.com and Walmart
  • It's that simple!
See How it Works
Create a Free Account

Memorex Manuals

Find free Memorex NDC6005-SB - Npower Flash Micro SpongeBob Digital Camera manuals and user guides available at ManualOwl.com. Try out our unique manual viewer allowing you to interact with manuals from directly within your browser!

Memorex Reviews

View thousands of Memorex user reviews and customer ratings available at ReviewOwl.com.

Contact Information

Complete Memorex customer service contact information including steps to reach representatives, hours of operation, customer support links and more from ContactHelp.com.

Scoreboard Ratings

See detailed Memorex customer service rankings, employee comments and much more from our sister site.