Get support for Maytag MMV1164WS

Maytag MMV1164WS Support Question

Maytag MMV1164WS Support Question

Find answers below for this question about Maytag MMV1164WS.
Need a Maytag MMV1164WS manual? We have 2 online manuals for this item!
Question posted by Anonymous-56656 on April 15th, 2012

How Do You Turn Off The Demo Mode

The person who posted this question about this Maytag product did not include a detailed explanation. Please use the "Request More Information" button to the right if more details would help you to answer this question.

Current Answers

There are currently no answers that have been posted for this question.
Be the first to post an answer!

Remember that you can earn up to 1,100 points for every answer you submit. The better the quality of your answer, the better chance it has to be accepted.

Related Maytag MMV1164WS Manual Pages

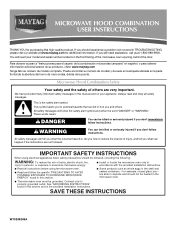
Owners Manual - Page 1

...and others are able to explode and should not be heated in the microwave oven. ■ The microwave oven must be killed or seriously injured if you what can be grounded. ... example, closed glass jars - IMPORTANT SAFETY INSTRUCTIONS When using the microwave oven. ■ Read and follow instructions. Microwave Hood Combination Safety Your safety and the safety of burns, electric ...
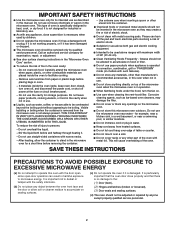
Owners Manual - Page 2

...or "PAN BROWN" mode (on models with such features). ■ Do not store any materials, other than manufacturer's recommended accessories, in this microwave oven outdoors. Do not leave...placed inside the oven ignite, keep oven door closed, turn the fan on top of the microwave oven when the microwave oven is not always present. Corrosive cleaning agents, such as lye-based oven cleaners, may...
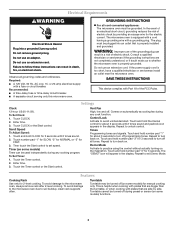
Owners Manual - Page 3

... Use only for about 3 seconds to follow these instructions can result in death, fire, or electrical shock. To avoid damage to the microwave oven due to exit Demo Mode. Turntable Turntable may be turned off (on some models) functions. 3 This is helpful when cooking with plates that are bigger than the turntable, or when cooking...
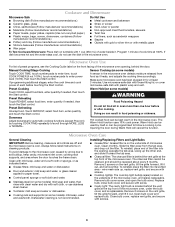
Owners Manual - Page 4

... if needed , then touch the Start control. Dishwasher cleaning is on the underside of microwave oven. Microwave Oven Care General Cleaning IMPORTANT: Before cleaning, make sure all controls are off and the microwave oven is (are ) located on the underside of the microwave oven, and is cool. To reinstall, place the filter into the opening , behind the door...
Owners Manual - Page 5

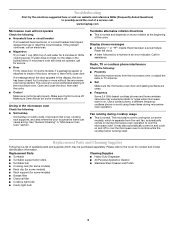
... buildup on some models) is separate from the microwave oven, or adjust the radio or TV antenna. ■ Soil Make sure the microwave oven door and sealing surfaces are clean. ■ Frequency Some 2.4 GHz-based cordless phones and home wireless networks may be purchased separately. Make sure Demo Mode (on motor rotation at 100% cooking power...
Owners Manual - Page 6

... Corporation or its related companies. 461966100751 3/09 Printed in -home service is contrary to instruct you on the upper or lower front facing of the microwave oven opening, behind the door. Have your major appliance, to replace or repair house fuses, or to Maytag with any questions or concerns at the number...
Installation Instructions - Page 1

...what the potential hazard is the safety alert symbol. Table of Contents MICROWAVE HOOD COMBINATION SAFETY 1 INSTALLATION REQUIREMENTS 2 Tools and Parts 2 Remove ... Install Damper Assembly 9 Install the Microwave Oven 9 Complete Installation 10 VENTING DESIGN SPECIFICATIONS 11 ASSISTANCE 12 Replacement Parts 12 Accessories 12 MICROWAVE HOOD COMBINATION SAFETY Your safety and the...
Installation Instructions - Page 2

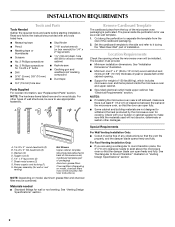
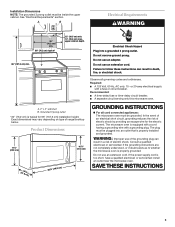
... round transition piece, the 3" (7.6 cm) clearance needs to exist above the microwave oven so that the materials used will be combined. See User Instructions.) NOTE: Depending... stud and minimum 3/8" (10 mm) thickness drywall or plaster/lath within cabinet opening where the microwave oven will not discolor, delaminate or sustain other types of installation. See "Rectangular to use as a...
Installation Instructions - Page 3

...delay fuse or time-delay circuit breaker. ■ A separate circuit serving only this microwave oven. Product Dimensions 17¹⁄₄" (43.8 cm) 16¹⁄₄"...outlet must be plugged into a grounded 3 prong outlet. Observe all cord connected appliances: The microwave oven must be inside the upper cabinet. Do not use an extension cord. Required: ■...
Installation Instructions - Page 4

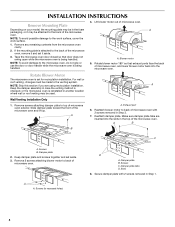
.... 3. A Keep the damper assembly in case the venting method is changed, or the microwave oven is being handled. 4. Blower motor 5. Wall Venting Installation Only 1. Remove any remaining contents from the microwave oven cavity. 2. A B C A. Lift blower motor out of the microwave oven and lift up. Exhaust port 6. Remove 2 screws attaching blower motor to the venting...
Installation Instructions - Page 5

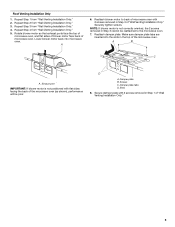
...Step 1 from "Wall Venting Installation Only." 4. Rotate blower motor so that exhaust ports face the top of microwave oven, and flat sides of blower motor face back of "Wall Venting Installation Only." 5 A 6. Slots 8. ... 2 screws removed in Step 3 cannot be reattached to back of microwave oven with flat sides facing the back of "Wall Venting Installation Only." Lower blower motor back into the...
Installation Instructions - Page 6

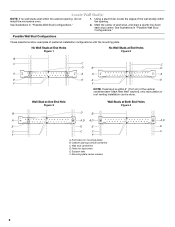
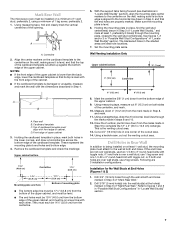
... configurations with the mounting plate. Wall stud centerlines D. Mounting plate center markers 6 End holes (on mounting plate) B. Cabinet opening , do not install the microwave oven. 1. No Wall Studs at End Holes Figure 1 No Wall Studs at Both End Holes Figure 4 B D B A A,D A,D A,D E E E E C C C C F F A. Holes for lag screws E. See illustrations in...
Installation Instructions - Page 7

..., mark both holes in "Locate Wall Stud(s)" section. 7 These represent the mounting plate's end holes and bottom edge. 4. This is level. 6. Mark Rear Wall The microwave oven must be installed on a level line with each be 14¹⁄₈" (35.9 cm) from the centerline. 5. Using measuring tape, find the wall stud...
Installation Instructions - Page 8

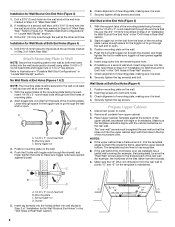
... Drill a 3/4" (19 mm) hole through the wall at the other hole marked in Step 6 of the microwave oven. Drill 3/16" (5 mm) holes into the remaining end hole. 6. With the support tabs of "Mark Rear.... 3. The template has trim lines to use as guides. ■ If the wall behind the microwave oven (as at both end holes drilled into the other hole drilled in Step 2 of "Installation for ...
Installation Instructions - Page 9

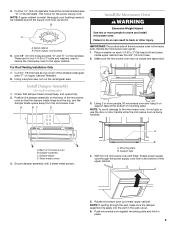
... hole in the wall cutout. 6. Position the damper assembly on the template. NOTE: To avoid damage to the upper cabinet. Damper blade D. Rotate microwave oven up toward upper cabinet. Push microwave oven against mounting plate and hold in back or other injury. B A A. These are for wall venting only) 1. Mounting plate B. NOTE: If upper cabinet...
Installation Instructions - Page 10

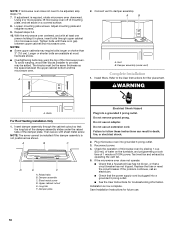
... a covered surface. 8. Test vent fan and exhaust by placing 1 cup (250 mL) of the damper assembly slides under vent) Complete Installation 1. Installation is required, rotate microwave oven downward. NOTES: ■ Some upper cabinets may warp the top of the damper plate. Connect vent to damper assembly. WARNING A. Damper assembly C. Do not remove...
Installation Instructions - Page 11

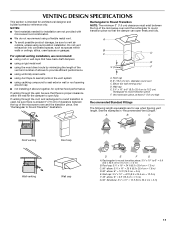
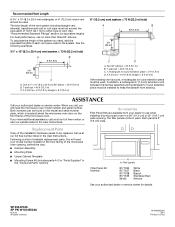
... system ■ using the most direct route by minimizing the length of the vent and number of the microwave oven and the transition piece. Do not vent exhaust air into concealed spaces, such as spaces within the wall for... (8.3 x 25.4 cm = 3 m) 11 Vent extension piece, at least 3" (7.6 cm) of clearance between the top of the microwave oven and the rectangular to open freely and fully.
Installation Instructions - Page 12

..., call , you will need , add the equivalent lengths of the microwave oven opening . ASSISTANCE Call your authorized dealer or service center for details. .... All rights reserved. 461966202992 8/10 Printed in pairs. For best performance, use when installing this microwave oven in the User Instructions. W10344702A SP PN W10345004A © 2010. One 3¹⁄₄" x...

Maytag Knowledge Base Results

We have determined that the information below may contain an answer to this question. If you find an answer, please remember to return to this page and add it here using the "I KNOW THE ANSWER!" button above. It's that easy to earn points!

  • Best cooking results - Microwave
    ...Microwave oven Setting the microwave timer Positioning Place delicate areas of foods, such as wing tips and leg ends of food. For even cooking, reduce the power when cooking large pieces of poultry. Rotation Turn...of standing time depends on the density and surface area of the dish. Microwave oven Product Recall Information Food characteristics and cooking results - To get the best ...
  • Food characteristics and cooking results - Microwave oven
    ...page Recipient Email * Required Your Email Your Name Food characteristics and cooking results - Microwave oven How do characteristics of food affect cooking results in fat and sugar will reach ..., porous food, such as cake. Email Your Feedback How old is your appliance? Microwave oven Setting the microwave timer Go Back to 5 years Greater than the same size of food   The...
  • Control setup and changing default settings - Microwave oven
    ... Best cooking results - You can change weight mode (from lbs. Touch Control Setup pad. Microwave Food characteristics and cooking results - to kg). Touch number 1 pad. Microwave oven Changing the default settings on a microwave oven. Example: To change the default values of your microwave.  Control setup and changing default settings - Microwave oven Touch number 2 pad.

Similar Questions

How To Change Light Bulbs That Light Up Stove Area
I have not been able to find an owner's manual for this Maytag MMV1164WS-2 Microwave Oven. The light...
(Posted by hweinstein55 9 years ago)
How To Attach Microwave Oven Door
How does one attach oven door
(Posted by RichaMry 10 years ago)
Microwave Oven Won't Heat
My microwave oven, 2 years old, not used that much has stopped heating up water.
(Posted by MarjorieChowning 11 years ago)
Maytag Mmv1164ws-0 Not Turning On.
I just changed out the light from under the microwave and now it the microwave will not power on at ...
(Posted by zveillon 11 years ago)
Maytag Microwave Mmv4203ds00
I have a Maytag microwave  model MMV4203ds00 that gives me an error se or 5e. I tried power off/on ...
(Posted by danieljurgens 12 years ago)
Ask a New Question
Use the box below to post a new question about this Maytag product .
Points & Prizes
  • You can earn points for nearly everything you do on HelpOwl.com
  • You can trade in those points for gift cards at leading retailers such as Amazon.com and Walmart
  • It's that simple!
See How it Works
Create a Free Account

Maytag Manuals

Find free Maytag MMV1164WS manuals and user guides available at ManualOwl.com. Try out our unique manual viewer allowing you to interact with manuals from directly within your browser!

Maytag Reviews

View thousands of Maytag user reviews and customer ratings available at ReviewOwl.com.

Contact Information

Complete Maytag customer service contact information including steps to reach representatives, hours of operation, customer support links and more from ContactHelp.com.

Scoreboard Ratings

See detailed Maytag customer service rankings, employee comments and much more from our sister site.

Maytag Recalls

Find comprehensive Maytag recall information updated hourly on RecallOwl.com.