Get support for LiftMaster 3280

LiftMaster 3280 Support Question

LiftMaster 3280 Support Question

Find answers below for this question about LiftMaster 3280.
Need a LiftMaster 3280 manual? We have 1 online manual for this item!
Question posted by saintgeodragon on June 23rd, 2021

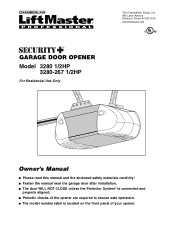
Chamberlain 3280 Lift Master Professional Formula 1

Frequency for outside door opener?

Current Answers

Answer #1: Posted by SonuKumar on June 23rd, 2021 7:18 PM
This answer was accepted by the poster of the original question.
SonuKumar

Member since:
May 9th, 2021

Points: 16,622,390
1,100
points
https://support.chamberlaingroup.com/s/article/LiftMaster-Model-3280-3280-267-Owner-s-Manual-1484145556183

What frequency does LiftMaster use?

433 MHz

LiftMaster 41A5235 433MHz three button remote control transmitter is ONLY used on garage door openers that use the 433 MHz frequency.

What is the frequency of my garage door opener?

2.4-GHz

Your garage door is likely using a frequency clustered around the 2.4-GHz band that's been designated the ISM band, otherwise known as the Industrial, Scientific and Medical band.

How do you sync a LiftMaster garage door opener?

HOW TO PROGRAM A STANDARD LIFTMASTER REMOTE CONTROL

Locate the "Learn" button on your garage door opener. ...

Press and release the "Learn" button.

Within 30 seconds of pressing the "Learn" button, press and hold the button you wish to program on the remote control for three seconds, then release.

How do you change the frequency on a LiftMaster garage door opener?

Find a button labeled "Smart" or "Learn" on the motor unit of the door opener. Press it and then release it.

Press and hold the "Learn" button on the door opener remote within 30 seconds.

Release the "Learn" button when the motor unit light blinks or clicks twice. ...

Press the remote button once to test the new code.


Please respond to my effort to provide you with the best possible solution by using the "Acceptable Solution" and/or the "Helpful" buttons when the answer has proven to be helpful.

Regards,
Sonu
Your search handyman for all e-support needs!!

Related LiftMaster 3280 Manual Pages

3280 Manual - Page 1

® GARAGE DOOR OPENER Model 3280 1/2HP 3280-267 1/2HP For Residential Use Only The Chamberlain Group, Inc. 845 Larch Avenue Elmhurst, Illinois 60126-1196 www.liftmaster.com Owner's Manual ■ Please read this manual and the enclosed safety materials carefully! ■ Fasten the manual near the garage door after installation. ■ The door WILL NOT CLOSE unless the Protector...
3280 Manual - Page 2

... and Service 36 Warranty 36 INTRODUCTION Safety Symbol and Signal Word Review This garage door opener has been designed and tested to the trolley 21-22 Adjustment 23-25 ... safety instructions 26 Using your garage door opener 26 Using the wall-mounted door control 27 To open the door manually 27 Care of your garage door and/or the garage door opener if you do not comply with...
3280 Manual - Page 3

Lift the door about halfway as illustrated below. Raise and lower the door to see if there is any ropes connected to garage door. • Complete the following test to loosen, move or adjust garage door, door springs, cables, pulleys, brackets or their hardware, all of the opener, instructions will call for hand tools as shown. To prevent possible SERIOUS...
3280 Manual - Page 4

... any of your opener. You may be required. See page 12. Safety Reversing Sensor Safety Reversing Sensor Gap between floor and bottom of door must not exceed 1/4" (6 mm). See page 12. Additional materials may find it helpful to refer back to your garage door. See page 19 for lightweight garage doors (fiberglass, steel, aluminum, door with the...
3280 Manual - Page 5

Carton Inventory Your garage door opener is also listed below . Parts may be stuck in two cartons which contain the motor unit and all parts illustrated below . Hardware for installation is packaged in the foam. LOCK LIGHT Multi-Function Door Control Panel SECURITY✚® 3-Button Remote Control Models 3280 (1) 3280-267 (2) Remote Control Transmitter Visor Clip...
3280 Manual - Page 6

...Attach the Rail to the Motor Unit To avoid installation difficulties, do not run the garage door opener until instructed to opener, ONLY use any tools. • Insert a screwdriver tip into the motor unitL....e5/b16o/9lt2s-!5/U21s/9e2 -o6f/2a/9n2y other bolts will cause6/1s1e/9r2ious damage to door opener. • Position belt over sprocket. Do not use bolts/fasteners mounted in top of ...
3280 Manual - Page 7

... may not reverse when required and could be made by a trained door systems technician BEFORE installing opener. 4. Install garage door opener 7 feet (2.13 m) or more above floor. 7. Upon completion of SEVERE INJURY or DEATH: 1. You have now finished assembling your garage door opener. Install garage door opener ONLY on wall next to do so. 8. They could result in SEVERE INJURY...
3280 Manual - Page 8

... the header bracket on a 2x4 (on page 9. 3. Open your door to the highest point of balance. DO NOT install header bracket over drywall. • Concrete anchors MUST be used if mounting header bracket or 2x4 into masonry. • NEVER try to loosen, move or adjust garage door, springs, cables, pulleys, brackets, or their hardware...
3280 Manual - Page 9

.... Optional Wall Mounting Holes Header Wall 2x4 Structural Support Header Bracket CEILING MOUNT ONLY UP Vertical Centerline of Garage Door Lag Screws 5/16"-9x1-5/8" Door Spring Horizontal Line Highest Point of Garage Door Travel Garage Door Vertical Centerline of Garage Door 9 WALL HEADER BRACKET INSTALLATION • Center the bracket on the vertical centerline with the bottom edge of...
3280 Manual - Page 10

... as shown. • Insert a ring fastener to secure. NOTE: If the door spring is in the way you'll need help. Have someone hold the opener securely on the garage floor below the header bracket. Header Wall Header Bracket Belt Pulley Bracket Garage Door INSTALLATION STEP 3 Attach the Rail to the Header Bracket • Position...
3280 Manual - Page 11

... this point if the ladder is used to garage door, rest garage door opener rail on 2x4 placed on its side is convenient for setting an ideal door-to-rail distance. • Remove foam packaging. • Raise the opener onto a stepladder. Rail Door 2x4 is not tall enough. • Open the door all the way and place a 2x4 laid flat...
3280 Manual - Page 12

... into masonry. Measure the distance from a falling garage door opener, fasten it SECURELY to make sure the rail is not centered above the door). 7. Operate the door manually. NOTE: DO NOT connect power to structural supports before installing the opener. Fasten the opener to the structural support. 2. If the door hits the rail, raise the header bracket. 8. On...
3280 Manual - Page 13

... mm) Strip wire 7/16" (11 mm) 13 Strip 7/16" (11 mm) of insulation from a closing garage door. Remove cover by color: white wire to WHT and white/red wire to motor unit. Connect bell wire to ...8226; Install top screw with a staple, creating a short or open position but will travel . • ALWAYS keep garage door in several places. Use insulated staples to secure. If not lit...
3280 Manual - Page 14

... and remain lit for approximately 4-1/2 minutes when power is connected. Use ONLY incandescent. Secure with a Garage Door Opener bulb. If rope knot becomes untied, you could result in the top of the rope through the hole in an open position. Gently rotate lens back and downward until the lens hinge is in the fully...
3280 Manual - Page 15

... Green Ground Screw Ground Wire Black Wire White Wire Black Wire 15 To avoid installation difficulties, do not run the opener at this time. Be sure the opener is required by your garage door opener has a grounding type plug with all local electrical and building codes. • NEVER use an extension cord, 2-wire adapter, or...
3280 Manual - Page 16

...® The safety reversing sensor must be connected and aligned correctly before the garage door opener will move in masonry construction, add a piece of its electronic beam. IMPORTANT...floor. Safety Reversing Sensor 6" (15 cm) max. If it is necessary to the garage door opener BEFORE installing the safety reversing sensor. Either can be unobstructed. The invisible light beam path...
3280 Manual - Page 17

... Sensor Bracket Lens Figure 2 IGWnasairldal ege WALL MOUNT (RIGHT SIDE) Fasten Wood Block to the opener is disconnected. Garage door track installation (preferred): • Slip the curved arms over the rounded edge of the track. Be sure all door hardware obstructions are cleared. • Fasten to the floor with concrete anchors as follows. INSTALLING...
3280 Manual - Page 19

... of Garage Door UP Vertical Centerline of door bracket. NOTE: Many door reinforcement kits provide for reinforcement kit. Secure the door bracket using a vertical angle iron brace between the door panel support and the door bracket: • Drill 3/16" fastening holes. For the vertical brace, 2 pieces of angle iron are not intended for an opener installation door reinforcement...
3280 Manual - Page 27

... all buttons. After the opener lights flash, release all buttons. To Open the Door Manually To prevent possible SERIOUS INJURY or DEATH from the Door Control, the Outside Keylock and the Keyless Entry Accessories. To reconnect the door to a maximum of persons and obstructions. • NEVER use emergency release handle unless garage doorway is clear of four...
3280 Manual - Page 36

... covered by this limited warranty in your local LIFTMASTER/CHAMBERLAIN dealer. WHEN ORDERING REPAIR PARTS, ALWAYS GIVE THE FOLLOWING INFORMATION:...TOLL FREE NUMBER: 1-800-528-2817 www.liftmaster.com For professional installation, parts and service, contact your area. Country Club Road...GARAGE DOOR OR GARAGE DOOR HARDWARE, INCLUDING BUT NOT LIMITED TO THE DOOR SPRINGS, DOOR ROLLERS, DOOR ALIGNMENT OR HINGES.

Similar Questions

Ask a New Question
Use the box below to post a new question about this LiftMaster product .
Points & Prizes
  • You can earn points for nearly everything you do on HelpOwl.com
  • You can trade in those points for gift cards at leading retailers such as Amazon.com and Walmart
  • It's that simple!
See How it Works
Create a Free Account

LiftMaster Manuals

Find free LiftMaster 3280 manuals and user guides available at ManualOwl.com. Try out our unique manual viewer allowing you to interact with manuals from directly within your browser!

LiftMaster Reviews

View thousands of LiftMaster user reviews and customer ratings available at ReviewOwl.com.

Contact Information

Complete LiftMaster customer service contact information including steps to reach representatives, hours of operation, customer support links and more from ContactHelp.com.

Scoreboard Ratings

See detailed LiftMaster customer service rankings, employee comments and much more from our sister site.