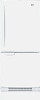
LG LRBN20512WW Support Question
LG LRBN20512WW Support Question
Find answers below for this question about LG LRBN20512WW.Need a LG LRBN20512WW manual? We have 3 online manuals for this item!
Question posted by Cheryn on August 9th, 2021
Leaking Refrigerator
Current Answers
Answer #1: Posted by Odin on August 9th, 2021 9:22 AM

Member since:
April 10th, 2010 Points: 41,236,680

If the issue persists or if you require further advice, you may want to consult the company: use the contact information at https://www.contacthelp.com/lg.
Hope this is useful. Please don't forget to click the Accept This Answer button if you do accept it. My aim is to provide reliable helpful answers, not just a lot of them. See https://www.helpowl.com/profile/Odin.
Answer #2: Posted by SonuKumar on August 9th, 2021 9:03 AM

Member since:
May 9th, 2021 Points: 16,622,780
Clogged or Frozen Defrost Drain
The first component to check in your LG refrigerator is the defrost drain. When it freezes up or gets clogged up with loose debris, it will not function correctly, and the overflowing water will leak out onto the floor.
Clogged or Frozen Defrost Drain
The first component to check in your LG refrigerator is the defrost drain. When it freezes up or gets clogged up with loose debris, it will not function correctly, and the overflowing water will leak out onto the floor.
To check if the defrost drain is the problem, you need to:
Remove any food inside your refrigerator so you can access the drain at the bottom of your refrigerator.
Check the drain to determine if it is clogged up or frozen. You can do this by trying to run some water down it.
If it is frozen, turn the fridge off at the wall and let it thaw out.
If it's not frozen, check for any blockages. If there are no blockages, move on to the next component to check.
Once thawed out, flush the drain out with hot water and then plug your fridge back in.
Turn your fridge back on at the wall, and then observe over the next 24 hours if the problem is solved.
Faulty Water Inlet Valve
The second possible cause of the leak is a faulty water inlet valve. The inlet valve operates by opening up to supply water to the ice maker when required. If it gets a crack in it, then it will become faulty and will cause a leak to occur.
You can check it by:
Turning your refrigerator off and pulling the plug out.
Pull your refrigerator out from the wall so you can access the back of it.
Remove the lower panel at the back of the refrigerator and locate the valve.
Check the valve to see if there are any cracks in it and if it is properly connected to the water supply pipe.
If there are no cracks and it is secured tightly to the water supply line, it is fine and not the cause of the problem. However, if you do find cracks in the valve, it will need to be replaced.
After replacing the valve, put the back panel back on, put the fridge back in its place, and turn the refrigerator back on at the wall.
Damaged Water Tank Assembly
The third component to check is the water tank assembly.
You can inspect the tank assembly by:
Turning the refrigerator off at the wall.
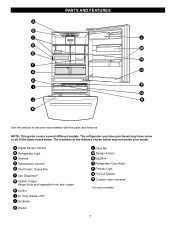
Check your manual for the exact location of the water tank.
Locate the tank and then check it for any signs of leaks coming out of it.
If you find a leak, it will need to be replaced. If you don't find a leak, then the tank is OK.
Once the tank has been replaced, you can turn your refrigerator back on at the wall.
Faulty Water Filter Head
The next component to check is the water filter head. When it gets damaged, the filter won't operate correctly and will cause a leak.
To check the water filter head, you need to:
Locate the water filter head.
Examine the water filter head and the seals for any signs of wear and tear. The most common issue is cracking developing in the water filter head.
If you find any damage, it will need to be completely replaced. If there is no damage, move on to the next possible cause.
Worn-Out Water Filter
The next component to check for damage is the water filter. Sometimes water filters will get worn out and will stop working correctly, which can cause leaks to occur. Keep in mind that you should be replacing your water filter regularly anyway.
To inspect the water filter, you need to:
Turn your refrigerator off at the wall.
Locate the water filter in your refrigerator, and remove it from the water filter housing.
Put it back in the housing and make sure that it fits properly.
If it doesn't fit correctly, this means it has to be replaced.
Once you've replaced the filter, turn the refrigerator power back on. Over 24 hours or so, you should be able to determine if this has solved the problem.
Cracked Drain Pan
The final cause to check is a faulty drain pan. Self-defrosting refrigerators have a drain pan at the bottom of the fridge that collects melted water, which evaporates over time by the condenser fan blowing warm air over the pan. If the drain pan gets a crack in it, this will cause a leak to develop.
To check the drain pan you need to:
Turn your refrigerator off at the wall, pull it out, and then remove the back panel.
Find the drain pan and inspect it for any signs of cracks in it.
If it is cracked, then it will need to be replaced.
Once replaced, you can put the back panel back onto the fridge and put the fridge back into its place.
Turn your refrigerator back on and check if replacing the drain pan has fixed the problem.
Please respond to my effort to provide you with the best possible solution by using the "Acceptable Solution" and/or the "Helpful" buttons when the answer has proven to be helpful.
Regards,
Sonu
Your search handyman for all e-support needs!!
Related LG LRBN20512WW Manual Pages


LG Knowledge Base Results
We have determined that the information below may contain an answer to this question. If you find an answer, please remember to return to this page and add it here using the "I KNOW THE ANSWER!" button above. It's that easy to earn points!-
Freezer too cold - LG Consumer Knowledge Base
... Views: 1729 Top Mount Side by Side Leaking inside freezer Water overshooting ice tray Refrigerator Configurations Unit not staying cool If there is not a lot of food in the compartment, the doors are not opened very often, or the ambient temperature is cool, then the unit does not need to the air vents will be cooler because... -
How to Replace Door Handles (LFX25970**/LFX21970** Models) - LG Consumer Knowledge Base
... tightened or removed use a 1/4" Allen wrench. If the handle mounting fasteners need to be tightened or removed use a 1/4" Allen wrench. Article ID: 2268 Views: 443 Freezer not cooling Reinstalling the Refrigerator Door Refrigerator: Not Sealing How to Remove Door Handles (LFX25960**/LFX21960** Models) Leaking from illustrations on the door by adjusting handle footprints to fit mounting... -
Unit not staying cool - LG Consumer Knowledge Base
... vents, the air will temporarily warm the unit, requiring the unit to run longer to bring the unit back to open Freezer not cooling Leaking inside refrigerator Ice bin over filling Demo Mode on to make certain they are being opened and closed properly, cold air can escape preventing the unit from maintaining the set...
Similar Questions


Does anyone have a list of error codes for model lrbn20512ww.

Where is and how do I reset the refrigerator?

Refrigerator is not cooling properly and the freezer is not freezing. Any idea what the problem coul...

i need to change door direction on lg refrigerator lrbn20512ww. Where can i find a manual or instruc...