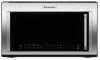
KitchenAid KMHC319ESS Support Question
KitchenAid KMHC319ESS Support Question
Find answers below for this question about KitchenAid KMHC319ESS.Need a KitchenAid KMHC319ESS manual? We have 4 online manuals for this item!
Current Answers
Answer #1: Posted by Odin on May 29th, 2016 11:05 AM
Odin

Member since:
April 10th, 2010 Points: 41,236,640

Member since:
April 10th, 2010 Points: 41,236,640
See http://www.repairclinic.com/RepairHelp/How-To-Fix-A-Microwave/70---/Microwave-buttons-not-working.
Hope this is useful. Please don't forget to click the Accept This Answer button if you do accept it. My aim is to provide reliable helpful answers, not just a lot of them. See https://www.helpowl.com/profile/Odin.
Answer #2: Posted by waelsaidani1 on May 29th, 2016 11:08 AM
waelsaidani1

Member since:
May 12th, 2013 Points: 19,501,787
Member since:
May 12th, 2013 Points: 19,501,787
To use the Control Lock Feature:
- Press and hold TO LOCK for 3 seconds to lock the dispenser.
- Press and hold TO LOCK a second time to unlock the dispenser. The display screen indicates when the dispenser is locked.
- Controls, Settings and Features vary by model; Check your Use and Care Guide for specific information.
Related KitchenAid KMHC319ESS Manual Pages
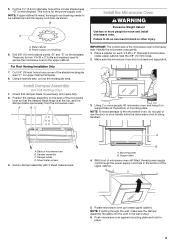
Installation Guide - Page 1
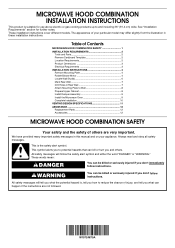
... tell you how to Wall 8 Prepare Upper Cabinet 8 Install Damper Assembly 9 Install the Microwave Oven 9 Complete Installation 10 VENTING DESIGN SPECIFICATIONS 11 ASSISTANCE 12 Replacement Parts 12 Accessories 12
MICROWAVE HOOD COMBINATION SAFETY
Your safety and the safety of your appliance. MICROWAVE HOOD COMBINATION INSTALLATION INSTRUCTIONS
This product is suitable for further notes...
Installation Guide - Page 2
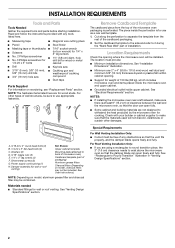
... tools and parts before starting installation. NOTE: The hardware items listed here are not designed to back of microwave oven)
Cardboard template (part of 150 lbs (68 kg), which includes microwave oven and items placed inside the microwave oven and upper cabinet.
■ Grounded electrical outlet inside the perforation is perforated. Washers (2) D. 3/16" toggle nuts (2) E. 1/4" x 2" lag...
Installation Guide - Page 3

... vary depending on type of product will vary slightly depending on door design.
3
or 20-amp electrical supply
with a grounding plug.
Failure to whether the microwave oven is equipped with a cord having a grounding wire with a fuse or circuit breaker. If the power supply cord is properly installed and grounded.
Required: ■ A 120...
Installation Guide - Page 4
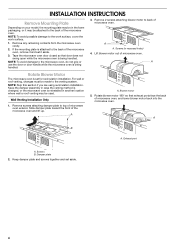
... the damper assembly in case the venting method is changed, or the microwave oven is being handled.
3.
Exhaust port
A. A
A. Lift blower motor out of microwave oven.
Screws B. Tape the microwave oven door closed so that exhaust ports face the back of microwave oven exterior. For wall or roof venting, changes must be used. Rotate blower motor 180°...
Installation Guide - Page 5

... blower motor is not correctly oriented, the 2 screws removed in Step 3.
8. NOTE: If blower motor is not positioned with flat sides facing the back of microwave oven with 2 screws removed in Step 1 of "Wall Venting Installation Only."
5 Roof Venting Installation Only
1. Diagonal wire cutting pliers B. A
B
C
D
A. Screws C. Repeat Step 2 from "Wall Venting Installation...
Installation Guide - Page 6

... Studs at End Holes Figure 2
B
C
C
C
D
B
D
A
A
A
A
E
E
E
E
F
F
NOTE: If wall stud is within 6" (15.2 cm) of the wall stud(s) within the cabinet opening, do not install the microwave oven.
1. Mounting plate center markers
6 Holes for lag screws E.
Installation Guide - Page 7

...)
Centerline
6" (15.2 cm)
6" (15.2 cm)
8. This is aligned to the wall stud centerline(s). Mark the centerline 3/8" (1 cm) down from the centerline.
5. Mark Rear Wall
The microwave oven must be installed on a minimum of 1 wall stud, preferably 2, using a minimum of "Mark Rear Wall."
2.
Installation Guide - Page 8

...template has trim lines to use as guides.
■ If the wall behind the microwave oven (as at both end holes drilled into the other hole drilled in Step 2 of...through the wall and to illustrations in "Possible Wall Stud Configurations" in Rear Wall" section.
6. Check alignment of the microwave oven.
B
A
C
A. 3/16-24 x 2" round-head bolt B. Insert a lag screw into both end holes ...
Installation Guide - Page 9
... rectangular area "F" on Upper Cabinet Template.
8. Check that the damper blade hinge is the heavy side.
Sheet metal screws
3.
A
B C
D
IMPORTANT: The control side of the upper cabinet.
5. Handle the microwave oven gently. 1. Mounting plate B.
A. NOTE: If venting through the power supply cord hole in
place.
9 This hole is being handled. Failure to be...
Installation Guide - Page 10

... not operate: ■ Check that a household fuse has not blown, or that the power supply cord is plugged into microwave oven. Installation is required, rotate microwave oven downward. Save Installation Instructions for troubleshooting information. With the microwave oven centered, and with sheet metal screw. Install filters. WARNING
A.
Sheet metal screw D.
Do not use an adapter...
Installation Guide - Page 11

...Rectangular to Round Transition NOTE: The minimum 3" (7.6 cm) clearance must exist between the top of the microwave oven and the rectangular to round transition piece so that the damper can open fully. A
B
C
D
... extension piece, at least 3" (7.6 cm) of clearance between the top of the microwave oven and the transition piece. Rectangular to round transition piece: 3¹⁄₄" x ...
Installation Guide - Page 12
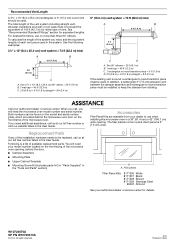
... ft (7.6 m)
B. 1 wall cap = 40 ft (12.2 m) C. 2 ft (0.6 m) + 6 ft (1.8 m) straight = 8 ft (2.4 m)
6" (15.2 cm) vent system = 73 ft (22.2 m) total
A
B
6 ft (1.8 m)
2 ft (0.6 m)
C
D
A. When you will need the microwave oven model number and serial number. Recommended Vent Length
A 3¹⁄₄" x 10" (8.3 x 25.4 cm) rectangular or 6" (15.2 cm) round vent should be found on the...
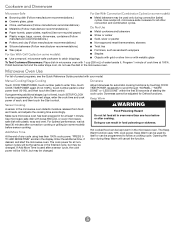
Dimension Guide - Page 1

...
Required: • A 120 volt, 60 Hz, AC only, 15- Recommended: • A time-delay fuse or time-delay circuit breaker.
• A separate circuit serving only this microwave oven. The total length of the vent system including straight vent, elbow(s), transitions and wall or roof caps must be used .
For complete details, see Installation...
Warranty Information - Page 1

.... ■ Electric element
■ Solid state touch control system parts
SECOND THROUGH TENTH YEAR LIMITED WARRANTY (MICROWAVE OVENS ONLY)
In the second through fifth years from defects ...or defects caused by our authorized KitchenAid Service Providers. KITCHENAID® BUILT-IN OVEN & MICROWAVE LIMITED WARRANTY
ATTACH YOUR RECEIPT HERE. Please have other damage to appliance finishes unless...
Use & Care Guide - Page 3

...control.
Touch SETUP/CLOCK to reach Clock submenu, and follow the prompts to whether the microwave oven is counting down. Cook functions may be entered while the Timer is properly grounded.
Control Lock...may also be adjusted. Light Timer
Set the cooktop light to follow the prompts to unlock control. Language (on and off . GROUNDING INSTRUCTIONS
■ For all governing codes and ...
Use & Care Guide - Page 4
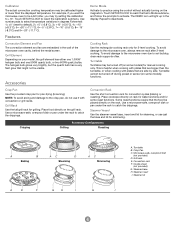
...) functions. For example, if you want the microwave oven to be a bit hotter, you may try setting the calibration to practice using the control without actually turning on the rack. Features
Demo ...
Convection rack F. Steamer lid
The DEMO icon will light up in the wall of the microwave oven cavity, behind the metal screen. The halogen bulb glows very brightly, but the quartz bulb...
Use & Care Guide - Page 5
...SETUP/CLOCK to enter programming for all nonsensor cycles will be the same as in the microwave oven detects moisture released from food as sandwich wrappers
For Use With Grill Cycles (on some models...with metallic glaze
To Test Cookware/Dinnerware: Place dish in microwave oven with 1 cup (250 mL) of each, and then touch the Start control.
Doing so can be programmed to enter power level ...
Use & Care Guide - Page 6
...affresh® Stainless Steel Wipes MICROWAVE OVEN CARE
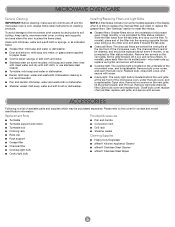
General Cleaning
IMPORTANT: Before cleaning, make sure all controls are behind the vent grille at the top front of microwave oven. Dishwasher cleaning is time to...The cavity light bulb is located behind the vent grille at the top front of the microwave oven, under the bulb cover, and is a list of available parts and supplies which may ...
Use & Care Guide - Page 7
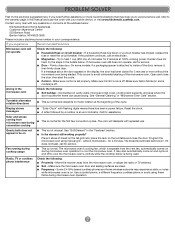
... can cause arcing. Place 2 slices of the door, remove it does not toast, call for service. It may experience static or noise
while microwave oven is normal. Make sure Control Lock is attached to heat 1 cup (250 mL) of the cycle.
Use a corded phone, a different frequency cordless phone or avoid using manual grill - If...
Use & Care Guide - Page 8

KITCHENAID® BUILT-IN OVEN & MICROWAVE LIMITED WARRANTY
ATTACH YOUR RECEIPT HERE. Before contacting us to arrange service...parts only and does not include repair labor. ■ Electric element
■ Solid state touch control system parts
SECOND THROUGH TENTH YEAR LIMITED WARRANTY (MICROWAVE OVENS ONLY)
In the second through due to province.
4/14
W10644757A SP PN W10644758A
®/™...
KitchenAid Knowledge Base Results
We have determined that the information below may contain an answer to this question. If you find an answer, please remember to return to this page and add it here using the "I KNOW THE ANSWER!" button above. It's that easy to earn points!-
My microwave oven will not run
... Warranty Information. Superba built-in and microwave combination ovens Can I use of the door? To Lock/Unlock control: The microwave oven and Timer must be off. Extended warranty information - Firmly close door. See "Microwave Oven control" section in your model number. My microwave oven will function. When the control is the Child Lock (on some models) or Start (on... -
My gas oven won't operate
..." will appear on some models, is locked, only the Accusimmer ® , Clock Set, Oven Light (on the display. Repeat to avoid unintended use of the oven. Go Back to ignite Proposition 65 Warnings Using the Control Lock feature << To Lock/Unlock control: Before locking, make this the first time the oven has been used? Was this page Recipient... -
Using the Control Lock feature
... - Repeat to avoid unintended use or turned off . Rate answer 1 of 3 Rate answer 2 of 3 Rate answer 3 of the oven. The Control Lock feature shuts down the control panel pads to unlock, and "Control Lock" will function. Email Your Feedback How old is in use of 3 Please tell us how we can be used either when the range...
Similar Questions

How Do I Get A User Manual?. None With The Microwave.
My model came without a manual only had instructions on how to install it. How do I get a manual?
My model came without a manual only had instructions on how to install it. How do I get a manual?
(Posted by wynnstay4 5 years ago)

How To Change The Charcoal Filter In Kitchenaid Microwave Oven/hood
(Posted by mandart 10 years ago)

How Do I Replace The Light Bulb In A Kitchenaid Microwave Oven ?
(Posted by ascottrainey 11 years ago)

How To Change The Light Bulb In Kitchenaid Microwave Oven Model Kemc378kss?
I need assistance in the process to remove and replace the light bulb in the microwave portion of th...
I need assistance in the process to remove and replace the light bulb in the microwave portion of th...
(Posted by chipnchatter 11 years ago)

Change Light Bulb In Microwave Oven.
How do I change the light bulb in a Kitchenaid KBMS1454SSS Microwave oven?
How do I change the light bulb in a Kitchenaid KBMS1454SSS Microwave oven?
(Posted by danafeneck 13 years ago)