Get support for KitchenAid KHHC2090SSS - Architect II 2.0 cu. ft. 1200 W

KitchenAid KHHC2090SSS Support Question

KitchenAid KHHC2090SSS Support Question

Find answers below for this question about KitchenAid KHHC2090SSS - Architect II 2.0 cu. ft. 1200 W.
Need a KitchenAid KHHC2090SSS manual? We have 3 online manuals for this item!
Question posted by trebemba on February 16th, 2014

Kitchenaid Microwave Khhc2090sss Door Wont Close

The person who posted this question about this KitchenAid product did not include a detailed explanation. Please use the "Request More Information" button to the right if more details would help you to answer this question.

Current Answers

There are currently no answers that have been posted for this question.
Be the first to post an answer!

Remember that you can earn up to 1,100 points for every answer you submit. The better the quality of your answer, the better chance it has to be accepted.

Related KitchenAid KHHC2090SSS Manual Pages

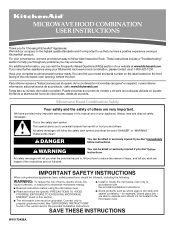
Use & Care Guide - Page 1

... a positive experience owning a KitchenAid® product. If you need further assistance using your appliance. This is , tell you how to help you through any problems you for example, closed glass jars - See "GROUNDING INSTRUCTIONS" found in this section and in the provided Installation Instructions. ■ Install or locate the microwave oven only in accordance...
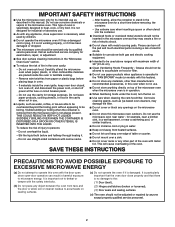
Use & Care Guide - Page 2

... containers with the safety interlocks. (b) Do not place any appliance, close properly and that the oven door close supervision is necessary when used above both before placing bags in use...are placed inside the oven ignite, keep oven door closed, turn the fan on sealing surfaces. (c) Do not operate the oven if it is damaged. Pieces can result in the microwave oven for a short time ...
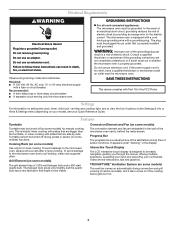
Use & Care Guide - Page 3

... with plates that are not completely understood, or if doubt exists as to whether the microwave oven is designed to be easily navigable, guiding you through the menus, offering multiple selections,...bar is too short, have a qualified electrician or serviceman install an outlet near the microwave oven. Do not use an extension cord. Consult a qualified electrician or serviceman if the ...
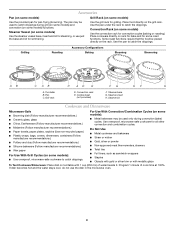
Use & Care Guide - Page 4

....) For Use With Convection/Combination Cycles (on some models) Use the steamer vessel base, insert and lid for steaming, or use the dish in the microwave oven. 4 The pan may be placed directly on the rack. Place food directly on some models) functions. Turntable B. Convection rack E. Cookie sheet (not provided) F. Use ovenproof...
Use & Care Guide - Page 5

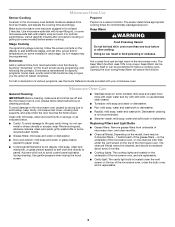
... give you the option to lessen doneness. Opening the door during Keep Warm will cancel the function. For optimal performance, wait at least 2 minutes. Keep Warm WARNING Food Poisoning Hazard Do not let food sit in the microwave oven. on the underside of the microwave oven, or one hour before sensor cooking. The sensor determines...
Use & Care Guide - Page 6

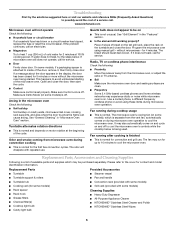
.... If it , then firmly close the door. Program the microwave oven using these items during cooktop usage ■ This is off. Fan running during microwave oven operation. Arcing in the display, the door has been closed for 4 minutes. www.kitchenaid.com Microwave oven will dissipate with some models) is off to cool the microwave oven. The microwave oven's cooling fan (on some...
Use & Care Guide - Page 8

... assistance, you on the upper or lower front facing of the microwave oven opening, behind the door. All rights reserved. ®Registered Trademark/TM Trademark of consumables or cleaning products not approved by KitchenAid. 5. This major appliance is designed to be borne by a KitchenAid designated service company. THIS WARRANTY GIVES YOU SPECIFIC LEGAL RIGHTS, AND...
Dimension Guide - Page 1

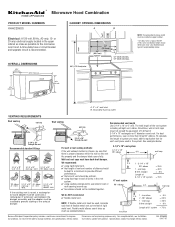
...using duct tape to seal all joints in the upper cabinet as close as possible to the microwave oven hood. Because Whirlpool Corporation policy includes a continuous commitment to provide efficient... sticking of rigid metal vent. Length of 3-1/4" x 10" system = 25 ft. = 40 ft. = 8 ft. = 73 ft. 6 ft. Instructions packed with product. or 20-amp electrical supply located in the vent ...
Installation Guide - Page 1

... HOOD COMBINATION SAFETY 1 INSTALLATION REQUIREMENTS 2 Tools and Parts 2 Location Requirements 2 Product Dimensions 3 Electrical Requirements 3 INSTALLATION INSTRUCTIONS 4 Remove Mounting Plate 4 Convert Microwave Oven to External Venting 4 Locate Wall Stud(s 6 Mark Rear Wall 7 Drill Holes in these installation instructions. W10247285B See "Installation Requirements" section...
Installation Guide - Page 2

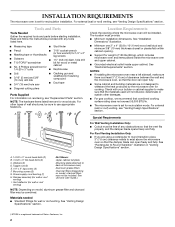
... the wall and the microwave oven, so that the damper blade can open freely and fully. See "Rectangular to exist above the microwave oven so that the door can open fully. &#...174;TORX is a registered trademark of 150 lbs (68 kg), which includes microwave oven and items placed inside the microwave oven and upper cabinet. ■ Grounded electrical outlet inside upper cabinet. NOTE: The...
Installation Guide - Page 3

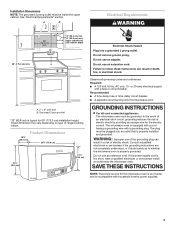
... fuse or time-delay circuit breaker. ■ A separate circuit serving only this microwave oven is an inverter, and is typical for the electric current. If the power supply...result in death, fire, or electrical shock. SAVE THESE INSTRUCTIONS NOTE: The power source for this microwave oven. See "Electrical Requirements" section. A B Electrical Requirements WARNING 69" (175.3 cm) min. ...
Installation Guide - Page 4

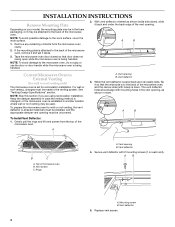
... reinstalled in another location where wall or roof venting may be made to the microwave oven, do not grip or use the door or door handle while the microwave oven is being handled. A B To Install Vent Deflector: 1. Vent deflector 5. Tape the microwave oven door closed so that the wide side is to the back of the vent opening. A. Top of...
Installation Guide - Page 5

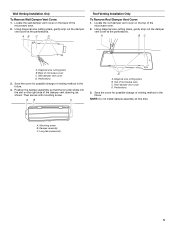
... of the damper vent opening, as shown. A B C D A. AB C D Roof Venting Installation Only To Remove Roof Damper Vent Cover: 1. Save the cover for possible change of microwave oven C. Wall damper vent cover D. Top of venting method in the future. A B C A. A. Save the cover for possible change of venting method in the future. 4. Using diagonal...
Installation Guide - Page 6

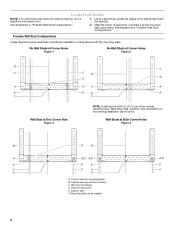
... Configurations." Wall Studs at One Corner Hole Figure 3 NOTE: If wall stud is within the cabinet opening vertical centerline C. Cabinet opening , do not install the microwave oven. 1. Wall stud centerlines D. Possible Wall Stud Configurations These depictions show examples of the vertical centerline (see "Mark Rear Wall" section), only recirculation or roof venting...
Installation Guide - Page 7

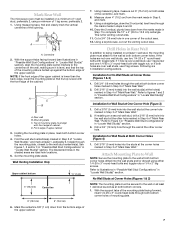
... the cutout area. 12. If the holes are over wall studs, use 1 lag screw and one corner of the upper cabinet. Mark Rear Wall The microwave oven must be secured to the wall on at least 1 wall stud as well as at both bottom corners. 1.
Installation Guide - Page 8

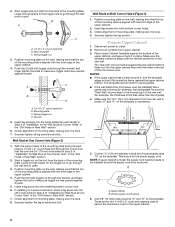
...against drywall. The template has trim lines to use as guides. ■ If the wall behind the microwave oven (as shown. Cut the 1¹⁄₂" (3.8 cm) diameter hole at One Corner Hole" ... sure it fits inside the frame, against the rear wall so that the top of the microwave oven. Check alignment of mounting plate, making sure that it is level. 7. Securely tighten the ...
Installation Guide - Page 9

... the door or door handle while the microwave oven is closed and taped shut. 3. NOTES: ■ Some upper cabinets may warp the top of mounting plate. NOTE: If microwave oven does not need to move and install microwave oven. Using a keyhole saw, cut out the rectangular area. Make sure the microwave oven door is being handled. 4. Handle the microwave oven gently. 1. Push microwave oven...
Installation Guide - Page 10

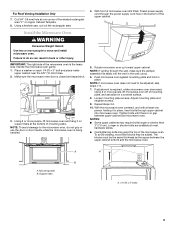
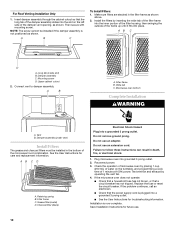
...vent to follow these instructions can result in death, fire, or electrical shock. 1. Microwave oven bottom Complete Installation WARNING A. Damper assembly (under vent) Install Filters The grease and ...must be installed if the damper assembly is now complete. AB C D A. Filter frame C. Plug microwave oven into a grounded 3 prong outlet. Test vent fan and exhaust by placing 1 cup (250 mL)...
Installation Guide - Page 11

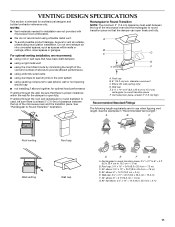
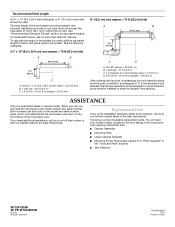
... garages. Rectangular to Round Transition NOTE: The minimum 3" (7.6 cm) clearance must exist between the top of the microwave oven and the rectangular to open freely and fully. A B C D E 3" (7.6 cm) F A. A B...) D. Rectangular to round transition piece: 3¹⁄₄" x 10" to 6" = 5 ft (8.3 x 25.4 cm to vent air outside, unless using a flexible metal vent. ■ ...
Installation Guide - Page 12

... straight vent, elbow(s), transitions and wall or roof caps must be found on the front frame of the microwave oven opening, behind the microwave oven door on the model and serial number plate, which is located behind the door. ■ Damper Assembly ■ Mounting Plate ■ Upper Cabinet Template ■ Mounting Screw Kit (includes parts A-G in...

KitchenAid Knowledge Base Results

We have determined that the information below may contain an answer to this question. If you find an answer, please remember to return to this page and add it here using the "I KNOW THE ANSWER!" button above. It's that easy to earn points!

  • My microwave oven will not run
    ...my microwave oven run? To Lock/Unlock control: The microwave oven and Timer must be off. See "Microwave Oven control" section in and microwave combination ovens Can I use of the door? ...Is the electronic oven control set ? Child Lock (on some models) set correctly? Is the door completely closed? Firmly close door. Remove spacer, then firmly close door. See "Child...
  • Changing the oven light bulb - Superba built-in and microwave combination ovens
    The lights will come on when the oven door is closed, touch Oven Light to turn them on when either door is off . Remove the bulb from the oven. Architect Series II - Using tissue or wearing cotton gloves, replace the bulb. Changing the oven light bulb - The oven lights are 12-volt, 5-watt maximum halogen bulbs. Disconnect power. Replace the...
  • Replacing oven light bulbs - Built-in ovens
    .... How can I replace a bulb(s) if it back into the wall. Architect Series II - On double oven models, both upper and lower lights should come on when the oven door is opened . To replace oven light bulbs: Before replacing any bulbs, make sure the oven is closed, touch Oven Light to handle the bulb. Replace the bulb, using tissue...

Similar Questions

Kitchenaid Microwave Khhc2090sss Troubleshooting
This over the stove microwave has lost all power including the lights except for a regular occasiona...
(Posted by gregzabel 10 years ago)
Kitchenaid Microwave Khhc2090sss Problems
Microwave used to hum as if a motor/fan was working while it heated and now it is completely quiet w...
(Posted by djdeyo64 10 years ago)
This Microwave Series Should Be Recalled Do To The Malfunction Of The Wave Guid
This microwave/convection oven should be recalled do to the malfunction of the wave guide? How long ...
(Posted by e1024 13 years ago)
Change Light Bulb In Microwave Oven.
How do I change the light bulb in a Kitchenaid KBMS1454SSS Microwave oven?
(Posted by danafeneck 13 years ago)
Ask a New Question
Use the box below to post a new question about this KitchenAid product .
Points & Prizes
  • You can earn points for nearly everything you do on HelpOwl.com
  • You can trade in those points for gift cards at leading retailers such as Amazon.com and Walmart
  • It's that simple!
See How it Works
Create a Free Account

KitchenAid Manuals

Find free KitchenAid KHHC2090SSS - Architect II 2.0 cu. ft. 1200 W manuals and user guides available at ManualOwl.com. Try out our unique manual viewer allowing you to interact with manuals from directly within your browser!

KitchenAid Reviews

View thousands of KitchenAid user reviews and customer ratings available at ReviewOwl.com.

Contact Information

Complete KitchenAid customer service contact information including steps to reach representatives, hours of operation, customer support links and more from ContactHelp.com.

Scoreboard Ratings

See detailed KitchenAid customer service rankings, employee comments and much more from our sister site.

KitchenAid Recalls

Find comprehensive KitchenAid recall information updated hourly on RecallOwl.com.