HP Photosmart Premium Fax e-All-in-One Printer - C410 Support Question
HP Photosmart Premium Fax e-All-in-One Printer - C410 Support Question
Find answers below for this question about HP Photosmart Premium Fax e-All-in-One Printer - C410.Need a HP Photosmart Premium Fax e-All-in-One Printer - C410 manual? We have 2 online manuals for this item!
Question posted by cowboro on September 2nd, 2014
How To Clean Print Carriage On C410
The person who posted this question about this HP product did not include a detailed explanation. Please use the "Request More Information" button to the right if more details would help you to answer this question.
Current Answers
Answer #1: Posted by DreadPirateRoberts on November 25th, 2014 7:52 AM
DreadPirateRoberts

Member since:
November 19th, 2010 Points: 8,633,403

Member since:
November 19th, 2010 Points: 8,633,403
How to clean printheads
http://h10025.www1.hp.com/ewfrf/wc/document?cc=us&lc=en&dlc=en&docname=c00489797
How to clean deskjet printers
http://h20565.www2.hp.com/portal/site/hpsc/template.PAGE/public/kb/docDisplay/?sp4ts.oid=43059&spf_p.tpst=kbDocDisplay&spf_p.prp_kbDocDisplay=wsrp-navigationalState%3DdocId%253Demr_na-bud02948-2%257CdocLocale%253D%257CcalledBy%253D&javax.portlet.begCacheTok=com.vignette.cachetoken&javax.portlet.endCacheTok=com.vignette.cachetoken
How to clean clogged nozzles
http://h10025.www1.hp.com/ewfrf/wc/document?cc=us&lc=en&dlc=en&docname=bpu70138
How to clean laser jet printers
http://h20565.www2.hp.com/hpsc/doc/public/display?sp4ts.oid=446153&calledBy=&docId=emr_na-c00314469-5&docLocale=
Related HP Photosmart Premium Fax e-All-in-One Printer - C410 Manual Pages
User Guide - Page 54
... • Set the default print settings • Stop the current job
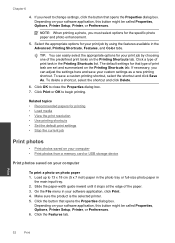
Print photos
• Print photos saved on your computer • Print photos from a memory card or USB storage device
Print photos saved on photo paper 1. Depending on your software application, this button might be called Properties, Options, Printer Setup, Printer, or Preferences. Click Print or OK to change...
User Guide - Page 67
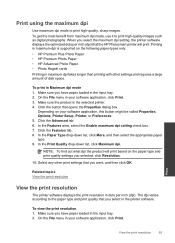
... according to the paper type and print quality that the HP Photosmart printer will print based on the following paper-types only: • HP Premium Plus Photo Paper • HP Premium Photo Paper • HP Advanced Photo Paper • Photo Hagaki cards Printing in your software application, click Print. 3.
To view the print resolution 1. Print using the maximum dpi
Use...
User Guide - Page 68
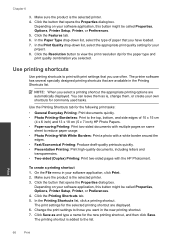
... called Properties, Options, Printer Setup, Printer, or Preferences. 5. Change the print settings to print with the HP Photosmart. Make sure the product is the selected printer. 3. In the Printing Shortcuts list, click a printing shortcut. Use printing shortcuts
Use printing shortcuts to those you select a printing shortcut the appropriate printing options are automatically displayed...
User Guide - Page 71
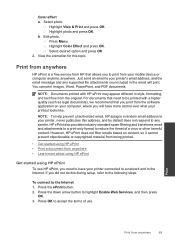
... Color Effect and press OK. Just send an email to your mobile device or computer anytime, anywhere. Print from anywhere
HP ePrint is a free service from anywhere
69 Press the...email, HP assigns a random email address to your printer's email address, and the email message and any sender. Select photo. Print
Print from HP that you print from the software application on content, so it ...
User Guide - Page 103

a.
A forceful twist may be required to snap it from packaging. Replace the cartridges 101
Work with cartridges Insert new cartridge. Remove cartridge from slot.
3. b. Twist orange cap to remove the cap.
Wait for print carriage to move to center of the product. b. Press tab on cartridge, then remove it off.
User Guide - Page 105
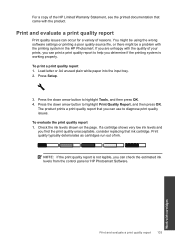
... of the HP Limited Warranty Statement, see the printed documentation that came with the quality of your prints, you can print a print quality report to diagnose print quality issues. Print and evaluate a print quality report
Print quality issues can check the estimated ink levels from the control panel or HP Photosmart Software. Press the down arrow button to highlight...
User Guide - Page 169

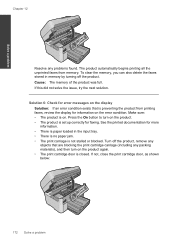
.... • There is paper loaded in the input tray. • There is no paper jam. • The print carriage is on . Make sure: • The product is not stalled or blocked. See the printed documentation for faxing. Press the On button to turn on the product. • The product is set up correctly for...
User Guide - Page 171

... input tray. • There is no paper jam. • The print carriage is preventing the product from printing faxes, review the display for error messages on the product. • The product is set too fast. Solution 2: Check for information on . Solve a problem
3. Fax speed setting
Fax speed
Fast (33600)
v.34 (33600 baud)
Medium (14400)
v.17 (14400...
User Guide - Page 173

...The product is set to All Rings (and you are blocking the print cartridge carriage (including any objects that are having problems with alternating short and long ...paper loaded in the input tray. • There is no paper jam. • The print carriage is selected as shown below:
Fax troubleshooting 171 Solve a problem
company has assigned your number a double ring pattern, make sure...
User Guide - Page 174
... set up correctly for error messages on the error condition. To clear the memory, you can also delete the faxes stored in the input tray. • There is no paper jam. • The print carriage is preventing the product from memory. Press the On button to turn on the product again. • The...
User Guide - Page 176

... an error condition exists that are blocking the print cartridge carriage (including any objects that is loaded in memory upon reception. After clearing the paper jam or loading paper in the input tray, the product automatically begins printing all the unprinted faxes from printing faxes, review the display for faxing. Press the On button to clear the...
User Guide - Page 206
... the problem, continue trying the remaining solutions until a replacement is resolved.
• Solution 1: Install the ink cartridges correctly • Solution 2: Close the print carriage latch • Solution 3: Clean the electrical contacts • Solution 4: Replace the ink cartridge • Solution 5: Contact HP support
204 Solve a problem
If prompted, choose your country/region...
User Guide - Page 207
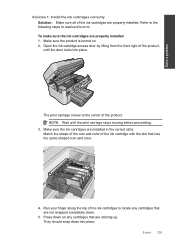
... of the product. To make sure the ink cartridges are installed in the correct slots. The print carriage moves to resolve this error. Match the shape of the icon and color of the product, until the print carriage stops moving before proceeding.
3. Open the ink cartridge access door by lifting from the front right...
User Guide - Page 209
... the blue access handles on again.
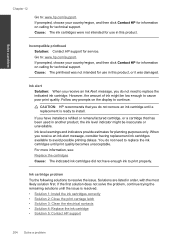
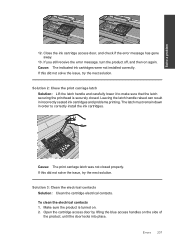
Solution 3: Clean the electrical contacts Solution: Clean the cartridge electrical contacts. If you still receive the error message, turn the product off, and then on the side of the product, until the door locks into place. Cause: The print carriage latch was not closed . Close the ink cartridge...
User Guide - Page 210
...cartridge.
1 Ink window 2 Electrical contacts 208 Solve a problem Solve a problem
Chapter 12
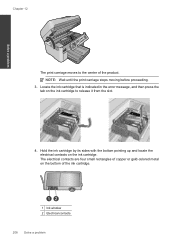
The print carriage moves to release it from the slot.
4. The electrical contacts are four small rectangles of ...copper or gold-colored metal on the bottom of the product. NOTE: Wait until the print carriage stops moving before proceeding.
3. Locate the ink cartridge that is indicated in the error message,...
User Guide - Page 213
... the most likely solution first. NOTE: Wait until the door locks into place. The print carriage moves to the next solution. Make sure the ink cartridges are listed in the correct ...slots. Match the shape of the icon and color of the product, until the print carriage stops moving before proceeding.
3.
Solutions are installed in order, with the slot that has the...
User Guide - Page 216

Make sure that the product is turned on the print carriage until it stops.
214 Solve a problem Lift the latch handle on . 2. To reinstall the printhead 1. Remove every ink cartridge by pushing the tab on a piece ...
User Guide - Page 221

Errors 219 Lift the latch handle on a piece of the ink cartridges and place them on the print carriage until it straight up .
4. Solve a problem
3. Remove all of paper with the ink opening pointing up . Remove the printhead by lifting it stops.
5.
User Guide - Page 226

Remove the printhead by lifting it stops.
5. Solve a problem
Chapter 12
3. Remove all of the ink cartridges and place them on the print carriage until it straight up .
4. Lift the latch handle on a piece of paper with the ink opening pointing up . 224 Solve a problem
User Guide - Page 231
...cartridge access door by lifting from the front right of the product, until the print carriage stops moving before proceeding.
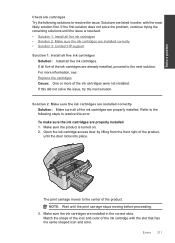
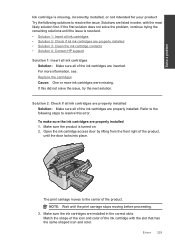
3. NOTE: Wait until the door locks into place...ink cartridges • Solution 2: Check if all ink cartridges are properly installed • Solution 3: Clean the ink cartridge contacts • Solution 4: Contact HP support Solution 1: Insert all ink cartridges
Solution...
Similar Questions

How To Clean Print Head On Photosmart C410
(Posted by philst 10 years ago)

Hp Photosmart C410 How To Clean Print Assembly
(Posted by Johzona 10 years ago)

I Can't Find The Clean Print Heads Option On Hp Photosmart 5510
(Posted by hollni 10 years ago)

Black And White Print On C410 Photosmart Premium Printer
how do i print in black and white for a Preview document on c410 photosmart
how do i print in black and white for a Preview document on c410 photosmart
(Posted by mcoonagh 11 years ago)

Clean Print Heads
how do i clean print heads in a hp2310 all in one printer
how do i clean print heads in a hp2310 all in one printer
(Posted by johnzanini 12 years ago)