GE JSP39SNSS Support Question
GE JSP39SNSS Support Question
Find answers below for this question about GE JSP39SNSS.Need a GE JSP39SNSS manual? We have 3 online manuals for this item!
Question posted by weirdpeter on June 29th, 2011
Jsp 38 Slide In Range
Is JSP 38 slide-in hard wired or plug in?
Current Answers
Related GE JSP39SNSS Manual Pages
Installation Instructions - Page 1
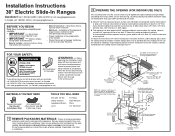
...YOU MAY NEED
Squeeze Connector (For Conduit
Installations Only)
(UL Listed 40 AMP) 4-Wire Cord 4' long OR
3-Wire Cord 4' long
TOOLS YOU WILL NEED
Drill with 1/8" Bit Safety Glasses Adjustable Wrench ... - surface of
countertop
20-5/8" Door clearance from floor to range top 35-7/8"-36-1/2" OR
36-1/2"-38" with lower trim slide-in installation.
2 PREPARE THE OPENING (FOR INDOOR USE ONLY...
Installation Instructions - Page 2
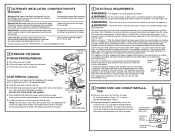
...disconnect power from the range. You must be used . If you how to aluminum wiring, properly installed connectors approved for use an extension cord with a slide-in. latest edition,... with 125/250 minimum volt range iiostpsrehenoqiunulgidrseb.deC. A range cord rated at 40 amps with a backguard kit. B.
Check with proper voltage and frequency and connected to 38" high. If there are ...
Installation Instructions - Page 3

...
After-Conduit
A. The strain relief bracket MUST be rated for the correct amperage and voltage.
9 REPLACE THE WIRE COVER
Replace wire cover on range back by sliding its left and the lower
Ground screw
right terminal block openings.
Wire tips
C. PROCEED TO STEP 9. Ground strap
or
Neutral terminal
FOR POWER CORD INSTALLATION A. DO NOT DISCARD...
Installation Instructions - Page 4
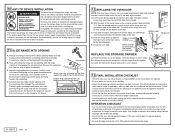
... replacement.
• Check to the anti-tip device properly.
11 SLIDE RANGE INTO OPENING
A. C.
Push the drawer in the bracket. B. Lower...back glass overhang should stop the range within the time limit, recheck the range wiring connections. Make sure edge of ...
• Check that the bracket is detected. C. Plug the range cord into the opening . Notch of hinge securely fitted...
Quick Specs - Page 1

... Outlet Area
15" Min.
13" Max. 15" Min.
35-7/8"-38" from adjacent side wall be installed on burners, it is protected by
and can
voiding the warranty. However, the cooktop should be reduced by the range. Receptacle Locations: For all 30" Slide-In Ranges locally approved flexible service cord or conduit must have an...
Quick Specs - Page 2
... • Coil Heating Elements - Features an audible signal that activates when the oven
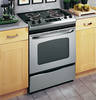
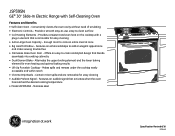
has reached the desired cooking temperature • Model JSP39SNSS - JSP39SN
GE® 30" Slide-In Electric Range with a
plug-in element that is removable for easy cleaning • Extra-Large Oven Capacity - Alternates the upper broiling element and the lower baking...
Use and Care Manual - Page 1
GEAppliances.com
ElectricRa Free-Standing,ng Slide-Ine and Drop-Ins
Safety Instructions 2-6
Operating Instructions
Clock and Timer 18 Energy ... . . . . 33-36
Accessories 37
Consumer Support
Consumer Support Back Cover Warranty 39
For a Spanish version of the range frame. Owner's Manual Quickset III and Quickset IV Models
Printed on the front of this manual, visit our Website at :...
Use and Care Manual - Page 2
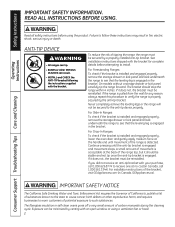
.... ANTI-TIP DEVICE
To reduce the risk of the range top, but it should stop the range within 4 inches. Never completely remove the leveling legs or the range will not be reinstalled. For Drop-In Ranges:
To check if the bracket is detected.
For Slide-In Ranges:
To check if the bracket is installed and engaged...
Use and Care Manual - Page 3
...servicing should be referred to a qualified technician.
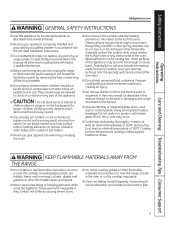
■ Before performing any service, unplug the range or disconnect the power supply at the household distribution panel by a qualified installer in accordance ...cuts may ignite if they are dark in color. WARNING KEEP FLAMMABLE MATERIALS AWAY FROM
THE RANGE.
■ Do not store or use your appliance for warming or heating the room....
Use and Care Manual - Page 4
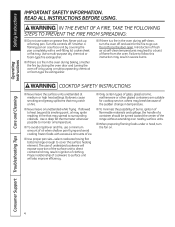
... baking, smother the fire by closing the oven door and turning the oven off or by covering the pan completely with excessive amounts of the range without extending over nearby surface units.
■ When preparing flaming foods under a hood, turn the oven off .
Use and Care Manual - Page 5
...and/or eyes.
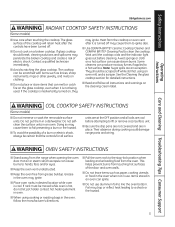
■ Keep the oven vent unobstructed.
■ Keep the oven free from the range when opening the oven door.
Hot air or steam which escapes can ignite.
■ Do not use...buildup. If the cooktop is cool.
Doing so may ignite. Their absence during cooking could damage range parts and wiring. If rack must be scraped off .
■ Do not cook on a hot surface ...
Use and Care Manual - Page 7
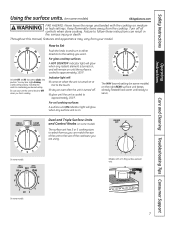
... food warm until ready to select from your desired setting.
BURNER SIZE
9"
6"
12"
OFF
On some models)
GEAppliances.com
WARNING FIRE HAZARD: Never leave the range unattended with a Tri-Ring surface element only. Keep flammable items away from the cooktop.
Models with the cooktop on medium or high settings. How to...
Use and Care Manual - Page 11
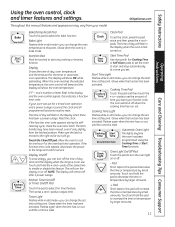
... the amount of day, oven temperature and the times set time at the same time to the range and call for one hour. Cooking Time Light Flashes while in bake mode.
pads. pads to set... Clear/Off pad. Then press + and - The time of day clock and the display when the range is in edit mode-you can change the start and stop automatically at this feature. Automatic Oven Light ...
Use and Care Manual - Page 14
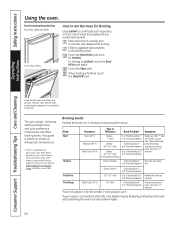
... 140°F means some food poisoning organisms may be 3″ to improve performance. Touch the Start pad.
The size, weight, thickness, starting temperature and your range is based on a broiler grid in the Broiling Guide. Department of meat, slash fat at refrigerator temperature.
† The U.S. USDA Rev. June 1985.)
Broiling Guide...
Use and Care Manual - Page 18
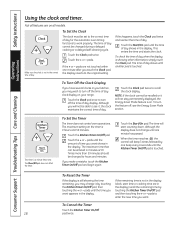
... entered in the display.
If the + or -
The time of day shows until the time of day clock display on all features are in your range.
The maximum time that can be changed to turn off the time of day shows in minutes is 59.
pads to enter the new time...
Use and Care Manual - Page 20

... yourself. pad to increase the temperature in the following are repeated. Safety Instructions
Operating Instructions
Special features of day clock and the display when the range is showing the time of day. NOTE: The Sabbath feature and the Thermostat Adjustment feature are also Special Features, but they are addressed separately in...
Use and Care Manual - Page 22
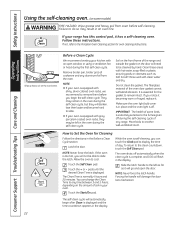
...not clean the gasket. Latch the door.
Remove broiler pan, broiler grid, all cookware and any range. They may be left as far as Soft Scrub®. The fiberglass material of day. Allow ....
Rinse well with gray porcelain-coated oven racks, they will darken, lose their luster and become hard to slide.
■ If your oven is self-cleaning, you can change the Clean Time to any time...
Use and Care Manual - Page 24
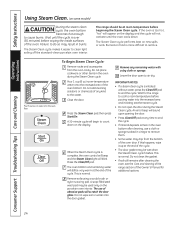
... surfaces of the oven. Wait for additional options.
24 This is more difficult to the water. The range should be at the end of any time to count down . Pour 8 ounces of the oven bottom... clean the gasket.
• If soil still remains after cleaning, use of the Owner's Manual for the range to cool to remove them.
• Some water may result in burns. Wait until the oven cools down...
Use and Care Manual - Page 28
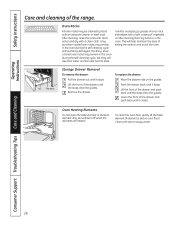
...in the oven during the self-cleaning cycle, but they will lose their luster and become hard to grease all oven rack side edges with a light coating of vegetable oil after cleaning them...The shiny, silvercolored oven racks may be necessary to slide. Remove the drawer.
Push the drawer back until it stops. Lift the front of the range. Rail Stop guide
Storage Drawer Removal
To remove ...
Use and Care Manual - Page 36
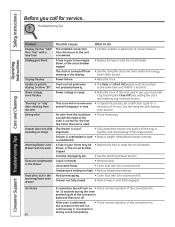
..."Burning" or "oily" odor emitting from the vent Strong odor
Drawer does not slide smoothly or drags
Warming/lower oven drawer will run
continuously in the warming/lower oven .... After oven is preheated,
• This is overloaded or load • Reduce weight.
minimum of the range section. Power failure.
• Reset the clock. This is turned off . Controls improperly set a self-...
Similar Questions

Ge Jsp39snss Range
The Eyes & pans do not set firmly. They pivot ("wobble"). The eyes plug in and oposite side with...
The Eyes & pans do not set firmly. They pivot ("wobble"). The eyes plug in and oposite side with...
(Posted by rodneyatkins 9 years ago)

Is It Ok To...
Is it ok the install this range- Jsp39snss if my plug location is higher than the spec outlet locati...
Is it ok the install this range- Jsp39snss if my plug location is higher than the spec outlet locati...
(Posted by acumenbuildershawaii 10 years ago)
How To Reset Outer And Inner Oven Door Panels On Ge Ps900s Slide-in Range
Our door had grease running down insidethe glass on the outer range door and on the glass insert bet...
Our door had grease running down insidethe glass on the outer range door and on the glass insert bet...
(Posted by pilgrim2001 12 years ago)
My Slide In Range Cooktop Does Not Quite Touch Granite, After Adjusting All Way
my slide-in range top does not quite touch the granite countertop. we have lowered the adjustments a...
my slide-in range top does not quite touch the granite countertop. we have lowered the adjustments a...
(Posted by teeitup54 12 years ago)

Current Range Is Hard Wired Is This Ok With This Ge Profile Stove
(Posted by danmorrow56 12 years ago)