Get support for GE GTD33EASKWW

GE GTD33EASKWW Support Question

GE GTD33EASKWW Support Question

Find answers below for this question about GE GTD33EASKWW.
Need a GE GTD33EASKWW manual? We have 3 online manuals for this item!
Question posted by tonattebakerhundley on September 1st, 2023

Where Do The Two Brown Wires Go That Come Up From The Left Side Of The Dryer Whe

You are looking straight at the back of the dryer

Current Answers

Answer #1: Posted by SonuKumar on September 1st, 2023 9:38 PM
This answer was accepted by the poster of the original question.
SonuKumar

Member since:
May 9th, 2021

Points: 16,621,300
1,100
points
The two brown wires that come up from the left side of the GE GTD33EASKWW dryer when you remove the backsplash go to the start switch. One brown wire goes to terminal 1 of the start switch, and the other brown wire goes to terminal 2 of the start switch.

The start switch is a safety switch that prevents the dryer from starting if the door is not closed properly. When the door is closed, the two brown wires make contact, completing the circuit and allowing the dryer to start.

Here are the steps on how to connect the two brown wires to the start switch:

Remove the backsplash of the dryer.

Locate the start switch. It is a small, rectangular switch that is typically located on the left side of the dryer.

Identify the two terminals on the start switch. Terminal 1 is usually marked with a "1" or a "S", and terminal 2 is usually marked with a "2" or a "T".

Strip about 1/2 inch of insulation from the end of each brown wire.

Twist the bare ends of the two brown wires together.

Connect the twisted wires to the corresponding terminals on the start switch.

Secure the wires in place with a wire nut.

Replace the backsplash of the dryer.

Once the two brown wires are connected to the start switch, the dryer should be able to start normally.

Here are some safety precautions to take when connecting the two brown wires to the start switch:

Make sure that the dryer is unplugged before you start working on it.

Be careful not to touch the exposed wires.

Use a wire nut that is the correct size for the wires you are connecting.

Secure the wires tightly in place with the wire nut.

If you are not comfortable connecting the two brown wires to the start switch, you should call a qualified appliance technician to do it for you.


Please respond to my effort to provide you with the best possible solution by using the "Acceptable Solution" and/or the "Helpful" buttons when the answer has proven to be helpful.

Regards,
Sonu
Your search handyman for all e-support needs!!

Related GE GTD33EASKWW Manual Pages

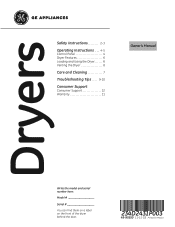
Use and Care Manual - Page 1

...2-3 Operating Instructions . . . 4-5 Control Panel 4 Dryer Features 6 Loading and Using the Dryer. . . . . . 6 Venting the Dryer 8 Care and Cleaning 7 Troubleshooting Tips . . . . 9-10 Consumer Support Consumer Support 12 Warranty 11 Owner's Manual Write the model and serial number here: Model Serial You can find them on a label on the front of the dryer behind the door. 234D2431P003...
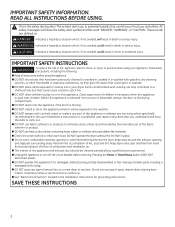
Use and Care Manual - Page 2

...of fire, explosion, electric shock, or injury to persons when using your dryer. IMPORTANT SAFETY INSTRUCTIONS WARNING To reduce the risk of this appliance is the...the Installation Instructions for grounding instructions. Close supervision of spray cleaner when cleaning dryer interior. IMPORTANT SAFETY INFORMATION. SAVE THESE INSTRUCTIONS 2 This symbol alerts you understand...
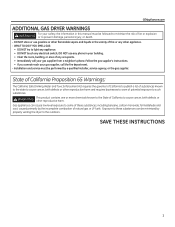
Use and Care Manual - Page 3

... the state to prevent damage, personal injury, or death. - GEAppliances.com ADDITIONAL GAS DRYER WARNINGS WARNING For your safety, the information in this or any electrical switch; SAVE THESE...or other reproductive harm. Installation and service must be performed by properly venting the dryer to warn of natural gas or LP fuels. Exposure to these substances, including benzene...
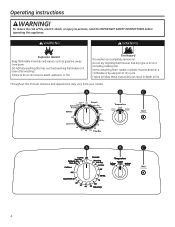
Use and Care Manual - Page 4

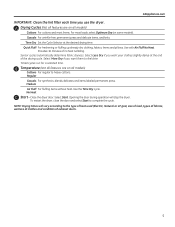
... of oil on it (even after washing). Failure to persons, read the IMPORTANT SAFETY INSTRUCTIONS before operating this manual, features and appearance may vary from dryer. Do not dry anything flammable on a clothesline or by using an air dry cycle. WARNING WARNING Explosion Hazard Keep flammable materials and vapors, such as...
Use and Care Manual - Page 5

...types of fabrics, wetness of clothes and condition of exhaust ducts. 5 NOTE: Drying times will stop the dryer. Time Dry Set the Cycle Selector at the end of no heat tumbling. No Heat C Start³&...the cycle. Select Less Dry if you use the dryer. Provides 10 minutes of the drying cycle. Use the Time Dry cycle. To restart the dryer, close the door and select Start to heavy ...
Use and Care Manual - Page 6

...: „ The drying rack must be laundering. If your model did not come with plastic trim and foam-filled items. Fabric Care Labels Below are sorted properly for the dryer. If the dryer drum should be sure to make the dryer drum provides the highest reliability available in accordance with the same size bulb...
Use and Care Manual - Page 7

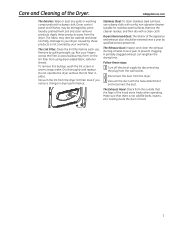
... the drying time. Dryer Interior and Duct: ... lint screen in dryer performance. Dry thoroughly... flaps of the Dryer. GEAppliances.com The...dryer caused by these steps: 1 ...dryer added fabric softener sheets. Dryer...dryer without the lint filter in place. Apply these products away from the dryer lint filter area if you notice a change in warm, soapy water. Remove by some laundry...
Use and Care Manual - Page 8

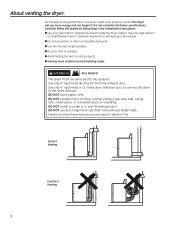
...UL listed flexible metal 4" diameter ductwork for the home exhaust duct. Fire Hazard This dryer MUST be properly vented. DO NOT use more energy and run longer if it is...; Avoid resting the duct on Exhausting in the exhaust length table. For the best drying performance, the dryer needs to be exhausted to the home exhaust. WARNING - Use only 4" rigid metal ducting for exhausting ...
Use and Care Manual - Page 9

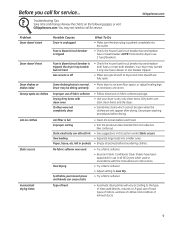
...; Sort lint producers (like chenille) from lint collectors (like corduroy). left in this section under Static occurs. Before you call for service. Troubleshooting Tips Save time and money! Review the charts on clothes Static occurs Inconsistent drying times Possible Causes Dryer is unplugged Fuse is blown/circuit breaker is tripped What To...
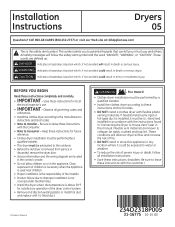
Installation Instructions - Page 1

... 234D2318P005 31-16775 10-15 GE Save these instructions for future reference. • Clothes dryer installation must be easily crushed and trap lint. Be sure to leave these instructions for ... the outdoors. • Before the old dryer is removed from service or discarded, remove the dryer door. • Service information and the wiring diagram are defined as: DANGER Indicates a hazardous...
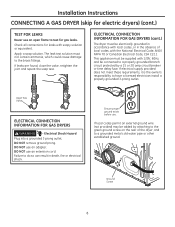
Installation Instructions - Page 8

... INFORMATION FOR GAS DRYERS WARNING - Electrical Shock Hazard Plug into a grounded 3 prong outlet. DO NOT use an adapter. If local codes permit an external ground wire (not provided) may...the soap test. Ensure proper ground exists before use. Installation Instructions CONNECTING A GAS DRYER (skip for electric dryers) (cont.) TEST FOR LEAKS Never use an open flame to have a licensed ...
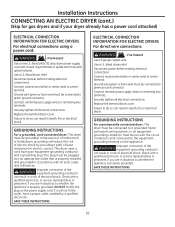
Installation Instructions - Page 10

...If it will reduce the risk of electric shock by a qualified electrician. GROUNDING INSTRUCTIONS For a permanently connected dryer: This dryer must be connected to a grounded metal, permanent wiring system, or an equipmentgrounding conductor must be plugged into an appropriate outlet that is properly grounded. Disconnect power before making electrical connections. DO NOT modify...
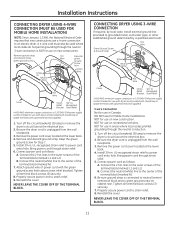
Installation Instructions - Page 11

... do not permit grounding through the neutral conduction. 1. Remove the power cord cover located at the electrical box. 2. Connect the 2 hot lines to an electric dryer. Attach ground wire of power cord with upturned ends (not supplied). 1. DO NOT use in areas where local codes prohibit grounding through the neutral...
Installation Instructions - Page 15

... tab in the base. Lift the tab to pull or damage the electrical wires inside the dryer exhaust duct and save Left Bottom Remove desired knockout (one only) Detach and remove the right (electric models only), left side Right Left Duct tape Left A 10-1/2" (26.67cm) Cut the duct as desired. Wrap duct tape around joint...
Installation Instructions - Page 16

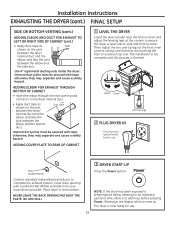
... the joint between the elbow and the bottom duct. Place dryer in final location. Otherwise, the display will not come on. ADDING ELBOW FOR EXHAUST THROUGH BOTTOM OF CABINET •... corners to ensure the dryer is finished. Installation Instructions EXHAUSTING THE DRYER (cont.) FINAL SETUP SIDE OR BOTTOM VENTING (cont.) ADDING ELBOW AND DUCT FOR EXHAUST TO LEFT OR RIGHT SIDE OF CABINET...
Installation Instructions - Page 17

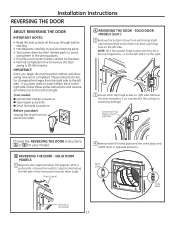
... and set them in the top hinge holes - 2 on a protective flat surface to the left and 2 on the right. 3 Loosen each top hinge screw on right side. A REVERSING THE DOOR - IMPORTANT: Once you start Unplug the dryer from the right side to avoid any damage. NOTE: All 4 front panel hinge screws will...
Installation Instructions - Page 18

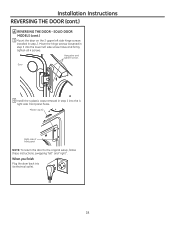
... 6 Install the 4 plastic caps removed in step 2. Move the hinge screws loosened in step 3 into the lower left side hinge screws installed in step 1 into its electrical outlet. 18 When you finish Plug the dryer back into the 4 right side front panel holes. SOLID DOOR MODELS (cont.) 5 Mount the door on the...
Installation Instructions - Page 20

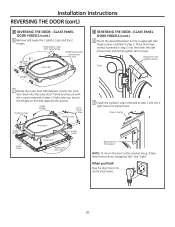
... front panel NOTE: To return the door to the original setup, follow these instructions, swapping "left side hinge screws installed in step 5. Install plastic caps from oposite side here Install hinges from ...in step 2 into the 4 right side front panel holes. Make sure you finish Plug the dryer back into the outer door frame and secure with the screws removed in step 2. GLASS PANEL DOOR...
Quick Specs - Page 1

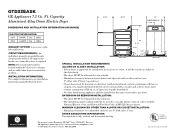
....2000. GTD33EASK GE Appliances 7.2 Cu. Capacity Aluminized Alloy Drum Electric Dryer DIMENSIONS AND INSTALLATION INFORMATION (IN INCHES) 22 1/2" 26 3/4" 27" POWER CORD 4 1/2" 11 3/4" ELECTRIC DRYER RATING: 240V 5600W 24A 60Hz 208V 4400W 22A 60Hz 44" 37 1/2" EXHAUST OPTION: 4-way rear, right, left and bottom CIRCUIT REQUIREMENTS: An individual, properly-grounded branch circuit, protected...
Quick Specs - Page 3

... out lint easy Reverse-a-door - venting capability - For clothes that come out feeling and looking great, this setting monitors air temperature to meet laundry room needs Model GTD33EASKWW - Up to set the optimal drying time Rotary electromechanical controls - Capacity Aluminized Alloy Drum Electric Dryer FEATURES AND BENEFITS Aluminized alloy drum - Make it simple to 120...

Similar Questions

Dryer Will Not Come On
why am I not getting power to the front of the drye
(Posted by Derikholder81 3 years ago)
I Replaced The Belt But While Putting The Unit Together, 3 Wires Became Inclined
Need to know which wires go where on the timer thank yo
(Posted by Captmikee 3 years ago)
The Start Button Doesn’t Work Anymore, And The Dryer Therefore Doesn’t Come
the dryer stopped working. It does not turn on when I press the start button. What could be the prob...
(Posted by Dtons74 6 years ago)
Ask a New Question
Use the box below to post a new question about this GE product .
Points & Prizes
  • You can earn points for nearly everything you do on HelpOwl.com
  • You can trade in those points for gift cards at leading retailers such as Amazon.com and Walmart
  • It's that simple!
See How it Works
Create a Free Account

GE Manuals

Find free GE GTD33EASKWW manuals and user guides available at ManualOwl.com. Try out our unique manual viewer allowing you to interact with manuals from directly within your browser!

GE Reviews

View thousands of GE user reviews and customer ratings available at ReviewOwl.com.

Contact Information

Complete GE customer service contact information including steps to reach representatives, hours of operation, customer support links and more from ContactHelp.com.

Scoreboard Ratings

See detailed GE customer service rankings, employee comments and much more from our sister site.

GE Recalls

Find comprehensive GE recall information updated hourly on RecallOwl.com.