2003 GMC Envoy Support Question
2003 GMC Envoy Support Question
Find answers below for this question about 2003 GMC Envoy.Need a 2003 GMC Envoy manual? We have 1 online manual for this item!
Question posted by KenneGregg on February 23rd, 2014
How To Remove Liftgate Trim Panel 2003 Gmc Envoy
The person who posted this question about this GMC automobile did not include a detailed explanation. Please use the "Request More Information" button to the right if more details would help you to answer this question.
Current Answers
Related Manual Pages
Owner's Manual - Page 2

The 2003 GMC Envoy/Envoy XL Owner Manual
0-1 SeatsandRestraint Systems ...1-1 Front Seats ...1-2 Rear Seats ...1-6 ...1-9 ... ...2-40 Onstar@System 2-42 HomeLink@ Transmitter ...2-46 Storage Areas ...2-53 Sunroof Vehicle Personalization ...2-54 Instrument Panel ...3-1 3-4 Instrument Panel Overview ...Climate Controls ...3-20 Warning Lights, Gages and Indicators ...3-33
... a
0 Preface 1
Driver ...
Owner's Manual - Page 3
...07130 Detroit, MI 48207 GENERAL MOTORS, GM, the GM Emblem, GMC, the GMC Truck Emblem andthe name ENVOY/ENVOY XL are registered trademarks of the manual. This manual includes the latest... vehicles first sold in Canada, substitute the name "General Motors of Canada Limited" for GMC whenever it appears in back of General Motors Corporation.
Canadian Owners
You can use it. Index
A good ...
Owner's Manual - Page 48
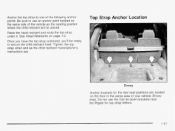
Be sure to use the rear tie-down brackets near the liftgate for the rear seat positions are located on page 1-5. Raise the head restraint and... as the child restraint manufacturer's instructions say. Top Strap Anchor Location
Envoy
Anchor brackets for top strap tethers.
1-41 Anchor the top strap to one of your vehicle (Envoy only). Once you have the top strap anchored, you'll be ...
Owner's Manual - Page 78
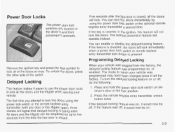
...off . When your vehicle. Programming Delayed Locking
Remove the ignition key and press the lock symbol to lock all the doors and the liftgate when leaving your vehicle was shipped from the ...and front passenger's armrests.
The lockout prevention feature will operate instead. All doors and the liftgate can be off , do the following:
Delayed Locking
This feature makes it left the factory...
Owner's Manual - Page 82
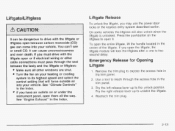
..." in the Index. Remove the trim plug to its highest speed and select the control setting that will also unlock when the liftgate is unlocked. Press the pushbutton on your vehicle. Reattach the trim plug.
2-13 It can come into your heating or cooling system to expose the access hole in the
trim panel.
3. Emergency Release...
Owner's Manual - Page 120
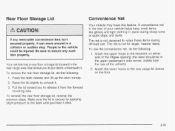
... the upper loops to secure any removable convenience itel sn't secured properly, it .
To remove the rear floor storage lid, do... the following : 1. The net is not for larger, heavier items. To use . Your vehicle has a rear floorstorage lid located in the rear cargoarea that allows you to the rear cargo tie downs on either side of the liftgate...
Owner's Manual - Page 121
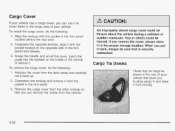
... the cover from the latch posts and carefully roll it from moving. You or others could be cargo tie downs in the trim panel located behind the rear seat. 2. When you remove the cover, always store it from the
pocket in the proper storage location. To install the cargo cover, do the following...
Owner's Manual - Page 144
...plugs only. Ashtrays and Cigarette Lighter
The front ashtray is removable and fits into your warranty. Notice: Don't put the cover back on the instrument panel. When it's ready, it 's ready. Improper use ...the accessory power outlets, you can plug in auxiliary electrical equipment such as they should. Remove the cover from the heating element when it will pop back out by itself. Hot ...
Owner's Manual - Page 146
... off and turns on again. Passenger's Side: The lever on the right side of the climate control panel is 0°F (-18°C) or lower, use the engine coolant heater, if equipped, to provide ... cool and dehumidify the air inside of windows is normal.
3-2 1 When the button is used to remove fog or frost from your vehicle. Use the defrost mode to raise or lower the temperature on the ...
Owner's Manual - Page 155

... mode and temperature positions now mimic the front control system mode and passenger side temperature.
panel mode is selected in the front controller, the rear system will distribute air from the ... (driver override switch), located on the front console, to R.
+3
@ (Defrost):
Envoy XL
3-30 Envoy XL
To operate the rear air conditioning system, the front air conditioning system must be...
Owner's Manual - Page 156

... the display. Selecting floor mode will deliver air to the floor outlet located in the third seat area.
3-31
Selecting panel mode will deliver air to the four headliner outlets. \
* '
Envoy XL Envoy XL Press the buttons at the bottom of airflow. Press the rear fancontrol button with the arrow pointing right to...
Owner's Manual - Page 347
... the vehicle.
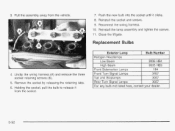
7. 3. Reconnect the wiring harness.
Unclip the wiring harness (A) and remove the three socket retaining screws (B).
5.
Reinstall the lamp assembly and ti hten the screws...Holding the socket, pull the bulb to release it clicks.
8. Remove the socket by releasing the retaining tabs.
6.
Close the liftgate. IO. Low Beam High Beam HB3 9005 194 Front Sidemarker ...
Owner's Manual - Page 363
See Rear Seat Operation on page 1-6 for more information.
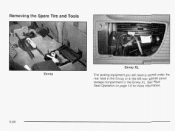
5-68 Removing the Spare Tire and Tools
Envoy XL Envoy The jacking equipment you will need is stored under the rear seat in the Envoy or in the left rear quarter panel storage compartment in the Envoy XL.
Owner's Manual - Page 364
...the tirefully against the underside of the extension connects into the hoist drive shaft hole.
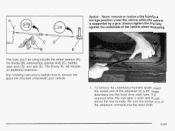
To remove the underbody-mounted spare, insert the socket end of the extension on a 45" angle ...hoist shaft.
5-69 Be sure the socket end of the vehicle when restowing. :-i
Notice: Never remove or restow a tire fromho a storage position under the vehicle while the vehicle is just above the...
Owner's Manual - Page 378
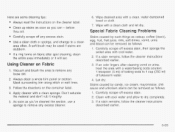
... area with a clean sponge. Vacuum and brush the area to dry completely. 3. Always clean a whole trim panel or section. Letdry. Use a clean cloth or sponge, and change to 1 cup (250 ml) of...Fabric Cleaning Problems
Stains caused by candy, ice cream, mayonnaise, chili sauce and unknown stains can be removed as follows: 1 . Apply cleaner with a clean, water-dampened towel or cloth.
7. Don't ...
Owner's Manual - Page 379
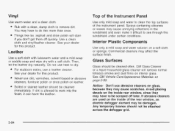
... on interior glass. For stubborn stains, use heat to clean the top surfaces of the instrument panel. Glass Surfaces
Glass should be cleaned immediately. Then, let the leather dry naturally. GM Glass ...cloth. Rub with a soft cloth. Things like tar, asphalt and shoe polish will remove normal tobacco smoke and dust films on a soft cloth or sponge.
Top of the rear window, ...
Owner's Manual - Page 381
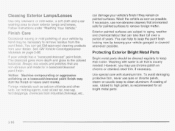
... safe for painted surfaces to clean aluminum. Notice: Machine compounding or aggressive polishing on chrome or stainless steel trim, if necessary. However, you may use auto or chrome polish, steam or caustic soap to remove foreign matter. Follow instructions under "Washing Your Vehicle."
can take their luster. Foreign materials such as soon...
Owner's Manual - Page 385

...Vehicle Identification Number (VIN)
Service Parts Identification Label
You'll find this label is not removed from outside your engine, specifications and replacement parts.
5-90 You can see it if ...the driver's side. f
Engine Identification
The 8th character in the front corner of the instrument panel, on a plate in your vehicle.
Be sure that this label on the Vehicle Certification ...
Owner's Manual - Page 388
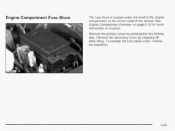
To reinstall the fuse panel cover, reverse the sequence.
5-93 Remove the primary cover by snapping off while lifting. Remove the secondary cover by pressing the two locking tabs. See Engine Compartment Overviewon page 5-12 for more information on the driver's side of the vehicle. ...
Owner's Manual - Page 429
... associated with "Quest International." Trip Routing is not part of disablement. GMC reserves the right to make any reasonable trip interruption expenses (up to retail lease customers operating 2003 GMC light duty trucks for fulfillment. Allow five working days for a period of GMC dealers along the route that are discounted through affiliation with warranty...
Similar Questions


Suspention My 2003 Envoy Lowered Its Self In The Back And Does Not Come Back Up.
(Posted by indiafoxtrot 12 years ago)

2003 Envoy Electrical
I'm looking to buy 2003 envoy.. First do you have to have the factory stereo in to hear the sound of...
I'm looking to buy 2003 envoy.. First do you have to have the factory stereo in to hear the sound of...
(Posted by kenpohlman 13 years ago)