Get support for 1999 Ford Taurus

1999 Ford Taurus Support Question

1999 Ford Taurus Support Question

Find answers below for this question about 1999 Ford Taurus.
Need a 1999 Ford Taurus manual? We have 3 online manuals for this item!
Question posted by whitev18 on June 7th, 2023

Heater Hose Assembly Removal & Installation

How to I remove & replace heater hose assembly on my 1998 Ford Taurus 3.0. DOH I am disabled & have to do this on my own.

Current Answers

Answer #1: Posted by SonuKumar on June 7th, 2023 9:33 PM
This answer was accepted by the poster of the original question.
SonuKumar

Member since:
May 9th, 2021

Points: 16,620,300
1,100
points
https://youtu.be/UJwRLQvMSw4

Ensure the engine is cool before starting any work.

Locate the heater hoses. They are usually located near the firewall on the passenger side of the engine compartment.

Place a drain pan beneath the vehicle to catch any coolant that may spill.

If necessary, remove any components that may be obstructing access to the heater hoses, such as air intake ducts or engine covers.

Identify the clamps securing the hoses to the fittings. These clamps may be screw-type or spring-type.

Loosen and remove the clamps using an appropriate tool (e.g., screwdriver, pliers, hose clamp pliers). Slide the clamps away from the fittings.

Carefully twist and pull the hoses off the fittings. If they are stuck, you can use a pair of pliers to grip the hose and twist it back and forth to loosen it.

Once the hoses are disconnected, inspect them for any signs of damage or deterioration. If they are worn or damaged, it is recommended to replace them.

Install the new heater hoses onto the fittings, making sure they are properly aligned.

Slide the hose clamps back onto the fittings and tighten them securely.

Double-check all connections to ensure they are tight and properly positioned.

Refill the coolant reservoir with the appropriate type and amount of coolant as specified by the vehicle manufacturer.

Start the engine and check for any leaks. Allow the engine to reach operating temperature while monitoring the coolant level and checking for leaks again.

If everything looks good, reinstall any components you removed earlier, such as air intake ducts or engine covers.

Remember to consult the vehicle's manual or a repair guide specific to your model for detailed instructions and any additional steps that may be necessary.


Please respond to my effort to provide you with the best possible solution by using the "Acceptable Solution" and/or the "Helpful" buttons when the answer has proven to be helpful.

Regards,
Sonu
Your search handyman for all e-support needs!!

Answer #2: Posted by HelpHero on June 7th, 2023 11:43 PM
HelpHero

Member since:
September 3rd, 2022

Points: 523,380
100
points
Here are the steps to remove and replace the heater hose assembly on a 1998 Ford Taurus 3.0 DOHC:

1. Locate the heater hose assembly. It is typically located on the passenger side of the engine, close to the firewall.

2. Turn off the engine and allow it to cool. If hot, the coolant can cause severe burns.

3. Place a drain pan under the radiator drain valve and remove the radiator cap. Open the drain valve to drain the coolant from the system. Dispose of the coolant properly.

4. Locate the clamps that secure the heater hose assembly to the engine and heater core. Use pliers to loosen the clamps and slide them away from the hose ends.

5. Carefully remove the old heater hose assembly. Be careful not to spill too much coolant in the process.

6. Inspect the hose ends, the heater core, and any fittings for damage or wear. Replace as necessary.

7. Apply a thin layer of silicone lubricant to the ends of the new heater hoses to make installation easier.

8. Carefully attach the new heater hose assembly to the engine and heater core. Make sure the clamps are in place and secure them tightly.

9. Refill the cooling system with fresh coolant. Start the engine and let it run for several minutes to ensure adequate circulation.

10. Check the system for leaks and check the fluid level again after driving for several miles.

11. Dispose of any remaining coolant and used parts properly.

Note: This is a general outline and may vary depending on the specific make and model of the vehicle. Always consult your owner's manual or a certified mechanic for specific instructions and safety precautions when working on your vehicle.


I hope this is helpful? PLEASE "ACCEPT" and mark it "HELPFUL" to complement my little effort. Hope to bring you more detailed answers.

Helphero

Related Manual Pages

Scheduled Maintenance Guide 3rd Printing - Page 5

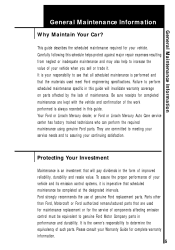
...of your vehicle and its emission control systems, it . Ford strongly recommends the use of maintenance. Protecting Your Investment Maintenance is an investment that the materials used for maintenance replacement or for completed maintenance are kept with the vehicle and ...and that will invalidate warranty coverage on parts affected by the lack of genuine Ford replacement parts.
Warranty Guide 5th Printing - Page 18

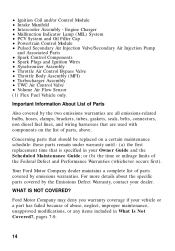
... • Synchronizer Assembly • Throttle Air Control Bypass Valve • Throttle Body Assembly (MFI) • Turbocharger Assembly • TWC Air...replacement time that are all emissions-related bulbs, hoses, clamps, brackets, tubes, gaskets, seals, belts, connectors, non diesel fuel lines, and wiring harnesses that is specified in What Is Not Covered?, pages 7-9. 14 Your Ford...
Warranty Guide 5th Printing - Page 20

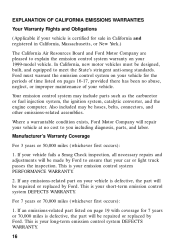
...will be hoses, belts, connectors, and other emissions-related assemblies. If an emissions-related part listed on your vehicle is defective, the part will be made by Ford. In California...This is your 1999-model vehicle. Where a warrantable condition exists, Ford Motor Company will be repaired or replaced by Ford to ensure that your emission control system PERFORMANCE WARRANTY. 2. This...
Warranty Guide 5th Printing - Page 26

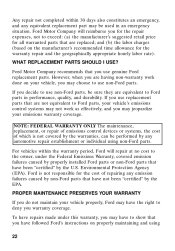
... constitutes an emergency, and any equivalent replacement part may have followed Ford's instructions on properly maintaining and using non-Ford parts. Ford Motor Company recommends that you have the...Emissions Warranty, covered emission failures caused by properly installed Ford parts or non-Ford parts that have not been "certified" by the U.S. Ford is not covered by the warranties, can ...
Owner Guide 1st Printing - Page 21

.... Also, avoid placing small objects on top of your instrument panel, be replaced. • If your vehicle has been parked with the windows closed during hot weather, the air conditioner will interfere with the airflow to the back seats. • Remove any desired position. • To prevent humidity buildup inside the vehicle...
Owner Guide 1st Printing - Page 28

...system in normal A/C, this may indicate that the cabin air filter (if equipped) needs to be replaced. • When placing objects on top of your windshield. These objects can fall down into ...the hot, stale air out of your instrument panel, be careful to the back seats. • Remove any desired position. • To prevent humidity buildup inside the vehicle, don't drive with the windows ...
Owner Guide 1st Printing - Page 56

... Position the floor mat so that the mat does not interfere with a variety of the vehicle. To remove the floor mat, reverse the installation procedure. 56 Controls and features CENTER CONSOLE Your vehicle may be removed for instructions on the seat up and toward the front of console features. Make sure that the...
Owner Guide 1st Printing - Page 59

... 59 Do not place any objects on the rear trim panels. They may lose its spring tension. Remove the shade from the vehicle and extend it with a cargo area shade that covers the luggage compartment of...the cargo area cover. Pull the end of a sudden stop or collision. To install the shade: 1. This is right side up). 2. Rewinding the shade With extended use, the cargo shade ...
Owner Guide 1st Printing - Page 79

... old and under the arm. 2) Never swing the safety belt around your vehicle has a specific safety belt assembly which is made up of locking modes described below: 79 To unfasten, push the release button and remove the tongue from ) until you hear a snap and feel it latch. Seating and safety restraints Each...
Owner Guide 1st Printing - Page 81

... 8 km/h (5 mph) or more, the combination safety belts will still retract to remove any slack in the shoulder belt. Seating and safety restraints receives an impact of the ...Safety Restraints for Children or Safety Seats for Children later in the vehicle. The automatic locking mode is installed in this mode, the shoulder belt is extracted. 81 Refer to use the automatic locking mode •...
Owner Guide 1st Printing - Page 99

...the child into the proper buckle for the center seating position until you should not be able to remove any slack in the automatic locking mode (you hear a snap and feel it latch. If the...in the lap belt seating positions 1. Push down on the child seat while pulling on tongue. 5. Installing child safety seats in the center seating position. 3. Allow the safety belt to retract to pull ...
Owner Guide 1st Printing - Page 132

... side of the vehicle, possibly injuring yourself or others. CHANGING THE TIRES If you to repair the temporary spare tire or remove it from its wheel • use the temporary spare tire continuously or do not follow these precautions, the tire could fail... as such. Roadside emergencies Relays Relays are located in the power distribution box and should be replaced by qualified technicians.
Owner Guide 1st Printing - Page 134

...came with the spare tire, making sure the valve stem is raised off the ground. 6. Remove the center ornament or wheel cover from the wheel with the tapered end of the tire you...nuts until the wheel is facing outward. Lower the wheel by turning the jack handle counterclockwise. 1 9. Replace the flat tire with your vehicle. Do not fully tighten the lug nuts until the wheel is snug ...
Owner Guide 1st Printing - Page 136

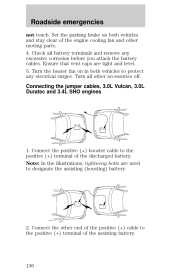
... cable to protect any excessive corrosion before you attach the battery cables. Turn the heater fan on both vehicles to the positive (+) terminal of the discharged battery. Roadside emergencies...of the assisting battery. 136 - - - + - + + + Turn all battery terminals and remove any electrical surges. Set the parking brake on in both vehicles and stay clear of the engine cooling...
Owner Guide 1st Printing - Page 147

...Ford oil specification is fully seated. 5. Recheck the engine oil level. Use SAE 5W-30 motor oil certified for gasoline engines by turning the filler cap clockwise until three clicks can be heard. Check the engine oil. Fully install... the engine oil filler cap by the American Petroleum Institute (API). Make sure the oil level is not covered by your vehicle's engine. Remove the...
Owner Guide 1st Printing - Page 148

... dirt or water from entering the reservoir. 2. Clean the reservoir cap before removal to meet Ford material and design specifications, startup engine noises or knock may be checked and ...experienced. Ford production and aftermarket (Motorcraft) oil filters are designed for the service interval schedules: 1. If a replacement oil filter is used that does not meet Ford specifications. ...
Owner Guide 1st Printing - Page 168

... correct genuine Ford or Motorcraft ...replace the fuel filler cap, replace it stops before completely removing the...remove the fuel filler cap, align the cap properly and reinstall it stops. The use fuel containing methanol. Choosing the right fuel Use only UNLEADED FUEL. If the fuel filler cap is not used. If you start the engine, the fuel filler cap may be properly installed...
Owner Guide 1st Printing - Page 178

... on the right side of the battery and move it straight out of children's reach. Maintenance and care Replacing headlamp bulbs Handle a halogen headlamp bulb carefully and keep out of the lamp assembly. 5. Remove the bulb retaining ring by its plastic base and do not touch the glass. If the bulb is in...
Owner Guide 1st Printing - Page 179

...the rear of the socket by rotating it 45 degrees and pulling it again. Install the bulb retaining ring over the plastic base until it snaps, locking it ... you changed the bulb, you feel a "stop". 4. Remove the bulb socket by rotating clockwise until the plastic base contacts the rear of socket and push in the lamp assembly. Open trunk. 2. Turn the headlamps on and make sure...
Owner Guide 1st Printing - Page 180

... lamp bulbs To change the license plate bulbs: Sedan 1. Replacing front parking lamp/turn signal bulbs For bulb replacement, see a dealer or qualified technician. 180 Install the lamp assembly on liftgate with two screws. Install the lamp assembly on rear bumper with screw. To complete installation, follow the removal procedure in the new bulb. 4. Carefully pull the bulb...

Similar Questions

Removing Alternator, On Ford Taurus
I have a 1999 ford taurus,w/a duratec 24 valve 3 L engine.It is located down under near the firewall
(Posted by fredd51 10 years ago)
Ask a New Question
Use the box below to post a new question about this Ford automobile .
Points & Prizes
  • You can earn points for nearly everything you do on HelpOwl.com
  • You can trade in those points for gift cards at leading retailers such as Amazon.com and Walmart
  • It's that simple!
See How it Works
Create a Free Account

Ford Manuals

Find free 1999 Ford Taurus manuals and user guides available at ManualOwl.com. Try out our unique manual viewer allowing you to interact with manuals from directly within your browser!

Ford Reviews

View thousands of Ford user reviews and customer ratings available at ReviewOwl.com.

Contact Information

Complete Ford customer service contact information including steps to reach representatives, hours of operation, customer support links and more from ContactHelp.com.

Scoreboard Ratings

See detailed Ford customer service rankings, employee comments and much more from our sister site.

Ford Recalls

Find comprehensive Ford recall information updated hourly on RecallOwl.com.