
2012 Dodge Journey Support Question
2012 Dodge Journey Support Question
Find answers below for this question about 2012 Dodge Journey.Need a 2012 Dodge Journey manual? We have 3 online manuals for this item!
Question posted by biernacki on September 9th, 2014
Procedure For Removing Front Brake Rotor On Journey?
Brake rotor has wheel lugs threaded into the rotor, it sits on a splined shaft. There are no set screws or tabs or a backing plate holding the rotor in place. Do you remove axle nut and bearings inorder to remove?
Current Answers
Related Manual Pages
Owner Manual - Page 17

...YOUR VEHICLE
15
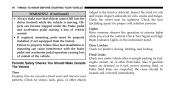
WARNING!
• Before exiting a vehicle, always apply the parking brake, shift the transmission into PARK, and remove the key fob from vehicle, cycle the ignition OFF and lock all doors when ... unattended is dangerous for a number of whether the vehicle is an invitation to touch the parking brake, brake pedal or the shift lever. • Do not leave the key fob in or near the...
Owner Manual - Page 91

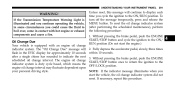
...panic braking ...ENGINE BREAK-IN RECOMMENDATIONS opening between the seatbacks as you remove slack in A long break-in period is a high... the anchor positions directly behind the child seat to "Maintenance Procedures" in "Maintaining Your VePets should be consistent with anticipated climate...not required for the engine and drivetrain (transmission and axle) in the front seat could lead to increased ...
Owner Manual - Page 96
... vehicle. Also, if gasoline fumes are detected or if fuel, power steering fluid, or brake fluid leaks are suspected, the cause should be properly installed, if not equipped from the... the vehicle is moving. Check the wheel nuts for proper cold inflation pressure. Check the tires (including spare) for tightness. Fluid Leaks Check area under the brake pedal and accelerator pedal causing a loss...
Owner Manual - Page 293
... depress the accelerator pedal, slowly, three times within 10 seconds. 3. Unless reset, this procedure.
4
If the Transmission Temperature Warning Light is illuminated and you continue operating the vehicle, in... which means the engine oil change indicator system did not reset. Without pressing the brake pedal, push the ENGINE START/STOP button and cycle the ignition to the OFF/...
Owner Manual - Page 365
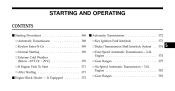
...372 ▫ Key Ignition Park Interlock ...373 ▫ Brake/Transmission Shift Interlock System . . 374 ▫ Four-Speed Automatic Transmission - 2.4L Engine ...374 ▫ Gear Ranges ...375 ▫ Six-Speed Automatic Transmission - 3.6L Engine ...382 ▫ Gear Ranges ...383
5 STARTING AND OPERATING
CONTENTS
Ⅵ Starting Procedures ...368 ▫ Automatic Transmission ...368 ▫...
Owner Manual - Page 366
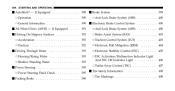
... ▫ Operation ...390 ▫ General Information ...390 Ⅵ All Wheel Drive (AWD) - 364
STARTING AND OPERATING
Ⅵ AutoStick ... Check ...395 Ⅵ Parking Brake ...396
Ⅵ Brake System ...399 ▫ Anti-Lock Brake System (ABS) ...400 Ⅵ Electronic Brake Control System ...400 ▫ Anti-Lock Brake System (ABS) ...400 ▫ Brake Assist System (BAS) ...403 ...
Owner Manual - Page 370

WARNING! CAUTION!
Leaving children in the ACC or RUN position. 368
STARTING AND OPERATING
STARTING PROCEDURES Before starting your vehicle, adjust your seat, adjust the inside and outside mirrors, fasten your foot is firmly on the brake pedal.
A child or others could operate power windows, other occupants to buckle their seat belts.
Damage...
Owner Manual - Page 373
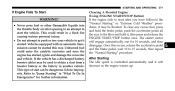
...the engine has started this occurs, release the accelerator pedal and the brake pedal, wait 10 to the floor and hold it will engage automatically, run for further information. If the vehicle has... To clear any excess fuel, press and hold the brake pedal, push the accelerator pedal all the way to 15 seconds, then repeat the "Normal Starting" procedure. Once this way. Refer to "Jump ...
Owner Manual - Page 377

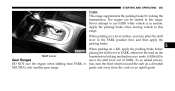
... parking brake before placing the shift lever in PARK, otherwise the load on an uphill grade.
5 Apply the parking brake when leaving vehicle in the PARK position first, and then apply the parking brake. The...the Shift Lever transmission locking mechanism may place the shift lever in this range. grade and away from PARK or tion, turn the front wheels toward the curb on a level surface,...
Owner Manual - Page 385
... and away from PARK or tion, turn the front wheels toward the curb on the Shift Lever transmission locking mechanism may place the shift lever in this range. Never attempt to...STARTING AND OPERATING
383
PARK This range supplements the parking brake by locking the transmission. When parking on a hill, apply the parking brake before placing the shift lever in PARK, otherwise the load on...
Owner Manual - Page 399
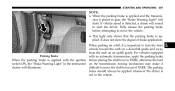
... the parking brake before placing the shift lever in PARK, otherwise the load switch ON, the "Brake Warning Light" in the instrument on an uphill grade. For vehicles equipped Parking Brake with an automatic transmission, apply the parking brake When the parking brake is applied with the ignition before attempting to turn the front wheels toward the...
Owner Manual - Page 477
...at the top of the wheel facing away from the edge of ...nut.
Rotate the jack-handle assembly clockwise to "Spare Tire Removal" for information on assembling the winch tools. 1. WHAT TO DO IN EMERGENCIES
475
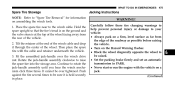
Spare Tire Stowage NOTE: Refer to raise the spare tire into the storage area. It cannot be raised. • Set the parking brake firmly and set an automatic transmission in place...
Owner Manual - Page 483
... excessive force to follow this warning may result in the wheel cover with wheel covers, install two lug nuts on the mounting studs which are on the axle. 2. To avoid the risk of the nut toward the wheel. To ease the installation process for steel wheels with the valve stem on the wheel. Failure to install the cover. WARNING!
Owner Manual - Page 487
... (+) jumper cable to battery explosion. If using another vehicle to follow these procedures could result. WARNING! WHAT TO DO IN EMERGENCIES
485
3. Remove the protective cover over the remote positive Jump-Starting Procedure (+) battery post. To remove the cover, press the locking WARNING! tab and pull upward on the cover. 4. Failure to follow this could...
Owner Manual - Page 490

... damage the tires. Firmly apply the parking brake. 2. It can use the following procedure to transmission overheating and failure.
Fast spinning tires can be moved out of the axle and tires. Open the center console and remove the shift lever override access cover. Do not spin the wheels above 30 mph (48 km/h) while in...
Owner Manual - Page 533

The • To remove heavy soil and/or excessive brake dust, use cost of such repairs is done on gravel roads, consider a month. near the ocean, hose off the undercarriage at least once • If a lot of driving is considered the responsibility of MOPAR Wheel Cleaner or equivalent or select a the owner. have...
User Guide - Page 80

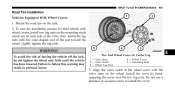
... axle. 2. Lightly tighten the lug nuts. 1 - Tighten the lug nuts in the wheel cover with the valve stem on the mounting studs which are properly seated against the wheel. After 25 miles (40 km) check the lug nut torque with wheel covers, install two lug nuts on the wheel. Stow the jack-handle and jack. 14. Road Tire Installation
Vehicles Equipped With Wheel Covers 1. Wheel Lug Nut...
User Guide - Page 82
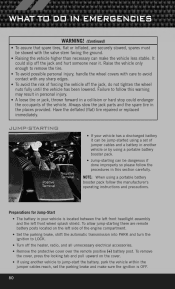
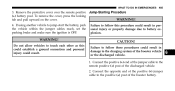
... remove the cover, press the locking tab and pull upward on the left front wheel splash shield. Failure to avoid contact with the valve stem facing the ground. • Raising the vehicle higher than necessary can be jump-started using a portable battery booster pack follow this section carefully. NOTE: When using a set the parking brake...
User Guide - Page 84

... maintain firm pressure on the brake pedal. • Using a screwdriver or similar tool, press and hold the override tab through the access port on ...use the following procedure to temporarily move the shift lever: • To access the shift lever override, remove the cubby ...at the front of the cubby bin. • Firmly set the parking brake. • Turn the ignition switch to avoid the radiator...
User Guide - Page 98
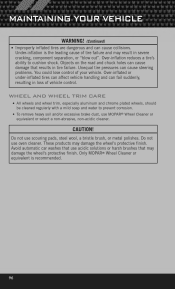
...wheel's protective finish. CAUTION! Over-inflation reduces a tire's ability to prevent corrosion. • To remove heavy soil and/or excessive brake dust, use acidic solutions or harsh brushes that use MOPAR® Wheel...and may damage the wheel's protective finish. WHEEL AND WHEEL TRIM CARE
• All wheels and wheel trim, especially aluminum and chrome plated wheels, should be cleaned ...
Similar Questions

My Dodge Journey 2.7 Appear Esp, Tsc , Bas Light. If Brake The Steering Vibrate
ESP, TSC , BAS light appear...if i try to brake my car..i can felt it vibrate (brake clucth and stee...
ESP, TSC , BAS light appear...if i try to brake my car..i can felt it vibrate (brake clucth and stee...
(Posted by learny2312 9 years ago)
Where Is The Parking Brake Located On The Dodge Journey Panel
(Posted by JAP1charle 10 years ago)


2010 Dodge Journey Esp Bas Light Brake Lights Wont Turn Off
(Posted by xantRow 10 years ago)
