Dell 2230 Support Question
Dell 2230 Support Question
Find answers below for this question about Dell 2230.Need a Dell 2230 manual? We have 1 online manual for this item!
Question posted by jimmyb1121 on May 17th, 2011
Replace Pc Unit But Message Is Still Displayed
The person who posted this question about this Dell product did not include a detailed explanation. Please use the "Request More Information" button to the right if more details would help you to answer this question.
Current Answers
Related Dell 2230 Manual Pages
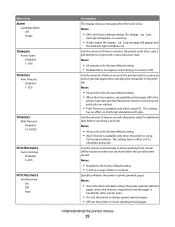
User's Guide - Page 5
...
Cleaning the exterior of the printer...87 Storing supplies...87 Conserving supplies...88 Extending the life of your toner cartridge...88 Replacing supplies...89
Replacing the toner cartridge ...89 Replacing the photoconductor kit ...91
Moving the printer...94
Before moving the printer ...94 Moving the printer to another location...94 Setting the printer up in a new location ...95...
User's Guide - Page 9
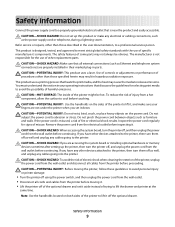
... touching. CAUTION-SHOCK HAZARD: If you are not under the printer when you have other replacement parts.
You must understand the section in hazardous radiation exposure.
If you set up the printer, then turn the printer off , and then unplug the power cord from the printer before continuing. CAUTION-SHOCK HAZARD: Do not set it...
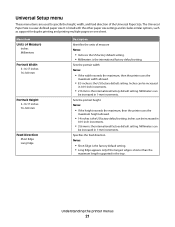
User's Guide - Page 20

... or feeder in other menus.
Description Name a Custom Type , and this user-defined name displays instead of paper, the Set Loading menu appears. Specifies whether duplex (2-sided) printing is turned... tray or feeder
in order for you to print from that source. Understanding the printer menus
20 Paper Loading menu
Menu item Select Type
Recycled Loading Bond Loading Letterhead loading...
User's Guide - Page 21
... mm
Feed Direction Short Edge Long Edge
Description
Identifies the units of the Universal Paper Size.
Understanding the printer menus
21
Inches can be increased in 1-mm increments. Millimeters....
Sets the portrait width
Notes:
• If the width exceeds the maximum, then the printer uses the
maximum width allowed.
• 8.5 inches is a user-defined paper size.
Millimeters...
User's Guide - Page 25
...Recovery Jam Recovery On Off Auto
Description
The display shows a message when the toner is the factory default setting. Lets the printer automatically continue printing from certain offline situations when...seconds is the factory default setting. • Wait Timeout is available only when the printer is low message will appear and
the indicator light will appear as a warning.
• Single ...
User's Guide - Page 31
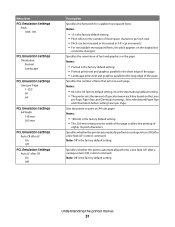
... width of the page to allow the printing of
eighty 10-pitch characters. Understanding the printer menus
31 Select the desired Paper Size and Orientation before setting Lines per Page, Paper ...default setting. 64 is the international default setting. • The printer sets the amount of space between each line based on the display but
cannot be increased or decreased in 0.01-cpi increments. &#...
User's Guide - Page 32
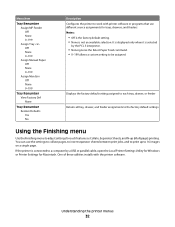
...
Use the Finishing menu to adjust settings for Macintosh. It is displayed only when it is not an available selection. If the printer is connected to a computer by the PCL 5 interpreter.
•... None is selected
by a USB or parallel cable, open the Local Printer Settings Utility for Windows or Printer Settings for such features as Collate, Separator Sheets, and N-up to 16 images ...
User's Guide - Page 36

... options
Installing a 250- you are installing a drawer after setting up the printer, turn off the printer, and unplug the power cable before continuing.
1 Turn the printer off. 2 Unpack the drawer, and remove any packing material. 3 Remove the tray from the support unit.
1 Support unit 2 Tray
4 Remove any packing material and tape from inside the tray...
User's Guide - Page 37
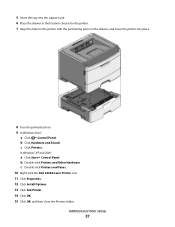
...
37 b Click Hardware and Sound. c Click Printers. 5 Insert the tray into the support unit. 6 Place the drawer in the location chosen for the printer. 7 Align the holes in the printer with the positioning posts on the drawer, and lower the printer into place.
8 Turn the printer back on. 9 In Windows Vista®:
a Click ΠControl Panel...
User's Guide - Page 40
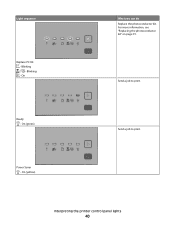
Blinking -
On (yellow)
Interpreting the printer control panel lights
40 On (green)
What you can do Replace the photoconductor kit.
Blinking - Power Saver -
For more information, see "Replacing the photoconductor kit" on page 91. On
Ready - Send a job to print. Send a job to print. Light sequence
Replace PC Kit -
User's Guide - Page 43
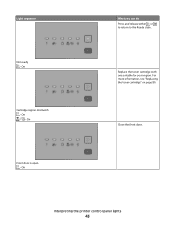
Light sequence
Not ready - On
Front door is open - On
What you can do Press and release either or l to return to the Ready state.
Close the front door. On - For more information, see "Replacing the toner cartridge" on page 89. Replace the toner cartridge with one suitable for your region. On
Cartridge region mismatch - Interpreting the printer control panel lights
43
User's Guide - Page 45
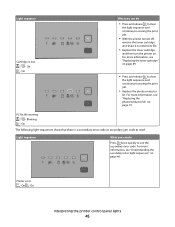
... can do
Press twice quickly to clear
the light sequence and continue processing the print job.
• Replace the photoconductor
kit. On - On
Interpreting the printer control panel lights
45
For more information, see the secondary error code. PC Kit life warning - On
The following light sequences show that there is low - Blinking...
User's Guide - Page 50
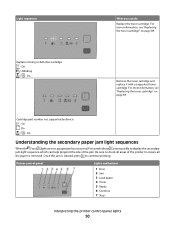
... not supported by device - Replace missing or defective cartridge -
Light sequences
What you can help pinpoint the site of the printer to ensure all the paper is cleared, press to continue printing. For more information, see "Replacing the toner cartridge" on page 89. Press and release twice quickly to display the secondary jam light...
User's Guide - Page 77
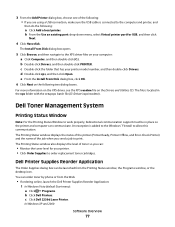
... on the following two dialog boxes. b From the Use an existing port: drop-down menu, select Virtual printer port for your printer. • Click Order Supplies to order replacement toner cartridges. The Printing Status window also displays the level of toner so you can communicate.
e From the Install From Disk dialog box, click OK...
User's Guide - Page 91
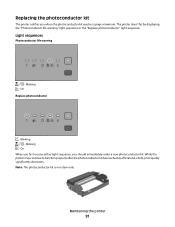
... sequence, you when the photoconductor kit reaches a page maximum. The printer does this by displaying the "Photoconductor life warning" light sequence or the "Replace photoconductor" light sequence. Note: The photoconductor kit is one item only.
Light sequences
Photoconductor life warning
- While the printer may continue to function properly after the photoconductor kit has reached...
User's Guide - Page 92
... the print quality of the photoconductor kit.
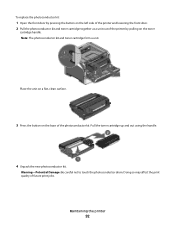
To replace the photoconductor kit:
1 Open the front door by pressing the button on the left side of the printer and lowering the front door. 2 Pull the photoconductor kit and toner cartridge together as a unit out of the printer by pulling on the base of future print...
User's Guide - Page 93
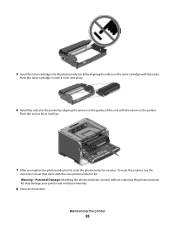
...: Resetting the photoconductor counter without replacing the photoconductor kit may damage your printer and void your warranty.
8 Close the front door. Push the toner cartridge in the printer. 5 Insert the toner cartridge into the printer by aligning the rollers on the guides of the unit with the tracks. Push the unit as far as it clicks...
User's Guide - Page 98
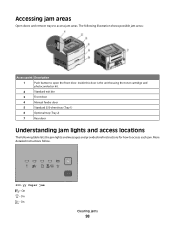
Accessing jam areas
Open doors and remove trays to access each jam. Inside this door is the unit housing the toner cartridge and
photoconductor kit.
2
Standard exit bin
3
Front door
4
Manual feeder ...On - On
Clearing jams
98 The following table lists the jam lights and messages and provides brief instructions for how to access jam areas. On - More detailed instructions follow.
200.yy Paper...
User's Guide - Page 126
...USB printing 72 on Mac OS X, for USB printing 72
installing software Local Printer Settings Utility 74
J
jam light sequences 98 messages 98
jam recovery setting 80
jams accessing jam areas 98 avoiding 97
jams,... clearing 200 102, 104 201 102, 104 233 106 behind photoconductor kit and toner cartridge unit 102 ...
User's Guide - Page 127
... jammed does not
reprint 114 paper jam
light sequences 98 messages 98 paper jams accessing jam areas 98 avoiding 97 light ...201 102, 104 233 106 behind photoconductor kit and
toner cartridge unit 102 behind the rear door 108 from manual feeder 107 from ... replacing 91 PostScript menu 30 Power Saver adjusting 96 print job canceling from Macintosh 85
Index
127
canceling from the printer control...
Similar Questions


How Do We Dell 2230 Dell 2230d Reset Photoconductor
How do we reset the photoconductor on the Dell 2230d after whe have installed new drum?
How do we reset the photoconductor on the Dell 2230d after whe have installed new drum?
(Posted by becky13193 11 years ago)