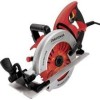
Get support for Craftsman 28195 - Professional 7-1/4 Hypoid Saw

Craftsman 28195 Support Question

Craftsman 28195 Support Question

Find answers below for this question about Craftsman 28195 - Professional 7-1/4 Hypoid Saw.
Need a Craftsman 28195 manual? We have 1 online manual for this item!
Question posted by jabutler470 on November 13th, 2023

The Stud That The Height Adjustment Lever Goes On Is Striped. Replaceable Or Wh

Is the stud that holds height adjustment replaceable? Or what is the thread size to retread it. Has been that way since I bought years ago and so have barely used it

Current Answers

Answer #1: Posted by SonuKumar on November 13th, 2023 10:12 PM
This answer was accepted by the poster of the original question.
SonuKumar

Member since:
May 9th, 2021

Points: 16,615,400
1,100
points
The part you are referring to is called a "stud" and it is not replaceable. The threads in the stud are stripped and it needs to be replaced.

To replace the stud, you will need to remove the height adjustment lever and then remove the stud from the machine. Once the stud is removed, you can replace it with a new one.

Here are the steps on how to replace the stud:

Remove the height adjustment lever. To do this, you will need to loosen the two screws that hold it in place. Once the screws are loose, you can carefully pry the lever off of the machine.

Remove the stud. To do this, you will need to use a stud extractor. A stud extractor is a tool that is designed to remove stripped studs. To use a stud extractor, you will need to attach it to the stud and then turn it counter-clockwise. The stud extractor will apply pressure to the stud and it will eventually break free.

Install the new stud. To do this, you will need to thread the new stud into the hole where the old stud was located. Once the stud is threaded in, you can tighten it down with a wrench.

Reinstall the height adjustment lever. To do this, you will need to carefully position the lever on the machine and then tighten the two screws that hold it in place.

Once you have completed these steps, you will have replaced the stripped stud and your machine will be working properly again.


Please respond to my effort to provide you with the best possible solution by using the "Acceptable Solution" and/or the "Helpful" buttons when the answer has proven to be helpful.

Regards,
Sonu
Your search handyman for all e-support needs!!

Related Craftsman 28195 Manual Pages

Product Manual - Page 2

... PROFESSIONAL ® PRODUCT If this Craftsman tool fails to cause cancer and birth defects or other rights, which vary from state to state, Sears, Roebuck and Co,, Hoffman Estates, IL 601 79 A WARNING: Some dust created by using power tools contains chemicals known to the state of California to give complete satisfaction within one year...
Product Manual - Page 5

...part of the tool in "Off" position before plugging the tool into a power source. A wrench that is in unexpected situations. 28195 Manual_Revised_07-0623 ...adjusting keys or blade wrenches before turning the tool "On." Do not overreach. Air vents often cover moving parts and should also be caught in moving parts. Carrying tools with safe operation before using this saw . Learn the tool...
Product Manual - Page 6

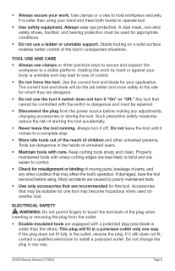
...any other untrained persons. If the plug does not fit fully in any adjustments, changing accessories or storing the tool. Always secure your hand and frees both hands to loss of control. ... body is wider than using . Stable footing on another tool. Holding the work . The correct tool and blade will fit in the hands of untrained users. Do not use the tool if switch does not turn...
Product Manual - Page 7

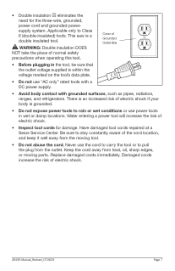
... the risk of normal safety precautions when operating this tool. Do not abuse the cord. Replace damaged cords immediately. This saw is within the voltage marked on the tool's data plate. Do not use power tools in the tool, be sure that the outlet voltage supplied is a double insulated tool. _. There is an increased risk of Grounded Outlet...
Product Manual - Page 8

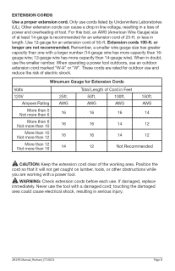
... cause a drop in line voltage, resulting in serious injury. 28195 Manual_Revised_07-0623 Page 8 or less in doubt, use the tool with a larger number (14-gauge wire has more capacity than...length. If damaged, replace immediately. Never use the smaller number. or longer are working area. Use 12-gauge for Extension Cords Volts 120V Total Length of tool. Minumum Gauge for ...
Product Manual - Page 9

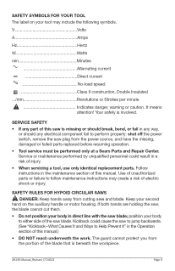
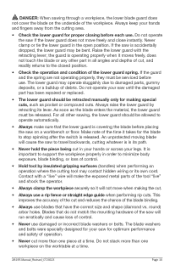
...:$95 Manual_Revised_07-0623 Page 9 If both hands are holding the saw blade. The guard cannot protect you from the portion of injury. • When servicing a tool, use only identical replacement parts. SAFETY SYMBOLS FOR YOUR TOOL The label on the auxiliary handle or motor housing. SAFETY RULES FOR HYPOID CIRCULAR SAWS ,_ DANGER: Keep hands away from the power...
Product Manual - Page 10

... the time it takes for optimum performance and safety of the workpiece. Hold tool by retracting its own cord. Contact with the retracting lever; Always clamp the workpiece securely so it moves freely, does not touch the blade or any other sawing, the lower guard should be allowed to damaged parts, gummy deposits, or...
Product Manual - Page 12

... other than 90 ° to the fence. Hypoid Gear: Specially machined gearing for damaged parts. Ripping...tool. Kickback: A hazard that has hardened. Saw-Blade Path: The area over, under, behind, or in a non-through the thickness of the workpiece, such as it applies to determine if it will be properly repaired or replaced at any other than 90 ° to the plane of the blade. 28195...
Product Manual - Page 13

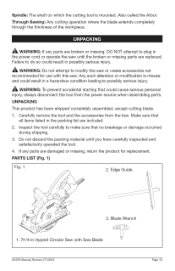
... injury, always disconnect the tool from the box. A WARNING: If any parts are damaged or missing, return the product for use with Saw Blade 28195 Manual_Revised_07-0623 Page 13 Do...sure that all items listed in Hypoid Circular Saw with this saw or create accessories not recommended for replacement. Blade Wrench 1.7-1/4-in the packing list are replaced. Failure to plug in possibly ...
Product Manual - Page 14

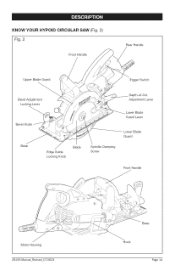
KNOW YOUR HYPOID CIRCULAR SAW (Fig. 2) Fig. 2 Front Handle Rear Handle Upper Blade Guard Trigger Switch Bevel Adjustment Locking Lever Bevel Scale Base Edge Guide Locking Knob Blade Spindle Clamping Screw Adjustment Lever Lower Blade Guard Lever Lower Blade Guard Front Handle Motor Housing 28195 Manual_Revised_07-0623 Base Hook Page 14
Product Manual - Page 15

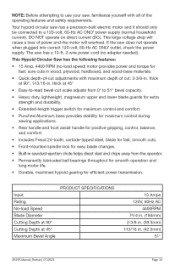
...Quick depth-of-cut adjustments with all of power and the motor will overheat. This Hypoid Circular Saw has the following features: * 15 Amp, 4400 RPM (no adapter needed). The saw has a precision-built.... Your hypoid circular saw has a 10-ft, 2-wire power cord (no -load speed) motor provides power and torque for fast, sure cuts in . (42.5mm) 51° 28195 Manual_Revised_07-0623...
Product Manual - Page 16

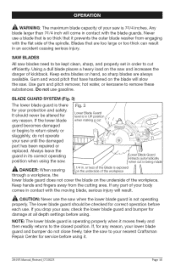
...saw , check the lower blade guard and bumper for service before using the saw blades need to return slowly or sluggishly, do not close freely, take the saw until the damaged part has been repaired or replaced.... Never use the saw is so thick that it . 28195 Manual_Revised_07-0623 Page 16 Do not use . Keep hands and fingers away from engaging with the flat side of your saw when the...
Product Manual - Page 19

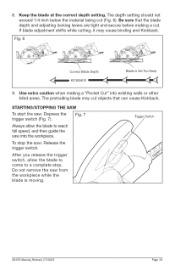
... If blade adjustment shifts while cutting, it may cut objects that the blade depth and adjusting locking levers are tight and secure before making a "Pocket Cut" into the workpiece. Use extra caution ...saw : Release the trigger switch. Do not remove the saw : Depress the trigger switch (Fig. 7). Trigger Switch 28195 Manual_Revised_07-0623 Page 19 STARTING/STOPPING THE SAW To start the saw...
Product Manual - Page 20

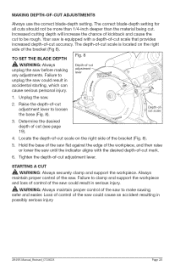
...unplug the saw until the indicator aligns with a depth-of-cut scale that provides increased depth-of-cut scale on the right side of the saw . 2. Hold the base of the saw flat ... 8). WARNING: Always maintain proper control of -cut adjustment lever 1. Tighten the depth-of the saw . MAKING DEPTH-OF-CUT ADJUSTMENTS Always use the correct blade-depth setting. Depth-of -cut ...
Product Manual - Page 21

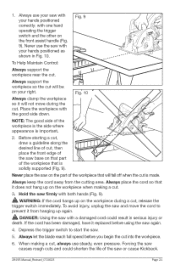
...using the saw firmly with the good side down. Before starting a cut, draw a guideline along the desired line of the saw and move the cord to start the saw causes rough cuts and could result in Fig. 10. Hold the saw... fall off when the cut , always use the saw with your right. Forcing the saw . 5. Depress the trigger switch to prevent it replaced before you begin the cut . 1.
Product Manual - Page 23

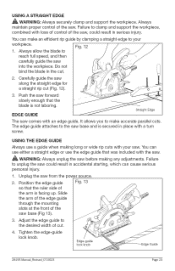
...saw into the workpiece. USING THE EDGE GUIDE Always use the edge guide that was included with a turn SCrew. Failure to clamp and support the workpiece, combined with loss of control of the saw base (Fig 13). 3, Adjust...knob. 28195 Manual_Revised_07-0623 Page 23 You can make accurate parallel cuts. Fig. 12 2. EDGE GUIDE The saw comes with your workpiece. 1. USING A ...
Product Manual - Page 24

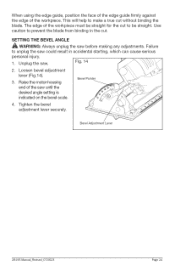
... desired angle setting is indicated on the bevel scale. 4. Tighten the bevel adjustment lever securely. Bevel Adjustment Lever 28195 Manual_Revised_07-0623 Page 24 Failure to make a true cut without binding the blade. Raise the motor-housing end of the saw before making any adjustments. Loosen bevel adjustment lever (Fig. 14). 3. Fig. 14 / 2. The edge of the workpiece. Unplug the...
Product Manual - Page 26

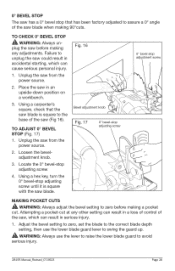
...saw before making a pocket cut at any adjustments. Adjust the bevel setting to zero, set the blade to the correct blade depth setting, then use the lower blade guard lever to swing the guard up. ,_ WARNING: Always use the lever...: Always adjust the bevel setting to avoid serious injury. 28195 Manual_Revised_07-0623 Page 26 TO CHECK 0° BEVEL STOP ,_ WARNING: Always unplug the saw , which...
Product Manual - Page 30

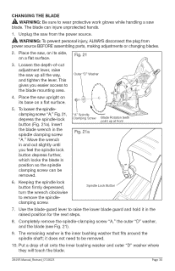
... -cut adjustment lever, raise the saw upright on its side, on a flat surface. Fig. 21 3. Place the saw up at front 6. SpindleLock Button 7. Insert the blade wrench in the raised position for the next steps. 8. Outer "D" Washer 5. it in the spindle clamping screw "A." Use the blade-guard lever to raise the lower blade guard and hold it...
Product Manual - Page 33

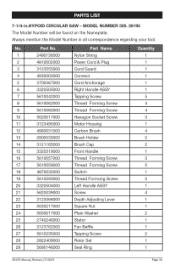
... 29 5690146000 28195 Manual_Revised_07-0623 Nylon String Power Cord & Plug Cord Guard Connect Cord Anchorage Right Handle ASSY Tapping Screw Thread Forming Screw Thread Forming Screw Hexagon Socket Screw Motor Housing Carbon Brush Brush Holder Brush Cap Front Handle Thread Forming Screw Thread Forming Screw Switch Thread Formong Screw Left Handle ASSY Screw Depth Adjusting Lever Square Nut...

Similar Questions

Replacement Brushes For 320-26302 Drill?
Are replacement brushes available for craftsman 320-26302 drill? Can't even find a part number.
(Posted by nkjohnso 4 years ago)
Purchase Replacement Battery
Can I purchase a replacement battery for a craftsman compressor / inflator model 75116?
(Posted by lewskis 5 years ago)
Router Will Not Come Up To Speed.
I, just purchased this new plunge Router less than 1 year ago, it has been used about 10 times on li...
(Posted by birizzo 13 years ago)
How To Replace Disc?
HOW DO YOU REPLACE DISCS ON POLISHER
(Posted by rubired77 13 years ago)
Battery Replacement
Can the battery be replaced on the Craftsman 4.8 volt pistol screwdriver. I've had mine 18 months an...
(Posted by flausahooey 13 years ago)
Ask a New Question
Use the box below to post a new question about this Craftsman product .
Points & Prizes
  • You can earn points for nearly everything you do on HelpOwl.com
  • You can trade in those points for gift cards at leading retailers such as Amazon.com and Walmart
  • It's that simple!
See How it Works
Create a Free Account

Craftsman Manuals

Find free Craftsman 28195 - Professional 7-1/4 Hypoid Saw manuals and user guides available at ManualOwl.com. Try out our unique manual viewer allowing you to interact with manuals from directly within your browser!

Craftsman Reviews

View thousands of Craftsman user reviews and customer ratings available at ReviewOwl.com.

Contact Information

Complete Craftsman customer service contact information including steps to reach representatives, hours of operation, customer support links and more from ContactHelp.com.

Scoreboard Ratings

See detailed Craftsman customer service rankings, employee comments and much more from our sister site.