Get support for 2005 Chevrolet SSR Pickup

2005 Chevrolet SSR Pickup Support Question

2005 Chevrolet SSR Pickup Support Question

Find answers below for this question about 2005 Chevrolet SSR Pickup.
Need a 2005 Chevrolet SSR Pickup manual? We have 1 online manual for this item!
Question posted by whatuwant2b on October 10th, 2023

How To Install Interior A Pillar Covers

I bought a 2005 SSR 2 months ago and I'm noting the interior a-pillar cover is not installed correctly, and the rubber around the window opening is not secure. I'm mechanically inclined but can find the steps or a video onlne to follow

Current Answers

Answer #1: Posted by SonuKumar on October 10th, 2023 9:29 PM
This answer was accepted by the poster of the original question.
SonuKumar

Member since:
May 9th, 2021

Points: 16,617,810
1,100
points
Gather your tools and materials. You will need a Phillips head screwdriver, a T10 Torx screwdriver, and a trim removal tool.

Remove the A-pillar cover. Start by removing the two Phillips head screws at the top of the A-pillar cover. Then, use the trim removal tool to gently pry the cover away from the windshield. Be careful not to damage the rubber gasket around the window opening.

Secure the rubber gasket. If the rubber gasket around the window opening is not secure, use a bead of silicone sealant to reattach it. Be sure to apply the sealant to both the gasket and the windshield.

Install the A-pillar cover. Once the rubber gasket is secure, replace the A-pillar cover. Start by aligning the cover with the windshield and then insert the two Phillips head screws at the top. Tighten the screws until they are snug.

Test the A-pillar cover. Once the A-pillar cover is installed, test it to make sure that it is secure and that the rubber gasket is sealing properly. You can do this by closing the door and then spraying water on the outside of the windshield. If the water does not leak into the interior of the vehicle, then the A-pillar cover is installed correctly.

Here are some additional tips for installing interior A-pillar covers:

Be careful not to damage the rubber gasket around the window opening. If the gasket is damaged, it will not seal properly and water may leak into the interior of the vehicle.

When installing the A-pillar cover, make sure that it is aligned with the windshield. If the cover is not aligned, it may not fit properly and may not seal properly.

Tighten the screws that secure the A-pillar cover until they are snug, but do not overtighten them. Overtightening the screws can damage the cover or the windshield.

I have not been able to find a video specifically on how to install interior A-pillar covers on a 2005 Chevrolet SSR, but the general steps described above should be the same for most vehicles. If you have any questions or concerns, please consult a qualified mechanic.


Please respond to my effort to provide you with the best possible solution by using the "Acceptable Solution" and/or the "Helpful" buttons when the answer has proven to be helpful.

Regards,
Sonu
Your search handyman for all e-support needs!!

Answer #2: Posted by Technicalproblemsolver on October 10th, 2023 7:39 PM
Technicalproblemsolver

Member since:
September 25th, 2023

Points: 190,500
140
points
Installing interior A-pillar covers and securing the rubber around the window opening on your 2005 Chevrolet SSR can be done with the following steps:

1. Start by ensuring you have the correct replacement A-pillar cover for your vehicle. You can check with the dealership or an auto parts store to ensure you have the right one.

2. Carefully remove the old or incorrectly installed A-pillar cover. Start by gently prying it away from the A-pillar using a trim removal tool or a flathead screwdriver wrapped with a cloth to avoid scratching the surface. Apply even pressure to avoid damaging the cover or the A-pillar.

3. Once the old cover is removed, inspect the A-pillar for any dirt or debris. Clean the area with a mild cleaner and a soft cloth to ensure a clean surface for the new cover.

4. Take the new A-pillar cover and align it properly with the A-pillar. Make sure all the clips, hooks, or fasteners on the back of the cover are properly aligned with the corresponding slots or holes on the A-pillar.

5. Apply even pressure and press the cover against the A-pillar. Start from the top and work your way down, ensuring all clips or fasteners engage with their respective slots or holes. Lightly tap or press each section of the cover to ensure a snug fit.

6. Once the A-pillar cover is properly installed, move on to securing the rubber around the window opening. It may involve removing the weatherstripping or rubber seal.

7. To remove the weatherstripping, use a trim removal tool or a flathead screwdriver wrapped with a cloth to gently pry it away from the window opening. Take your time to avoid damaging the rubber or the surrounding area.

8. Clean the window opening with a mild cleaner and a soft cloth to remove any dirt or residue.

9. Align the rubber seal or weatherstripping properly with the window opening. Starting from one end, press it against the metal frame, ensuring it fits securely.

10. Continue pressing the rubber seal or weatherstripping around the entire window opening, ensuring it is properly seated and secured.

11. Once everything is in place, give it a final inspection to make sure all parts are properly installed and aligned.

If you're more of a visual learner, you can search for video tutorials online specific to your Chevrolet SSR or a similar vehicle model. These videos can provide a step-by-step guide and visual demonstration.


"Hi there,

I hope my response was helpful in addressing your question or concern. If you found it valuable, I kindly ask you to consider accepting my answer by clicking the designated button. Your support will not only acknowledge my efforts but also guide others in finding useful solutions. Thank you for your trust and I'm ready to assist you further if needed.

Best regards,
Technicalproblemsolver"

Related Manual Pages

Owner's Manual - Page 1

2005 Chevrolet SSR Owner Manual Seats and Restraint Systems ...1-1 Front Seats ...1-2 Safety Belts ...1-6 Child Restraints ...1-19 Airbag System ...1-38 Restraint System Check ...1-51 Features and Controls ...2-1 Keys ...2-3 Doors and Locks ...2-9 Windows ...2-11 Theft-Deterrent Systems ...2-13 Starting and Operating Your Vehicle ...2-15 Mirrors ...2-28 HomeLink® Transmitter ...2-30 Storage ...
Owner's Manual - Page 4

... other manuals, you need help avoid the damage. They use symbols instead of a component, gage, or indicator, reference the following topics: Seats and Restraint Systems in Section 1 Features and Controls in Section 2 Instrument Panel Overview in Section 3 Climate Controls ... tells about something that could damage your vehicle's warranty, and it could be covered by your vehicle.
Owner's Manual - Page 36

... tether strap. Some restraints also use the vehicle's safety belts. A. Lower Anchorage C. This system, designed to make installation of child restraints easier, does not use another vehicle anchor to secure the restraints. Lower Anchorage B. Lower Anchorages and Top Tethers for Children (LATCH System) Your vehicle is located in the passenger seat. Top...
Owner's Manual - Page 52

...). If you experience breathing problems following an airbag deployment, you have breathing problems but not too hot to do so. You can lock the doors again and turn the interior lamps on when the airbags in...64258;ated. If you should get fresh air by using the door lock and interior lamp controls. 1-46 This dust could cause breathing problems for a short time. There will automatically unlock...
Owner's Manual - Page 57

...information about servicing your belts, buckles, latch plates, retractors and anchorages are close to follow proper service procedures, and make sure the safety belt reminder light and all your vehicle...for you see Service Publications Ordering Information on page 7-12. Look for any opened or broken airbag covers, and have them repaired or replaced. (The airbag system does not need regular...
Owner's Manual - Page 89

...steps involved, it is also recommended that does not have a newer garage door opener with any interference received, including interference that a new battery be sure to follow Steps 6 through 8 to the following...; Transmitter with rolling codes, please be installed in your HomeLink® Transmitter. 2-31...security purposes. Refer to assist you have the "stop and reverse" feature.
Owner's Manual - Page 95

... if the convertible top release tool is provided by the dealer and stored in the glovebox. Open the tailgate. Disconnect the electrical connector located on page 2-11 for instructions. 2. These plugs have been installed to remove the cargo cover. 1. Your vehicle's cargo cover can be removed. See Tailgate on the underside of the cargo...
Owner's Manual - Page 98

... floor track covers, follow these steps: 1. Locate and remove the fastener at the tailgate end of your dealer. The floor tracks may have covers that can be removed so that can be used to install accessories in the cargo... has floor tracks and side rails that available accessories can be installed if the optional cargo compartment trim is ordered. Open the tailgate.
Owner's Manual - Page 99

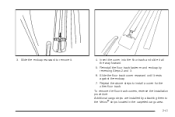
... until it all the way forward. 5. Repeat the above steps to remove it. 4. Additional cargo strips are installed by reversing Steps 2 and 3. 6. 3. Slide the endcap rearward to install a cover for the other floor track. To remove the floor track covers, reverse the installation procedure. Reinstall the floor track fastener and endcap by attaching them...
Owner's Manual - Page 106

.... Then reinstall the endcap on the forward end of the side rails, the endcaps do the following: Side Rail with End Cap Removed Shown Removable Endcaps Shown 1. If your vehicle has an access... slot on the forward end of the cargo area. If your vehicle has the floor track covers installed, they must first be removed for instructions. 2-48 See Floor Tracks on the forward end ...
Owner's Manual - Page 137

...fuse could be sure to follow the proper installation instructions included with the ...equipment. Do not use of accessory or accessory bracket from the heating element when it or keep other flammable items in while it is heating will open to your warranty. Notice: Adding any type of the power outlet can cause damage not covered...
Owner's Manual - Page 231

...shorten the life of all occupants, cargo and all nonfactory-installed options. Also, overloading can break, and it may properly... If you will find the label attached to the B-pillar of your vehicle any heavier than the Gross Vehicle Weight Rating ...Label {CAUTION: Do not load your vehicle. With the driver's door open, you do, parts on tires and in kilograms and pounds. Label ...
Owner's Manual - Page 236

The repairs would not be covered by your warranty. Do not tow your dealer or a professional towing service if you buy and install the new equipment. Towing Towing Your... a motorhome. If your vehicle must be towed, it should be covered by your vehicle. For information about recreational vehicle towing, see the following entry. 4-34 Be sure to weigh your vehicle before you need to...
Owner's Manual - Page 242

Remove the cover of the housing located behind the license plate area by pushing in the tabs and pulling downward. 4-40 Installing the Ball Rod To install the ball rod do the following: 2. Unlock using the key. 1. Be sure the unit is unlocked before pretensioning.
Owner's Manual - Page 243

... following: • Close the lock, withdraw the key, and install the lock cover securely. • The green area on the ball rod. • Move the hitch back and forth to ensure it is properly secured....opposite the white dot on the handwheel should be installed in this happens, you will go. If the key is inserted and the lock is open, tighten the handwheel slightly and turn clockwise as ...
Owner's Manual - Page 245

... the tongue from contacting the road if it becomes separated from your vehicle's master cylinder. Follow the manufacturer's recommendation for this far, then make the brake fluid tap at the... weighs more than 4. Reinstall the housing cover. 0.02 cubic inch (0.3 cc) of the trailer to drag on the master cylinder that sends fluid to install, adjust and maintain them to the bumper...
Owner's Manual - Page 300

... blade assembly. Replacement blades come in different types and are locked by your warranty. Blade Assembly B. A. Windshield Wiper Blade Replacement Windshield wiper blades should be covered by bottom claws of the blade assembly. See Scheduled Maintenance on the blade assembly to touch the windshield when no wiper blade is...
Owner's Manual - Page 331

...can do this fallout condition within 12 months or 12,000 miles (20 000 km...Glass Cleaner Chrome and Wire Wheel Cleaner Usage Interior and exterior polishing cloth. Use on and ...these materials from chrome wheels and wire wheel covers. Vehicle Care/Appearance Materials See your GM dealer... attack painted surfaces on purchasing the following products. Underbody Maintenance Chemicals used for...
Owner's Manual - Page 341

... information. 3. Relay Center There is open. See Lowering the Convertible Top on the sides of the passenger compartment. 1. To access the relay center, do the following: 2. Open the convertible top until the roof tonneau and the boot cover panel are upright so that secure the cover to the backside of the cover and lift to remove the...
Owner's Manual - Page 369

... Chevrolet's Bumper-to use our service, it is added security while traveling for the repair or replacement of the tire if not covered by the New Vehicle Limited Warranty. For prompt and efficient assistance when calling, please provide the following to the Warranty and Owner Assistance Information book. Please refer to the Roadside...

Similar Questions

2005 Ssr 6 Speed Manual T56 Tremec
can't shift gears until engine warmed up
(Posted by angelo1282 9 years ago)
Type Of Oil Best
What type of oil is best for chevy ssr
(Posted by Robinsonricky58 11 years ago)
Ask a New Question
Use the box below to post a new question about this Chevrolet automobile .
Points & Prizes
  • You can earn points for nearly everything you do on HelpOwl.com
  • You can trade in those points for gift cards at leading retailers such as Amazon.com and Walmart
  • It's that simple!
See How it Works
Create a Free Account

Chevrolet Manuals

Find free 2005 Chevrolet SSR Pickup manuals and user guides available at ManualOwl.com. Try out our unique manual viewer allowing you to interact with manuals from directly within your browser!

Chevrolet Reviews

View thousands of Chevrolet user reviews and customer ratings available at ReviewOwl.com.

Contact Information

Complete Chevrolet customer service contact information including steps to reach representatives, hours of operation, customer support links and more from ContactHelp.com.

Scoreboard Ratings

See detailed Chevrolet customer service rankings, employee comments and much more from our sister site.

Chevrolet Recalls

Find comprehensive Chevrolet recall information updated hourly on RecallOwl.com.