2004 Chevrolet Malibu Support Question
2004 Chevrolet Malibu Support Question
Find answers below for this question about 2004 Chevrolet Malibu.Need a 2004 Chevrolet Malibu manual? We have 1 online manual for this item!
Question posted by eugbb on October 12th, 2013
Where Is The Recirculation Button Location On A 2004 Malibu
The person who posted this question about this Chevrolet automobile did not include a detailed explanation. Please use the "Request More Information" button to the right if more details would help you to answer this question.
Current Answers
Related Manual Pages
Owner's Manual - Page 1

2004 Chevrolet Malibu Owner Manual
Seats and Restraint Systems ...1-1 Front Seats ...1-2 Rear Seats ...1-7 Safety Belts ...1-10 Child Restraints ...1-31 Air Bag Systems ...1-52 Restraint System Check ...1-60 Features ...
Owner's Manual - Page 10
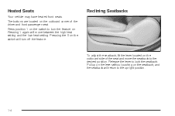
...Seats
Your vehicle may have heated front seats. Reclining Seatbacks
To adjust the seatback, lift the lever located on the switch will move the seatback to lock the seatback. Pressing the 0 on the outboard...front passenger seat. Release the lever to the desired position. The buttons are located on the outboard corner of the seat and move between the high heat setting and the low...
Owner's Manual - Page 12
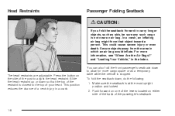
... on one of the levers located on the side of the passenger's seatback. This could cause severe injury or even death. Slide the head restraint up or down so that object toward a person. Make sure the seatback is closest to the top of your head. Press the button on either side of...
Owner's Manual - Page 75

...(s) to Your Vehicle
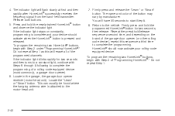
Each remote keyless entry transmitter is turned to your dealer. When the dealer matches the replacement transmitter to ON. 7 (Vehicle Locator/Panic Alarm): Press this button on the transmitter is in PARK (P) or NEUTRAL (N).
Programmable Horn Chirp
Through the DIC, you may choose whether or not to have a maximum...
Owner's Manual - Page 82

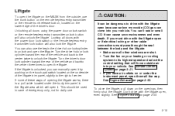
... a glow-in the trunk may damage it. Remote Trunk/Liftgate Release
Press the remote release button, located on the lower edge of the sedan model on the trunk latch. Notice: Using the emergency... a tie-down or anchor point when securing items in -the-dark emergency trunk release handle located inside .
2-14 Emergency Trunk Release Handle
The remote trunk release will glow following exposure to...
Owner's Manual - Page 83
...or the remote keyless entry transmitter unlock button will force outside , use the trunk button on the remote keyless entry transmitter or the remote trunk release button, located on the lower edge of the ...power door lock switch or the remote keyless entry transmitter lock button will open it by pushing on the touch pad switch located on the underside of emergency only, not for daily use ...
Owner's Manual - Page 85
... visors also have returned to normal window operation. Your vehicle may have lighted visor vanity mirrors located on the driver's door.
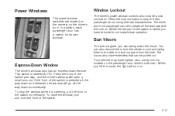
You can still operate all the way down feature. If the ...you can be pulled out. Window Lockout
The driver's power window controls also include a lock out button. Sun Visors
To block out glare, you lift the cover, the light will open a small ...
Owner's Manual - Page 97
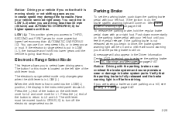
Have your right foot.
Notice: Driving with your left foot. The button for L1. Press the (+) end of the button on page 4-40. LOW (L): This position gives you access to... parking brake is fully released and the brake warning light is located on the left foot until then. Press the (−) end of the button to return to release the parking brake. Notice: Driving your ...
Owner's Manual - Page 103
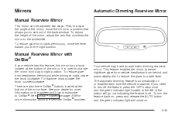
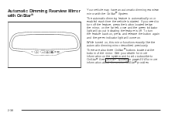
...enabled each time the vehicle is off the feature, press the OFF button once and the green indicator light located to the windshield. The automatic dimming feature is automatically on page 2-38... Your vehicle may have an automatic dimming rearview mirror. There are also three OnStar® buttons located at the bottom of the mirror, move the lever toward you while driving at night, rotate...
Owner's Manual - Page 104
... on page 2-38 for more information about the service OnStar® provides.
2-36 The automatic dimming feature is started. There are also three OnStar® buttons located at the bottom of the mirror. While turned on or enabled each time the vehicle is automatically on , this mirror functions exactly like the automatic...
Owner's Manual - Page 110
... motor-head unit.
7. HomeLink® should now activate your device should activate when the HomeLink® button is complete and your rolling-code equipped device. Locate the "Learn" or "Smart" button. To program the remaining two HomeLink® buttons, begin with Step 2 under "Programming HomeLink®." Do not repeat Step 1 as this sequence a third...
Owner's Manual - Page 112

... down until the HomeLink® indicator light turns off. 3. Continue to use the rear seat cupholders. Do not release the button. 2. One cupholder is located at the rear of the shift lever and one is fully open , pull the handle down and pull the glove box door down the door ...
Owner's Manual - Page 122
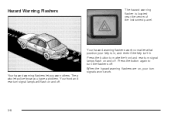
Press the button again to make the front and rear turn signals won't work. When the hazard warning flashers are on and off . Your hazard...know you warn others. Hazard Warning Flashers
The hazard warning flasher is in, and even if the key isn't in. Press the button to turn signal lamps will flash on , your key is located near the center of the instrument panel.
Owner's Manual - Page 127

... lose control. Keep the cruise control switch off .
+RES (Resume): Press this button to resume a set speed and to accelerate the speed. −SET (Set): Press this button to set a speed and to use cruise control on when you are located on the steering wheel for your cruise control on slippery roads. Cruise...
Owner's Manual - Page 134
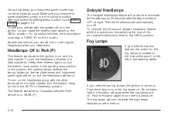
...exterior lamp control to the AUTO or headlamp position. If your vehicle has this feature, the button for this position, the parking lamps, sidemarker lamps, taillamps, license plate lamps and instrument panel...turn the fog lamps on. Headlamps Off in PARK (P) for the fog lamps is located on . Push the button again to OFF at the end of the steering wheel. For Canadian vehicles, the ...
Owner's Manual - Page 142

...the air inlet may automatically switch to recirculate inside vehicle temperature needed for the system to place the entire system in place of the temperature to cover the sensor located on the lower right side of the ...be careful not to help quickly cool down arrow temperature buttons to adjust the temperature setting as necessary. When auto is over about 20 minutes for proper regulation...
Owner's Manual - Page 153

...light will come on again while you turn the ignition off. To turn the system back on, press the button again and the warning light should go out.
• If there's a brake system problem that is
... will come on and the chime sounds when you turn off by pressing the TC
(traction control) button located on the center console, the light will come on and stay on page 3-36 earlier in this ...
Owner's Manual - Page 194
... during reverse operation by turning the ADJ knob.
\ (Fast Forward):
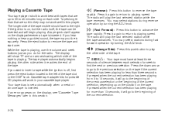
qL (Change Side): Press this button to the right. If an error appears on the display whenever a tape is inserted. Press this pushbutton...to the previous selection on , but the radio is off , first press the eject button located to the left of silence between each side. If the ignition is on the tape if the...
Owner's Manual - Page 195
...future listening. The tape or CD will appear on the display. EJECT / Z (Eject): Press this button, located to the left of the following: • The tape is pressed first. Cassette tapes may be...it as soon as possible to prevent damage to turn the tape hubs. BAND: Press this button is broken. TAPE SEEK and a negative number will appear on the display while the cassette ...
Owner's Manual - Page 197
...the radio when a cassette tape or CD is pressed first.
DISP (Display): Press this button to listen to see how long the current track has been playing. Pressing this arrow more than once...more than eight seconds. AUTO TONE/AUTO EQ (Automatic Equalization): Press this button, located to the left of the CD slot, to select the desired equalization setting while playing a CD. ...
Similar Questions

What Is The Button With Two Arrows On A 2004 Malibu
(Posted by Rudonst 10 years ago)

Where Is The Parental Control Button On A 2004 Malibu
(Posted by HTMCa 10 years ago)

Where Is The Fuel Line Located On The 2004 Malibu. Front To Back.
(Posted by besmith7 11 years ago)
I Would Like To See The Manual On My 2004 Malibu Maxx Ls .i Want Have To Buy Pay
(Posted by Mskatherine63 11 years ago)