2003 Buick Rendezvous Support Question
2003 Buick Rendezvous Support Question
Find answers below for this question about 2003 Buick Rendezvous.Need a 2003 Buick Rendezvous manual? We have 1 online manual for this item!
Question posted by davidshrewsbury33 on October 1st, 2014
What Tool Is Needed To Remove 2003 Rendezvoua Glove Box
The person who posted this question about this Buick automobile did not include a detailed explanation. Please use the "Request More Information" button to the right if more details would help you to answer this question.
Current Answers
Answer #1: Posted by sabrie on October 1st, 2014 5:31 PM
sabrie
Member since:
May 23rd, 2013 Points: 3,306,778

Member since:
May 23rd, 2013 Points: 3,306,778
please visit the link below for instructions
http://www.fixya.com/cars/t14394737-replace_glove_box_door_2006_buick
www.techboss.co.za
Related Manual Pages
Owner's Manual - Page 3
...this manual from your vehicle.
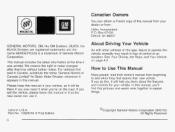
This manual includes the latest information at the time it was printed. Box 07130 Detroit, MI 48207 GENERAL MOTORS, GM, the GM Emblem, BUCK, the BUCK Emblem are registered... and the name RENDEZVOUS is a trademark of this , it will be there if you ever need it when you do this type, failure to make changes after that pictures and words work together...
Owner's Manual - Page 4
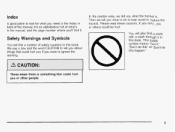
... find it in the manual, and the page number where you were to ignore the warning. It's an alphabetical list of the manual. We use a box and the word CAUTION to tell you about things that could hurt you or other people. Index
A good place to look for what you...
Owner's Manual - Page 69

... center position for the bench seat i located s on the floor behind the second row seats. If the vehicle has the extended rear convenience center, you need to remove a plastic plug and look under the convenience center to anchor the child restraint for the rear seating positions.
Owner's Manual - Page 95
...and Unlock Confirmation .. Exiting Programming Mode ...MemorySeat ...2.45
Onstar@ ...2.35 Onstar@System ...2.35 HomeLink@Transmitter ...-2-37 Programming the HomeLink@Transmitter ...2.38 Storage Areas ...2.41 Glove Box ...2.41 Cupholder(s) ...2.41 Cell Phone Storage Area ...2-41 Overhead Console ...2-41 Floor Console Storage Area ...2-42 Front Armrest Storage Area ...2-42 Roof Rack System ...2-42...
Owner's Manual - Page 111
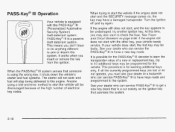
...new or replacement key. PASS-Key@111 Operation
Your vehicle is equipped with the other key, your vehicle needs service. It is a cut exactly as the ignition key that is possible for the PASS-Key@Ill...@Ill is for the vehicle. This means you don't have to do not operate, you insert or remove the key from the ignition. Turn the ignition off and try another ignition key. If your dealer who...
Owner's Manual - Page 112

...to how quickly the key is programmed.
6. Verify the new key has PK3 stamped on , you will need two current driver's keys (black in the ignition and start , see your Ill dealer who can service ...are ever driving and the SECURITY message comes on and stays on it to ON within 10 seconds of removing the previous key. If you are to be able to restart your engine if you turn off . Canadian...
Owner's Manual - Page 113

... mph (88 km/h) or less for more information.
Ignition Positions
With the key in which you can remove the key. Don't make full-throttle starts. A
A (OFF): This is the only position in ...the ignition, you can turn the key to four different positions. Your vehicle doesn't need an elaborate "break-in." But it will perform better in guideline every time you have all-...
Owner's Manual - Page 114

Turn the key only with your vehicle needs service. If the engine is off the engine, but still turn off . B (ACCESSORY): This ... ON for example, if your engine and release the key. L--L
, U
&I
ywul
D (START): This position starts the engine.
Using a tool to force it , be sure you are using the correct key; Retained Accessory Power (RAP)
With RAP, the power windows, the audio system,...
Owner's Manual - Page 128

...hours a day, 7 days a week.
2-35 An Onstar@subscription plan is included in vour Onstar@-equipped vehicle's glove box literature. A complete Onstar@user's guide and the terms and conditions of the Onstar@Subscription Service Agreement are :
e...your Onstar@ services to meet your personal needs. Onstar* System
Onstar@' Services
Onstar@provides a number of service plans to closely meet your...
Owner's Manual - Page 129

... be found at 1-888-4-ONSTAR (1-888-466-7827). To find out more about Onstar@Personal Calling, refer to the Onstar@owner's guide in your vehicle's glove box, or call Onstar@at www.onstar.com.
2-36 Terms and conditions of Onstat-@ services and prepaid calling minutes are also required for Onstar@ Personal Calling...
Owner's Manual - Page 134
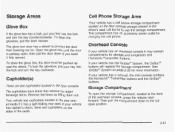
...the latch release. Then pull the compartment down to the driver's seat. Overhead Console
To close the glove box, the door must be pushed up past the detent.
has captain's chairs, there are two cupholders located in the ... armrests if it has a split folding rear seat.
The cupholders have liners that remove tor larger beverage items. Remove the liners by lifting them out.
Owner's Manual - Page 137
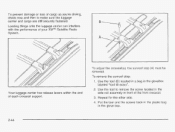
... of each crossrail support.
2. Repeat for the other side.
4. To remove the sunroof stop (A) must be removed. Your luggage carrier has release levers within the end of your XMTMSatellite Radio System. Use the tool (B)located in a bag in the glove box.
2-44 Put the tool and the screws back in the plastic bag in the glovebox...
Owner's Manual - Page 138

...not in the rear of your vehicle, as far forward as needed, to cover items in the upper left corner. Attach both the upper...in use, it is on the driver's side and one of your vehicle. Store the net in the full rear position. Using the tool, put the screws back into each side to keep small loads, like grocery bags, from falling over. s p e ~ s ...To remove the covers, lift up .
? ~
2-45
Owner's Manual - Page 156

instrument Panel Cluster E. Instrument Panel Outlets G. Audio Steering Wheel Controls I. Front Armrest Storage (3. Instrument Panel Fuse Block
Q. Glove Box
3-5 Ashtray/Cigarette Lighter/Accessory Power Outlet/Cell Phone Storage/Purse Storage/Cupholders P. AudioSystem H. Hood Release K. Climate Controls
M. Hazard Warning Flasher Switch D. Turn SignaVMultifunction Lever ...
Owner's Manual - Page 376

...in the switch will come on the driver's side. Remove the protective cap covering the outlet.
6.
Attach the ...remove the cover, pull the tab on page 5-96 or see your dealer for the air inflator. Attach that end of the hose that has the pressure gage.
3. It includes a 20-foot (6 m) hose with an air pressure gage and nozzle adapters. With it off. The light in the glove box...
Owner's Manual - Page 377

...a tire, it in a skid. In any rear blowout, remove your jacking equipment to change a flat tire safely. Gently brake ...can use your foot from the outlet. 2. Place the inflator kit tools in the pouch, and store in the switch will come on a ... for a tire to secure the cover.
5-66 The light in the glove box.
Push down the tab to "blow out" while you're driving, ...
Owner's Manual - Page 379

I
2. Jack B. WingNut F.
J-Hook
5-68
A
B
D
The tools you 'll need is located in the storage compartment at the rear of the vehicle, on the passenger's side.
1. Remove the jack and jacking tools by lifting up the tab and pulling the cover off. Wing Bolt C. A. Jacking Instructions
D.
Folding Wrench E. Separate the jack by turning the wing bolt...
Owner's Manual - Page 396

Remove the J-hook and the wing nut from the back of the compartment cover into the cover opening. Assemble the wing nut ... trip and have your vehicle was fully inflated when your full-size tire repaired or replaced where you want. Put back all tools as you need it rests in place.
5-85 Check the inflation pressure regularly. 3. Install the wing nut and the J-hook to replace your...
Owner's Manual - Page 408
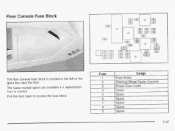
I Power Door Locks
:- - - - The fuses marked spare are available if a replacement
1
Fuse
3
I
Pull the door opento access the fuse block.
5-97 A 5 IU5C 1 i iGGUGU.
I
1
n
.
.
[2)
( ) 3
L
Usage
I
_j .". .
A - Floor Console Fuse Block
I
The floor console fuse block is located to the left of the glove box near the floor.
Owner's Manual - Page 460
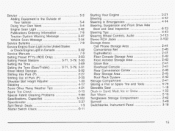
...Cupholder(s) ...2-41 Floor Console Storage Area ...2-42 ...2-42 Front Armrest Storage Area ...Glove Box ...2-41 Overhead Console ...2-41 Rear Convenience Center ...2-46 2-45 Rear Storage Area ......2-42 Roof Rack System ...Storage Compartment ...2-41 Storing a Flat or Spare Tire and Tools ...5-79 Stowable Seat ...1-18 ..-I. :h4..A I-* 3LuLn 1 1 1 Qat I u , I v I u u...
Similar Questions

How To Remove The Glove Box On A Buick Rendezvous
(Posted by mohamtonyb 10 years ago)


2003 Buick Rendezvous How To Remove Glove Box
(Posted by baindRUIV 10 years ago)

How To Remove Speakers From A 2003 Buick Rendezvous
(Posted by michkall 10 years ago)
