
2002 Buick LeSabre Support Question
2002 Buick LeSabre Support Question
Find answers below for this question about 2002 Buick LeSabre.Need a 2002 Buick LeSabre manual? We have 1 online manual for this item!
Question posted by kellybailey5692 on August 31st, 2014
Removing Black Plastic Cover Of Blower Motor With 5 Bolts 02 Lesabre?
The person who posted this question about this Buick automobile did not include a detailed explanation. Please use the "Request More Information" button to the right if more details would help you to answer this question.
Current Answers
Related Manual Pages
Owner's Manual - Page 78

Check the operation of the transmitter. 2. For battery replacement, use a pencil eraser to remove the old battery. Once the transmitter is separated, use one DuracellR battery, type DL-2032, ... it counterclockwise to be sure no moisture can enter. 5. Turn it as the instructions inside the cover indicate. 4. Remove and replace the battery. To replace the battery, do the following: 1.
Owner's Manual - Page 107
...
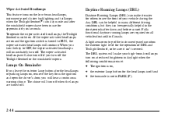
Daytime Running Lamps (DRL) can be sure it easier for the headlamps or parking lamps on, remove the key from the ignition and open the driver's door, you will immediately turn on at reduced...for the operation of your high-beam headlamps turn off . The DRL system will make it isn't covered. The wiper-activated headlamps will turn off and D the transaxle is not in PARK (P).
2-44 The...
Owner's Manual - Page 118
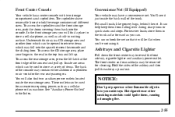
... the oval in the trunk as far forward as a built-in the Index. You can be removed for the rear seat passengers. Ashtrays and Cigarette Lighter
Pull down the front center tray to store...cupholders have a convenience net. To access the cupholders and the front storage area, push the doors covering them from falling over during sharp turns or quick starts and stops. In the front storage area...
Owner's Manual - Page 157
...left of focus.
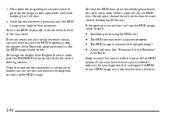
2-94 If the ignition is designed for HUD or your HUD image may need to remove any dirt or film that your windshield replaced, be sure to get one that is on the lens to... D D
Something is part of the HUD image.
If you ever have to have your windshield is covering the HUD unit. The HUD dimmer lever is no brighter than necessary. Keep in mind that reduces the...
Owner's Manual - Page 241
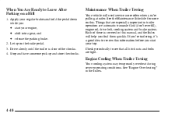
...into a gear, and D release the parking brake.
2. Drive slowly until the trailer is covered in the Index.
4-40 Engine Cooling When Trailer Towing
Your cooling system may temporarily overheat during...that are especially important in trailer operation are tight. Things that all hitch nuts and bolts are automatic transaxle fluid (don't overfill), engine oil, drive belt, cooling system and...
Owner's Manual - Page 246
... water to take care of that first. If it on your vehicle under the rear passenger's seat.
If you . Access the remote positive (+) terminal by removing the cover. People have been hurt doing this, and some have been blinded. You don't need more light. But if a battery has filler caps, be present...
Owner's Manual - Page 249

... just as good there, and the chance of the negative (-) cable at least 18 inches (45 cm) away from electrical shorting if jumper cables are removed incorrectly. The repairs wouldn't be covered by your vehicle may result from the dead battery, but not near engine parts that move. Connect the other metal.
Owner's Manual - Page 250

...the good battery. 4. Return the positive (+) remote terminal cover to tow your disabled vehicle towed. Disconnect the black negative (-) cable from the other vehicle. 5. Dead ...dead battery. 2. See "Roadside Assistance" in the Index.
5-9 Towing Your Vehicle
Jumper Cable Removal A. Heavy, Unpainted Metal Engine Part or Remote Negative (-) Terminal Consult your dealer or a ...
Owner's Manual - Page 257

...hiss, wait for that to stop. Turn the pressure cap slowly counterclockwise until it . You can remove the radiator pressure cap when the cooling system, including the radiator pressure cap and upper radiator hose,.... 3. A hiss means there is no longer hot. Remove the pressure cap. 1. Remove the 3800 Series II V6 engine cover shield to the Radiator
2. How to Add Coolant to access the bleed...
Owner's Manual - Page 258

... one bleed valve. If you have the supercharged engine, remove the nut in the valve cover oil fill hole until you're ready to replace the cover shield.
5-17 D. C. Lift the engine cover shield at the front, slide the catch tab out of the cover shield. Put the oil fill tube, with cap attached, counterclockwise...
Owner's Manual - Page 259

...the nut in the center of the filler neck. Put the cap back on the engine. Remove the oil fill tube, with the proper DEX-COOLR coolant mixture, up to the FULL COLD mark.
5...., from the engine and the compartment.
9. Replace the 3800 Series II V6 engine cover shield. Place the hole in the cover shield over the hole in the Index for more information about the proper coolant mixture....
Owner's Manual - Page 262

Pull the carpeting from the floor of the trunk. 2. Remove the compact spare tire. Removing the Spare Tire and Tools
The following steps will tell you 'll need is located in this section for more information about the compact spare.
5-21 See "Compact Spare Tire" later in the trunk. 1. Lift and remove the cover. 3. The equipment you how to use the jack and change a tire.
Owner's Manual - Page 263

... flat end of the wheel wrench to remove the container that hides the wheel nuts, remove the center cover by using include the jack (A) and the wheel wrench (B). When reinstalling the wheel cover, carefully line up the tire valve stem and the notch in the wheel cover.
5-22 Removing Wheel Covers and Wheel Nut Caps
The tools...
Owner's Manual - Page 264
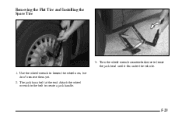
Turn the wheel wrench counterclockwise to create a jack handle.
5-23 Attach the wheel wrench to the bolt to lower the jack head until it fits under the vehicle. 1. Removing the Flat Tire and Installing the Spare Tire
3. The jack has a bolt at the end. Use the wheel wrench to loosen the wheel nuts, but don't remove them yet. 2.
Owner's Manual - Page 266

...flat tire. The wheel could come off .
5-25 Remove any rust or dirt from the wheel bolts, mounting surfaces and spare wheel.
When you change a wheel, remove any rust or dirt from the places where the ... after a time. but be sure to use a cloth or a paper towel to the vehicle. Remove all the rust or dirt off and cause an accident. Raise the vehicle by turning the wheel wrench...
Owner's Manual - Page 277
... air, all gasolines in the United States are not reformulated for low emissions may be covered under your warranty. You should not have to add anything to find. That damage wouldn... occurs, return to clean air. General Motors recommends that contains methanol. Fuels in your area to contribute to your fuel system and also damage plastic and rubber parts. The malfunction indicator lamp...
Owner's Manual - Page 305

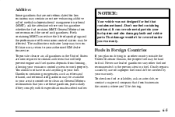
... badly hurt if you and gas that can explode. Vehicle Storage
If you're not going to drive your vehicle for 25 days or more, remove the black, negative (-) cable from running down.
Owner's Manual - Page 306

... procedure not listed in the Index.
Slide the headlamp outward until the pins are loose. 3. For the bulb types to be injured. Remove the two bolts retaining the headlamp assembly. 2. Remove the headlamp assembly to read and follow the instructions on the bulb package. 1. Headlamps
Halogen Bulbs
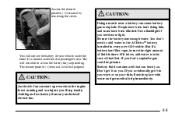
CAUTION:
Halogen bulbs have pressurized gas...
Owner's Manual - Page 314

... clicks into place. 11. Turn the bulb socket one -quarter turn counterclockwise, while pressing it firmly.
7. Loosen and remove the bolts that hold the assembly in place.
6. Pull out the bulb assembly.
6-42 Remove the plastic trim piece from the rear area to reinstall the bulb assembly.
5. Replace with a new bulb by pulling it...
Owner's Manual - Page 326

....
Wipe vinyl, leather, plastic and painted surfaces with a clean, water-dampened towel or cloth. 7. As soon as follows: 1.
Use a clean cloth or sponge, and change to remove any excess cleaner. 6. ... or it roughly. 5.
Special Fabric Cleaning Problems
Stains caused by such things as catsup, coffee (black), egg, fruit, fruit juice, milk, soft drinks, vomit, urine and blood can be used...
Similar Questions

Blower Motor And Resistor
I have a 2000 Buick lesabre and I am wondering if I can drive the car without the blower motor in wh...
I have a 2000 Buick lesabre and I am wondering if I can drive the car without the blower motor in wh...
(Posted by Byrdn50 8 years ago)

Switch Removal
How do you remove neutral safety switch on 2002 Buick Lesabre
How do you remove neutral safety switch on 2002 Buick Lesabre
(Posted by Anonymous-135949 9 years ago)

How To Remove Driver Information Center From 2002 Lesabre
(Posted by ludzidch 10 years ago)

The Blower Motor
the blower on this thing comes on only when it wants to fuses or good blower motor a year old it has...
the blower on this thing comes on only when it wants to fuses or good blower motor a year old it has...
(Posted by vinceclbrk4 11 years ago)

Elbow Leaking Water Out...connects To Alternator And To Motor.
(Posted by Anonymous-62743 11 years ago)