
Bernina Bernette 92C Support Question
Bernina Bernette 92C Support Question
Find answers below for this question about Bernina Bernette 92C.Need a Bernina Bernette 92C manual? We have 1 online manual for this item!
Question posted by Tash36275 on March 29th, 2014
Straight Stitching Tension On The Underside Of Fabric Is Too Tight
The person who posted this question about this Bernina product did not include a detailed explanation. Please use the "Request More Information" button to the right if more details would help you to answer this question.
Current Answers
Related Bernina Bernette 92C Manual Pages
Operation Manual - Page 2
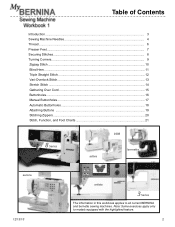
Note: Some exercises apply only to all current BERNINA and bernette sewing machines. Table of Contents
Introduction ...3 Sewing Machine Needles 4 Thread ...6 Presser Feet ...7 Securing Stitches...8 Turning Corners...9 Zigzag Stitch...10 Blind Hem ...11 Triple Straight Stitch 12 Vari-Overlock Stitch...13 Stretch Stitch ...14 Gathering Over Cord 15 Buttonholes ...16 Manual Buttonholes...17 ...
Operation Manual - Page 3
... ! After all BERNINA and bernette models. This mini-quiz will help you can be used for the exercise and it becomes available. Visit all types of the stitch(es) used so you with quality sewing machines, and informative publications and classes.
Along with a "Sew How" box.
Stitch numbers, presser feet, and machine functions are their favorites. This...
Operation Manual - Page 4
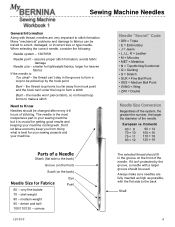
...'t pierce fabric, so no thread loop forms to make sure needles are very important to form a stitch
Blunt - Shaft
4 shirt-weight 80 - very fine batiste 70 - smaller for getting good results and keeping your machine.
Don't let false economy keep you from hook point and the hook can 't stay in your sewing machine but it...
Operation Manual - Page 5
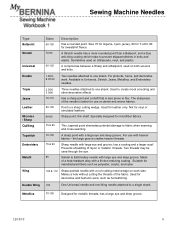
...acrylic, and nylon.
100 & 110
Sharp-pointed needle with heavier fabrics -
Similar to prevent skipped stitches in Universal, Stretch, Jeans, Metallica, and Embroidery needles.
Available ...Made of the needle is better for microfiber fabrics.
75 & 90
Thin, tapered point eliminates potential damage to one shank. Sewing Machine Needles
Type Ballpoint Stretch
Universal Double
Triple ...
Operation Manual - Page 6
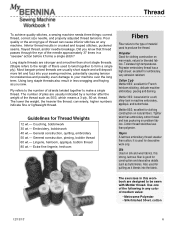
... of fibers used to make a single thread. Thread
To achieve quality stitches, a sewing machine needs three things: correct thread, correct size needle, and properly adjusted thread tensions. Long staple threads are usually short staple and will deposit more lint and fuzz into the fabric. conversely, higher numbers indicate fine or lightweight thread.
excellent for decorative...
Operation Manual - Page 7
... the machine to engage the wider stitch width....
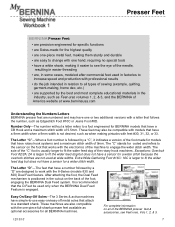
The sole of the "C" foot is recommended that have a number followed by the best and most complete educational materials in relation to all BERNINA machines.
Number Only-The number without a letter refers to a foot engineered for BERNINA models that follows the number, such as optional accessories for all types of sewing...
Operation Manual - Page 8
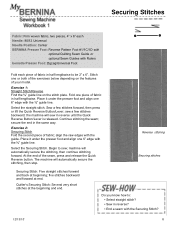
... with the guide. At the end of fabric; Select the straight stitch. the machine will sew in the same way. Exercise 2: Securing Stitch Fold the second piece of the seam, press and release the Quick Reverse button. Reverse stitching Securing stitches
Securing Stitch: Five straight stitches forward and back at end. Stitch one piece of fabric in half lengthwise to be 2" x 6".
Continue...
Operation Manual - Page 9
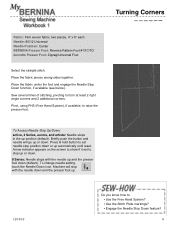
... engage the Needle Stop Down function, if available (see below). Turning Corners
Fabric: Firm woven fabric, two pieces, 4" x 6" each Needle: 80/12 Universal Needle Position: Center BERNINA Presser Foot: Reverse Pattern Foot #1/1C/1D bernette Presser Foot: Zigzag/Universal Foot
Select the straight stitch. Pivot, using FHS (Free Hand System), if available, to form at...
Operation Manual - Page 10
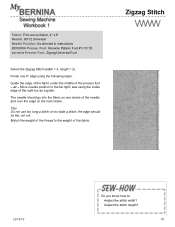
sew using the following steps. The needle should lie flat, not roll. Move needle position to : ▪Adjust the stitch width? ▪Adjust the stitch length?
10 Fabric: Firm woven fabric, 4" x 6" Needle: 80/12 Universal Needle Position: As directed in instructions BERNINA Presser Foot: Reverse Pattern Foot #1/1C/1D bernette Presser Foot: Zigzag/Universal Foot
Select the...
Operation Manual - Page 11
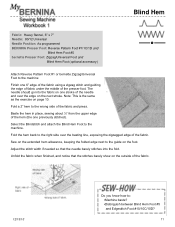
...;" from the upper edge of the fabric. Sew on the extended hem allowance, keeping the folded edge next to : ▪Machine baste? ▪Distinguish between Blind Hem Foot #5 and Edgestitch Foot #10/10C/10D?
11
Unfold the fabric when finished, and notice that the needle barely stitches into the fabric on one stroke of the needle...
Operation Manual - Page 12
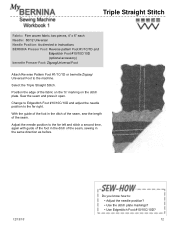
... or bernette Zigzag/ Universal Foot to the machine.
Adjust the needle position to the far left and stitch a second time, again with guide of the foot in the ditch of the seam, sewing in the same direction as before.
12/13/10
Do you know how to the far right. Select the Triple Straight Stitch. Sew the...
Operation Manual - Page 13
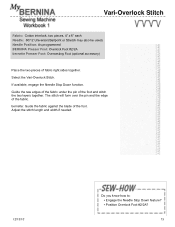
... sides together. If available, engage the Needle Stop Down function. The stitch will form over the pin and the edge of the foot. bernette: Guide the fabric against the blade of the fabric. Select the Vari-Overlock Stitch. Adjust the stitch length and width if needed.
12/13/10
Do you know how to: ▪ Engage...
Operation Manual - Page 14
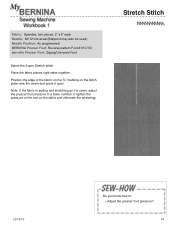
... fabric pieces right sides together. sew the seam and press it is pulling and stretching as it open. Position the edge of the foot on the stitch plate; Fabric: Spandex, two pieces, 2" x 6" each Needle: 80/12 Universal (Ballpoint may also be used) Needle Position: As programmed BERNINA Presser Foot: Reverse pattern Foot #1/1C/1D bernette...
Operation Manual - Page 15
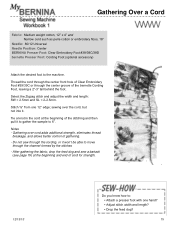
... it won't be able to the machine. Stitch ⅝" from one hand? ▪ Adjust stitch width and length? ▪ Drop the feed dog?
15 Tie a knot in the cord at the beginning and end of the stitching and then pull it .
After gathering the fabric, drop the feed dog and sew a bartack
(see page 19) at...
Operation Manual - Page 16
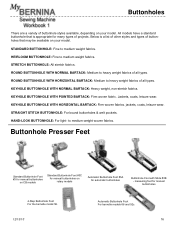
.... ROUND BUTTONHOLE WITH HORIZONTAL BARTACK: Medium to heavy weight fabrics of all types. STRAIGHT STITCH BUTTONHOLE: For bound buttonholes & welt pockets. ROUND BUTTONHOLE WITH NORMAL BARTACK: Medium to medium-weight woven fabrics. Buttonhole Presser Feet
Standard Buttonhole Foot #3 for manual buttonholes
on CB models
Standard Buttonhole Foot #3C for manual buttonholes on rotary...
Operation Manual - Page 17
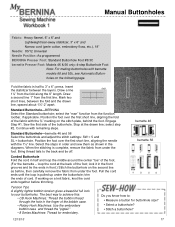
...with bernette models 66 and 92c, see...fabric from the function toolbar, if applicable. Tension Tips A slightly tighter bobbin tension gives a beautiful full look to 3" x 6"; Stop at the back of the bobbin case.
• Rotary Hook Machines: Use the embroidery bobbin case and thread the "pigtail."
• 8 Series Machines: Thread for buttonhole size? ▪ Select a buttonhole? ▪ Stitch...
Operation Manual - Page 18
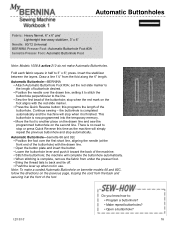
... complete the buttonhole automatically. ▪ When stitching is now programmed into the temporary memory. ▪ Move the foot to another place on the drawn line and sew the programmed buttonhole on the second line. the buttonhole is finished. the machine will stop automatically. Automatic Buttonholes
Fabric: Heavy flannel, 6" x 6" and Lightweight tear-away stabilizer, 3" x 6"
Needle...
Operation Manual - Page 19
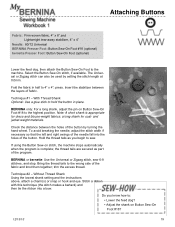
... into a bow. BERNINA or bernette: Use the Universal or Zigzag stitch, sew 6-8 stitches, and stop. Technique #2 - and jacket-weight materials.
the thread tails are secured as you know how to 4" x 4"; Bring the thread tails to the machine.
Check the distance between the layers of fabric.
trim the excess thread. Fold the fabric in place. With Thread Shank...
Operation Manual - Page 20
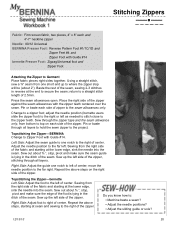
...Sewing from the right side of the fabric and starting at the end to a straight stitch length of 2.5mm.
return to secure the seam; Press the seam allowances open. adjust the needle position (bernette...#14 bernette Presser Foot: Zigzag/Universal foot and Zipper Foot
Attaching the Zipper to Garment Place fabric pieces right sides together. move the needle position to : ▪ Machine baste a...
Operation Manual - Page 21
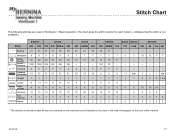
...1&2
9
9
9
--
--
--
--
-- --
6
6
6
4
5
51 16 14 --
19
17
14
--
4
6
6
8 --
3
3
3
--
3
6
5 76
2
2
2
2
2
3
3 33
* The stitches on bernette model 46 are not numbered on the machine but are used in the order they appear on the front of the machine.
12/13/10
21 Stitch Chart
The following stitches are indicated on the chart in Workbook 1: Basic Operation.
Similar Questions


My Bernette 92c Seems To Be Stuck On Straight Stitch Only.
I took my machine out today to do some sewing. Last time I use my machine was November last year.It ...
I took my machine out today to do some sewing. Last time I use my machine was November last year.It ...
(Posted by marionrgrs 4 years ago)

New Bulb Not Working In Sewing Machine Bernette 12 What Can It Be
(Posted by Anonymous-152221 8 years ago)

Tension Too Loose When Free Machining
I am using the darning foot to do free machining. The top tension is too loose not matter what numbe...
I am using the darning foot to do free machining. The top tension is too loose not matter what numbe...
(Posted by sarawallace 11 years ago)

My Sewing Machine Bernette 15 Stops Working
After 1 day using my Bernette 15 stops working - engine hoots but doesn't rotate spindle and hand wh...
After 1 day using my Bernette 15 stops working - engine hoots but doesn't rotate spindle and hand wh...
(Posted by sgrayxx 12 years ago)