
Bernina 807 Support Question
Bernina 807 Support Question
Find answers below for this question about Bernina 807.Need a Bernina 807 manual? We have 1 online manual for this item!
Question posted by elainebrown on May 19th, 2016
Needle Not Working/moving
HEllo, the needle on my machine isn't moving, I have turned the RH small knob but it doesn't do anything, the motor is working, and the foot pedal, the light, everything else, any suggestions?
Current Answers
Answer #1: Posted by waelsaidani1 on May 19th, 2016 4:51 AM
waelsaidani1

Member since:
May 12th, 2013 Points: 19,501,787

Member since:
May 12th, 2013 Points: 19,501,787
it is because thread (or possibly a broken needle) is stuck in the bobbin area. The thread does not need to be very long so it may be hidden. The other reason it has happened to me is right after I wind a bobbin. I forget to move the spool pin back to the left and then the machine will not work at all until I move it back to the correct position.
Related Bernina 807 Manual Pages
Manual - Page 2
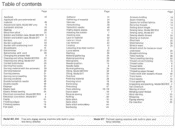
... upper thread
8
Trellis work with metallic thread
40
Tricot hems
17
Tricot seams
19
Tricot patching
18
Unpacking and packing, Model 807/810 4
Vari-Overlock
21
Waving of tricot
17
Winding lower thread
7
Wool darning
33
Wrapping
15
Zigzag sewing
15
Zip insertion
35
Model 807, 810 Free-arm zigzag sewing machine with built-in plain...
Manual - Page 3
... from the socket when changing the light bulb, the needle, presser loot, bobbin or needle plate, when stopping work without supervision and during servicing (cleaning). Weight of stitches
approx. 1100 stitches/min.
We have placed in )
power: 15 watts
Number of machine (807)
approx. 8,1 kg
Weight complete with carrying case (807) approx. 12,2 kg
Important note (safety...
Manual - Page 4
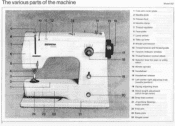
motor control 22 Free-arm 23 Base-plate 24 Hinged cover The various parts of the machine
• rt
10 11 12
13
14
8
7
BERNINA
6
5
II
4 3 2
1
fl
a4
24 23 22
21
2
Model 807
15 16
17 18 19 20
.0"
1 Free-arm cover-plate 2 Needle-plate 3 Presser-foot 4 Needle...-center-right adjusting knob
(needle position) 18 Zigzag adjusting knob 19 Stitch length adjustment
(stitch length lever) 20 Drop-...
Manual - Page 6
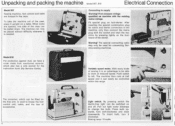
... used to work at half speed and it is used for the instruction book (My Bemina Guide).
,e. To insert bulb, turn anti-clockwise and draw downwards. Sewing lamp: 15 watts
First compare voltage
specified on a table. The machine then runs at reduced speed. Unpacking and packing the machine Model 807, 810
Electrical Connection
Model 807
Sewing machine, foot control and...
Manual - Page 7
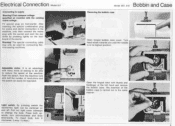
...machine. Fit special plug on machine with the socket and start the machine by pressing lightly on and off. Adjustable motor. First compare voltage specified on foot-starter. To insert bulb, turn ...7 tsorid
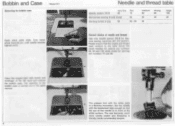
Model 807, 810 Bobbin and Case
Removing the bobbin case ii
Open hinged bobbin case cover. Turn hand wheel towards you until the needle -mod is carried out in the machine, only then ...
Manual - Page 8
.... 90 and 100 while those for Bernina sewing machines 807, 810 and 817.
Set the needle with thumb and forefinger of the white surface.
Use only needle system 705 B for darning are numbers 70 and 80. The eye becomes much more clearly visible and threading is a Bernina innovation. Turn hand- Open the hinged latch with the...
Manual - Page 9
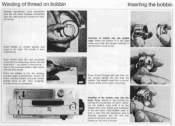
... and then under tension spring. Raise needle to the mounted bobbin.
Then re-tighten knurled screw on .
Insertion of the left . Do not hold handwheel with thumb and forefinger
of bobbin into the
hook. ing the bobbin case hold it by turning the knurled screw. Start motor with the right hand by the...
Manual - Page 10

... centering wheel (12) can be set to be lowered for special purposes. Now turn . Pull both threads under the presser foot and lay them there sideways. Turn knob (20) to the darning sign. For all normal sewing work the lever must be set to the needle in centre of approximately 10 cm (4 ins.).
8
The thread tension discs.
Manual - Page 27
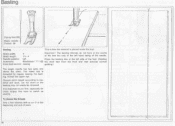
... Is placed under the foot
Stitch width: Stitch length:
4 11/2 -4
Important I (2) the work , not too short or the basting may not easily be removed.
It is threaded for cross stripes that have to material and work taut from the front and rear ensures correct
Drop feed control: sewing
guiding.)
The magic needle has two eyes...
Manual - Page 28
... before Finishing off.
Move needle downwards to foot level and check that needle comes to required length. Lift foot. Turn work . Bar Tack: Lift needle out of the fool.
Sew stitches for second bead... work
left
1. But never
change zigzag or needle position.
1
2 34-
17
lo
1. Hold work . thread - few stitches, still holding work . By turning the
zigzag knob slightly...
Manual - Page 31

... foot 285
Needle: 80-70 Thread: 50
Darning material
Stitch width:
0
Stitch length: 0
Automatic:
straight stitch
Drop feed control: lowered
The quick mastering of stitching. ways) for selvedge and weftway.
(0)
1
2
3
A careful darn Is done In 3 runs
1. Weftway.
2. Same way as 2nd run of this . How to hold hoop correctly Not like this work moved...
Manual - Page 34
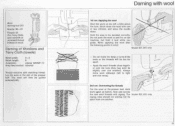
...sew across the new wool threads with one or two stitches, and leave the needle down the wool with zigzag. The wool will be too far apart.
-
Do not push the work again as before. Do not make too deep a curve at the presser foot...threads will then be mended correctly. Always move work on the machine, but hold it taut while you guide. The Model 807, 810 only zigzag rows should not ...
Manual - Page 43

... small curves. motive is Incorrect
the sewing table. Tack material for rough and irregularly wo- Important: The machine feeds automa- curves the work must be restricted. Finish by stitch (using as the of your hand in the position as
Scn
frame; ven fabrics are difficult to draw on the
presser foot. Guiding the work can be turned...
Manual - Page 44
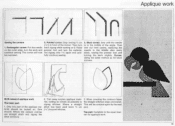
...
be tacked on 0. Muill-coloured applique work and presser foot and turn is in front of the applique ma- turning the work
Sewing the corners
2. Sew ('/o") beyond stitches.
terial should be oversewn. Pointed corner: Stop sewing 'h cm 3. Applique work slightly. Rectangular corner: Put the needle back zigzag while sewing on . fully continue sewing. Curves:
Using the same method...
Manual - Page 45
... oversewn corner: Sew to the corner. Remove paper
presser foot and turn work and continue sewing. Corner with white width of a cardboard stencil onto the ma1. Needle position, left ! Needle position left or right (ac- b) Sew to make a stitch from the left in the slot that the design appears once again in curves. c) Raise foot, turn work . d) During sewing turn zigzag onto...
Manual - Page 48
... .
embroidery without pintucks, use the pintuck foot
plete the turn work . Jj
rw
. .
•
07,
1•WW9 rril1r•l
The quickest way to set up lever to do one stitch, as desired
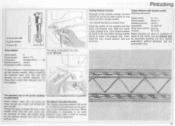
work . Pintucking
Sewing Pintuck Corners
Fancy Patterns with a single needle. When threading the machine take -up the machine The gimp is controlled automatically by hand to...
Manual - Page 51

...
I .5
k.\•. -c! hole sewing).
Important: Lower the foot lever
Just the same as usual, otherwise the Guiding the work
top thread tension will result. the middle of the bobbin case the work will remain open and unattractive work
Bold frame as when darning.
i t
•
/ it . Move the frame as through wanting to Important: Allow the machine to run...
Manual - Page 53
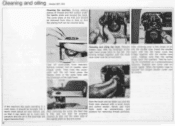
...with a small brush and cotton duster. Lock the
locking bridge together with the hook bridge together with the left .
inserted the hinged shuttle cover can be taken out and the
*
If the machine has been...forefinger of oil
bobbin case.
Remove presser foot or needle, open hinged cover. During sewing pieces of the right hand.
'I . Replace arm cover and re- measure....
Manual - Page 54
... the release knob (see illustration) and can easily be disconnected from the power supply by pulling out the plug from the socket when changing the light bulb, the needle, presser foot, bobbin or needle plate, when stopping work without supervision and during servicing (cleaning). The moving needle Is a source of danger (danger of injury to fingers).
The sewing machine should...
Manual - Page 55

... sure that the spring snaps back
turned down.
Never use hard tools such as a precautionary measure. The moving needle Is a source of danger (danger of machine to fingers). the needle. when stopping work without supervision and during servicing (cleaning).
proper position again.
•• Now the hook can be closed. The sewing machine should be removed. into the...
Similar Questions

Motor For Bernina 807
I need of an electric motor for a bernina sewing machine that was bought in 1974
I need of an electric motor for a bernina sewing machine that was bought in 1974
(Posted by antondup52 3 years ago)

Wanted :bernina 1260 Sewing Machine.
wanted to buy : Bernina 1260 sewing machine , in good working order.
wanted to buy : Bernina 1260 sewing machine , in good working order.
(Posted by beektze 10 years ago)

Oiling Bernina Sewing Machine 807
How do I open the top of Bernina 807 to oil it?
How do I open the top of Bernina 807 to oil it?
(Posted by inadebr 10 years ago)

Bernina 1090 S Sewing Machine Manual
I Dont See The User Manual For This Machine For Free Downloading.what User Manual Are The Same As Th...
I Dont See The User Manual For This Machine For Free Downloading.what User Manual Are The Same As Th...
(Posted by cynthianel 10 years ago)
